You can make journal adjustments to the trial balance data that you've imported or manually entered.
Journal adjustments can't be deleted so make sure the correct data is entered. If you need to make a correction, reverse the incorrect journal and start again.
- From the Clients menu, select Clients list.
- Change the client list view to either Active clients or a custom view that includes all relevant clients.
- From the Accounts production widget on the Dashboard, select the required accounting period. Ideally, select the latest / newest period.
If a relevant account period does not exist, you must create and set up one first.
-
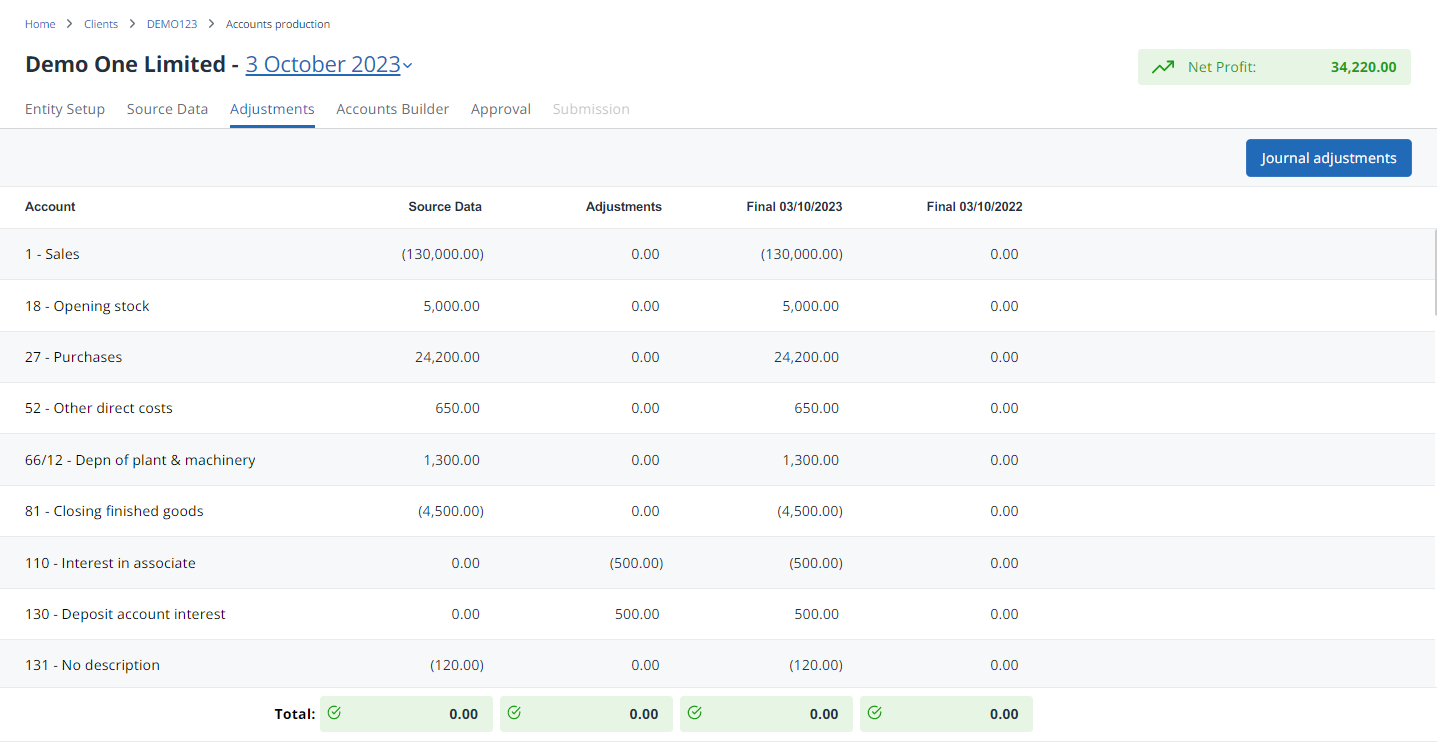
Select the Adjustments tab which shows the source data and up to 2 columns of comparative data.
-
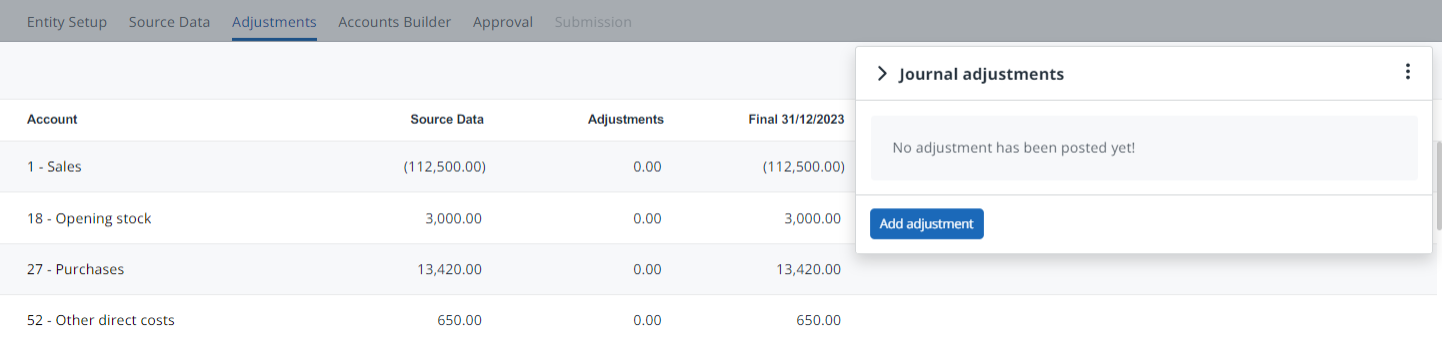
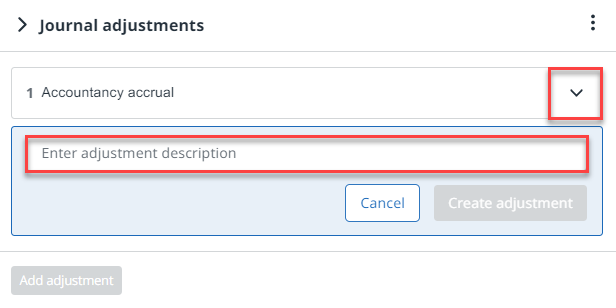
Select Journal adjustments to open the adjustments panel, then select Add adjustment.
You can close the panel again by selecting the arrow to the left of the Journal adjustments heading.
-
Enter a description for the adjustment such as
Accountancy accrual, then select Create adjustment.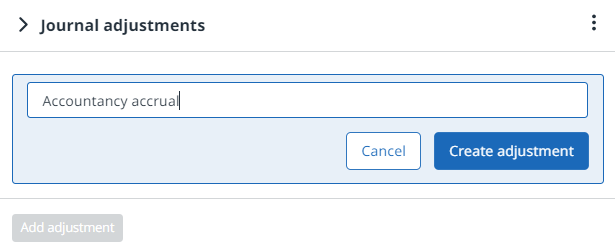
-
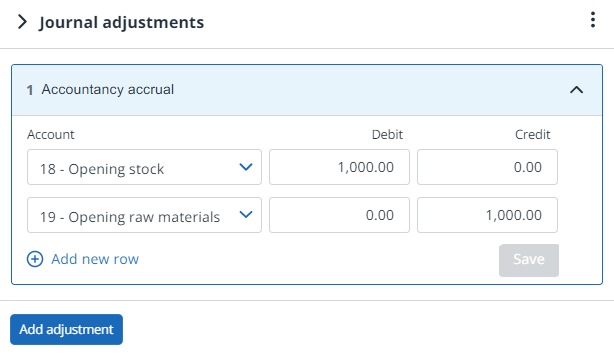
Enter or select the account code, then enter the Debit or Credit values in the same way as you do on the Source data tab. Repeat for the corresponding account code. Find out how to manually enter accounts data.
Use the Tab key, or Shift + Tab to navigate through the boxes.
-
Select Add new row to add additional lines. Select Save to save this adjustment. Continue to add any further adjustments by selecting Add adjustment. The previous adjustment is minimised and a new accrual started. View the detail of the previous accrual by selecting the down arrow.
- Repeat this process until the required adjustments have been added. Select the arrow to the left of the Journal adjustments heading to close the panel. You can view the adjustments by selecting this arrow again.
Any imbalance can be identified at the bottom of the screen with a warning icon and red colour. You can then go back into the adjustments panel and correct the adjustment highlighted in red.
Next step: Build and generate an accounts report
View a breakdown for this period
Once you've made the adjustments, you can check the final values for the period in the applicable Final column. Any new adjustment codes are added to the list in code order.
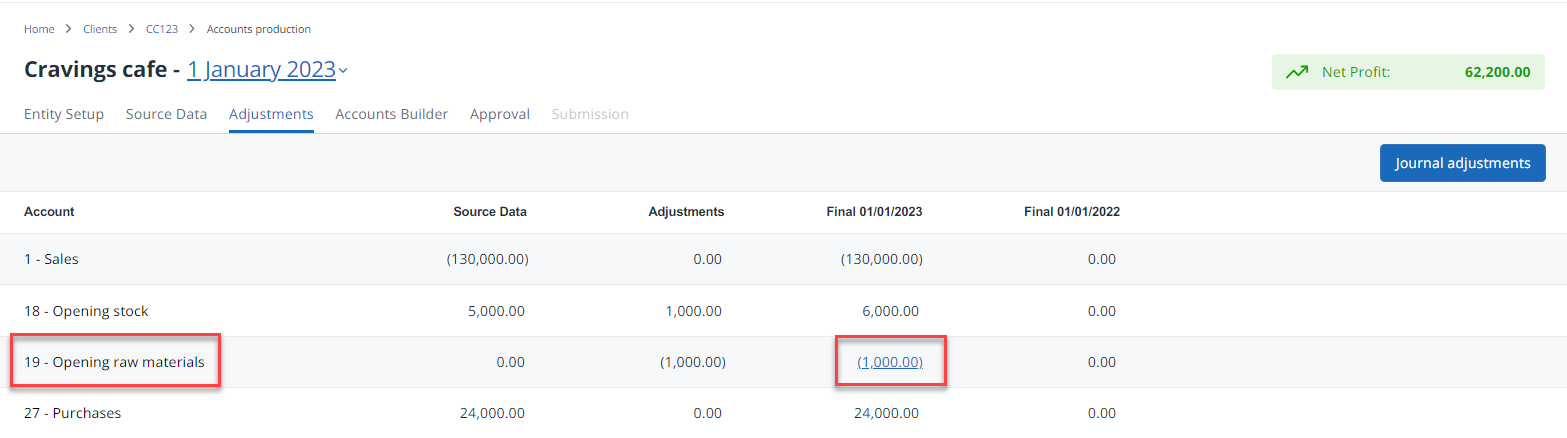
Hover over the required figure, then select the hyperlinked value.
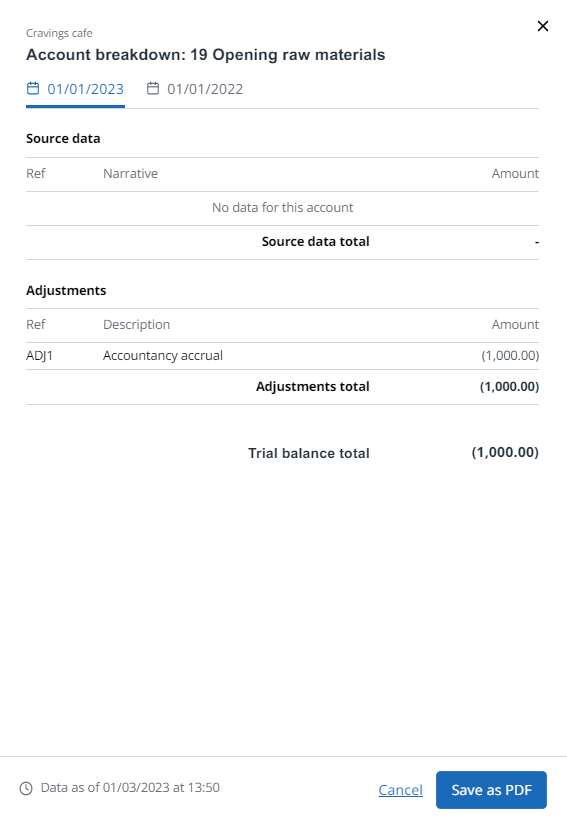
The breakdown shows the original source data together with any adjustments that have been made. Select Save as PDF to download a PDF version for your records or send to your client.
Learn how to adjusting the accounts' journals and running the trial balance report in IRIS Elements Accounts Production
More videos and playlists available in our library.