Add a new supplier
Add suppliers to IRIS Elements Cashbook so that you can record your purchase orders and purchase invoices. View your supplier list to check that the supplier has not already been added.
You can also create new suppliers with quick expense and quick purchase invoice.
-
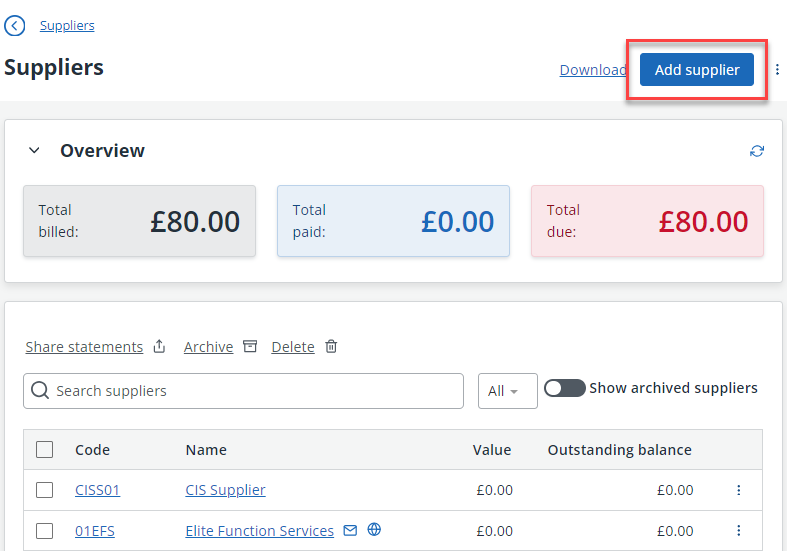
Go to Purchases > Suppliers then select Add supplier.

-
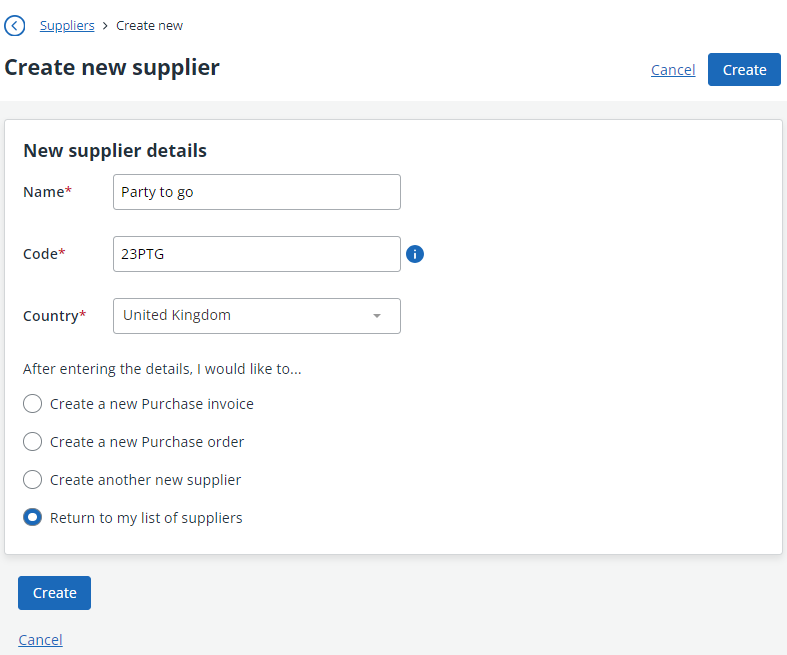
Enter the supplier Name and create a Code. The code can be a combination of letters or numbers which helps you identify your suppliers easily. The code must be unique to this supplier.
-
Choose what to do after you have finished creating this supplier. By default, you return to your list of suppliers, but you can choose to create a new purchase invoice, order or new supplier.

-
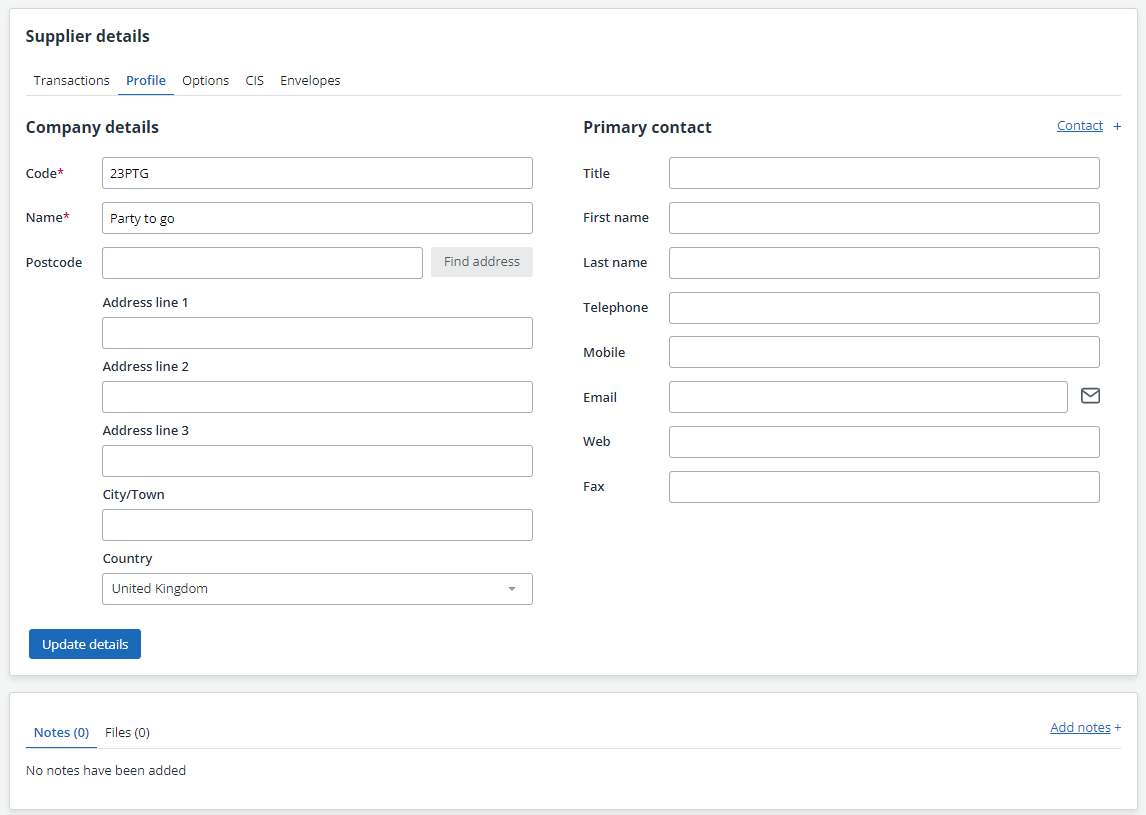
Select Create. A supplier record is created and opened on the Profile tab, where you can set the company address and contact details. To hold more information about the supplier, there are multiple tabs available:
- Profile - use to view / enter supplier details. Import supplier details from Companies House and add one or more contacts.
- Transactions - shows a financial overview (Total billed, Total paid, Total due), together with purchase receipts. From here, you can create a statement of accounts, record advanced payments or deposits.
-
Options - use to set up how you will manage this supplier, such as VAT numbers, default outgoing type, payment terms and bank details. Refer to Set supplier options.
- CIS settings - if enabled, use to apply CIS to receipts.
-
Envelopes - used to print envelopes and labels.
-
Notes & Files – here you can add internal notes for this Supplier, and also attach internal files to the Supplier. This can be used for anything from scans of business cards to any meetings recorded.

Next steps: