Manage Grade Marks
Use the Certification tab in the Curriculum Manager module to view and manage grade marks. Grade marks are the grades awarded to each student's work, such as 'A', 'B', 'C'.
Once grade marks have been set up you can allocate them to grade sets. Each grade mark can be allocated to multiple grade sets. Grade sets can then be allocated to courses.
To manage grade marks, follow the steps below:
- Open the Gradebooks module and select the Certification tab.
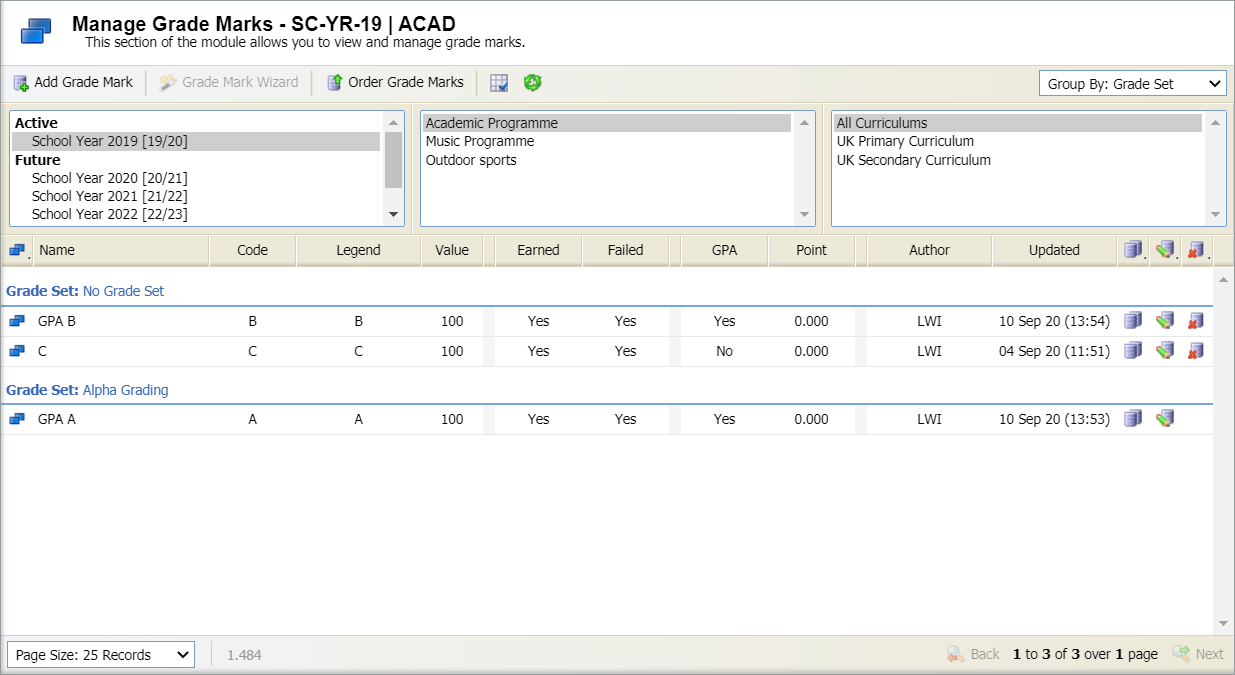
- Select Manage Grade Marks from the right hand menu to display this screen:
- All of the grade marks are listed.
- The details displayed and how they are displayed is determined by the settings in entity preferences. See Update Grade Management entity preferences for more help with this.
- Use the drop-down in the top right of the screen to change the Group By setting if required.
- Use the navigation tools at the bottom of the screen to display the grade marks that you want to work with.
- Choose to:
Add a grade mark
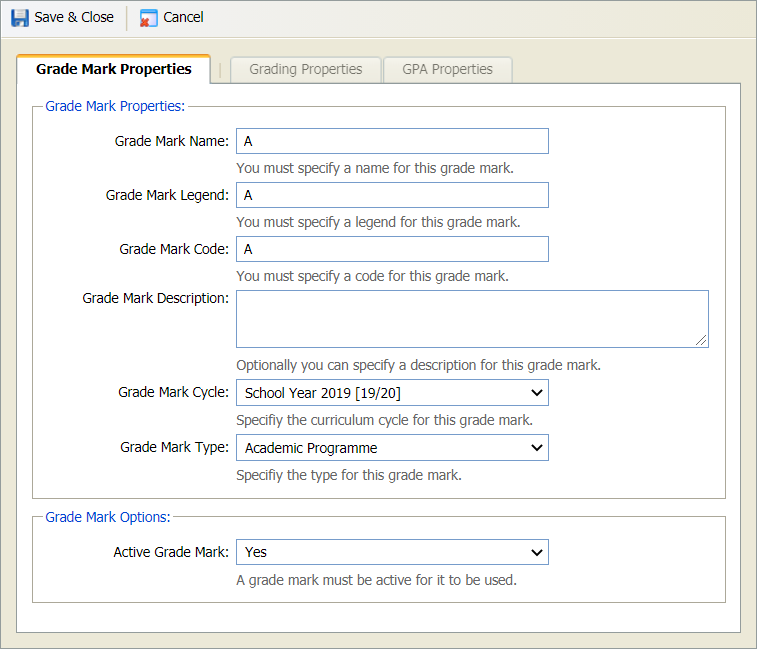
- Select Add Grade Mark in the header. A popup window is displayed:
-
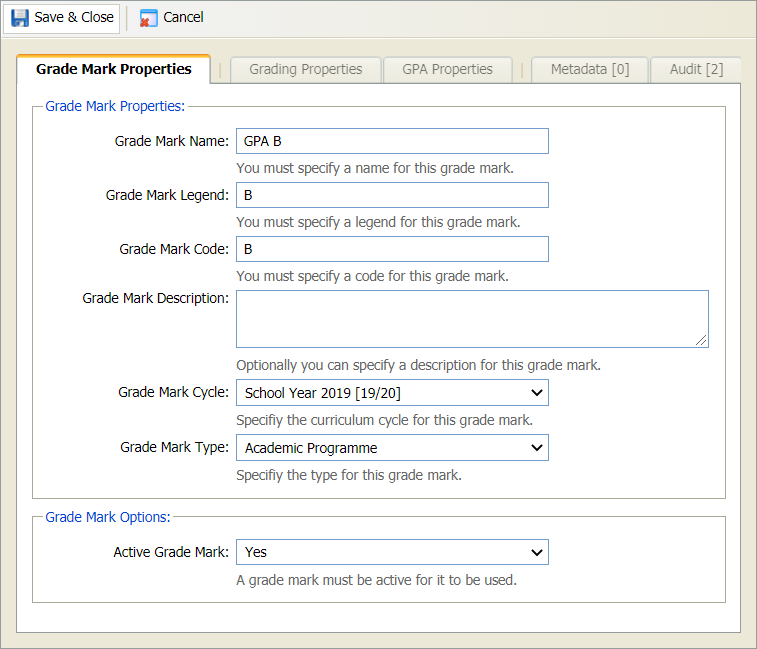
Select the Grade Mark Properties tab and complete the fields displayed:
Section Explanation Grade Mark Properties Grade Mark Options Use the drop-down to set the status of the grade mark. Selecting 'No' marks the grade mark as 'Inactive'.
-
Select the Grading Properties tab and complete the fields displayed:
Section Explanation Printing Properties Specify the grades to be used in reports and transcripts for this grade mark. Customise the grade marks to suit your school.
Calculation Properties - Report Grade Value. Enter the value that a student must get to receive this grade mark.
- Specify the minimum and maximum value that a student must get to receive this grade mark.
Grading Properties Use the drop-down to set whether the grade mark counts towards a student's earned/failed credit score. For example, you can set whether the grade mark is counted towards earned credit calculations even if a student has not completed a full course.
-
Select the GPA Properties tab:
- Choose for the grade mark to be used in GPA calculations if required. Selecting 'Yes' displays the grade mark under Manage GPA Grade Marks.
- Enter the default GPA value for the grade mark. This allows you to weight the grade as required, for example you might want to add a higher GPA value for the grade as it is awarded in more challenging courses.
- Select Save & Close.
Order grade marks
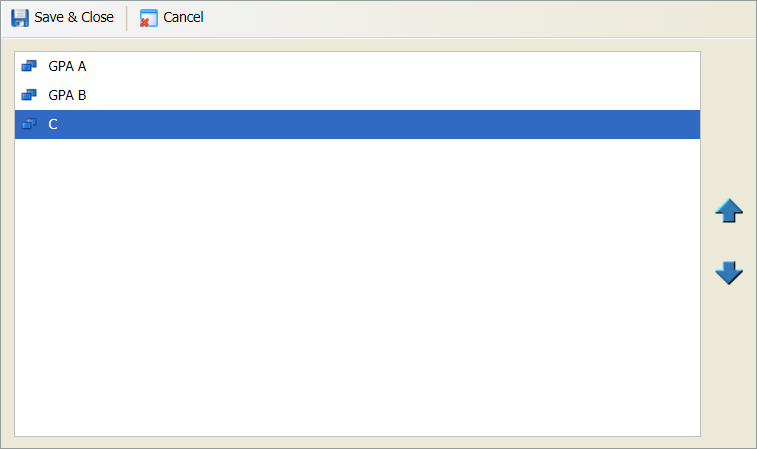
- Select Order Grade Marks in the header. A popup window is displayed:
- Select a grade mark in the list shown and use the blue arrows on the right to move it as required.
- Select Save & Close once you have made all the changes required.
Copy a grade mark
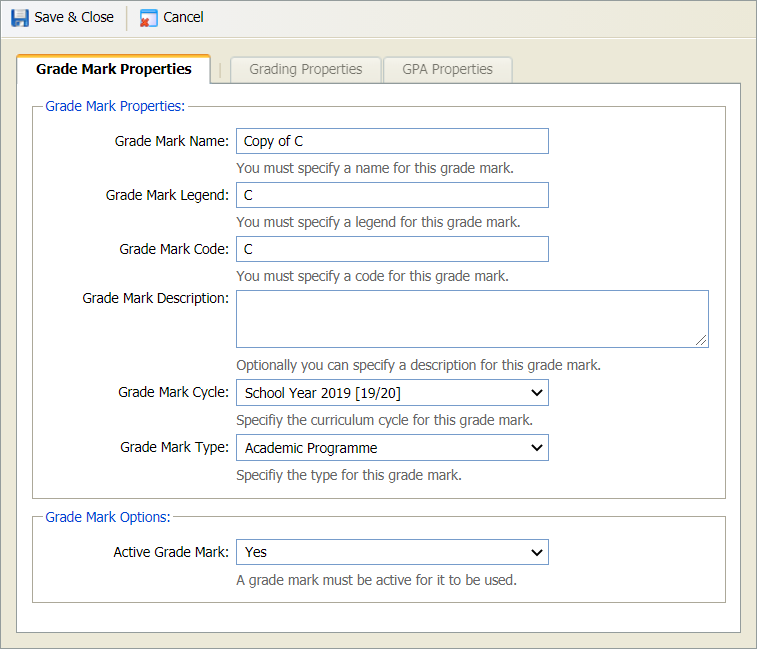
- Select the copy grade mark icon in the grade mark that you want to copy. A popup window is displayed:
-
Select the Grade Mark Properties tab and complete the fields displayed:
Section Explanation Grade Mark Properties Grade Mark Options Use the drop-down to set the status of the grade mark. Selecting 'No' marks the grade mark as 'Inactive'.
-
Select the Grading Properties tab and complete the fields displayed:
Section Explanation Printing Properties Specify the grades to be used in reports and transcripts for this grade mark. Customise the grade marks to suit your school.
Calculation Properties - Report Grade Value. Enter the value that a student must get to receive this grade mark.
- Specify the minimum and maximum value that a student must get to receive this grade mark.
Grading Properties Use the drop-down to set whether the grade mark counts towards a student's earned/failed credit score. For example, you can set whether the grade mark is counted towards earned credit calculations even if a student has not completed a full course.
-
Select the GPA Properties tab:
- Choose for the grade mark to be used in GPA calculations if required. Selecting 'Yes' displays the grade mark under Manage GPA Grade Marks.
- Enter the default GPA value for the grade mark. This allows you to weight the grade as required, for example you might want to add a higher GPA value for the grade as it is awarded in more challenging courses..
- Select Save & Close.
Edit a grade mark
- Select the edit icon in the grade mark that you want to work with. A popup window is displayed:
-
Select the Grade Mark Properties tab and complete the fields displayed:
Section Explanation Grade Mark Properties Grade Mark Options Use the drop-down to set the status of the grade mark. Selecting 'No' marks the grade mark as 'Inactive'.
-
Select the Grading Properties tab and complete the fields displayed:
Section Explanation Printing Properties Specify the grades to be used in reports and transcripts for this grade mark.Customise the grade marks to suit your school.
Calculation Properties - Report Grade Value. Enter the value that a student must get to receive this grade mark.
- Specify the minimum and maximum value that a student must get to receive this grade mark.
Grading Properties Use the drop-down to set whether the grade mark counts towards a student's earned/failed credit score. For example, you can set whether the grade mark is counted towards earned credit calculations even if a student has not completed a full course.
-
Select the GPA Properties tab:
- Choose for the grade mark to be used in GPA calculations if required. Selecting 'Yes' displays the grade mark under Manage GPA Grade Marks.
- Enter the default GPA value for the grade mark. This allows you to weight the grade as required, for example you might want to add a higher GPA value for the grade as it is awarded in more challenging courses.
- Two other tabs are available, these are explained as follows:
- Metadata. Any metadata fields set up for grade marks are listed here. Add values for the metadata fields as required.
- Audit. Any changes made to the grade mark are listed here.
- Select Save & Close.
Delete a grade mark
- Select the delete icon in the grade mark that you want to delete. You are prompted Are you sure you want to delete this grade mark?
- Select Yes. The grade mark is deleted.