Module Programmes
Use the Configuration tab in the Curriculum Manager module to manage programmes. Use programmes to group together similar types of activity. For example, have a programme for your 'Academic Programme' and another for your 'Sports Programme'.
If your school uses an enterprise edition if the Curriculum Manager module, you can have as many programmes as you need for your school.
Only a single programme can be created in standard editions.
Each programme can also be configured so that it displays as a separate module in Ed:gen if required.
- Open the Curriculum Manager and select the Configuration tab.
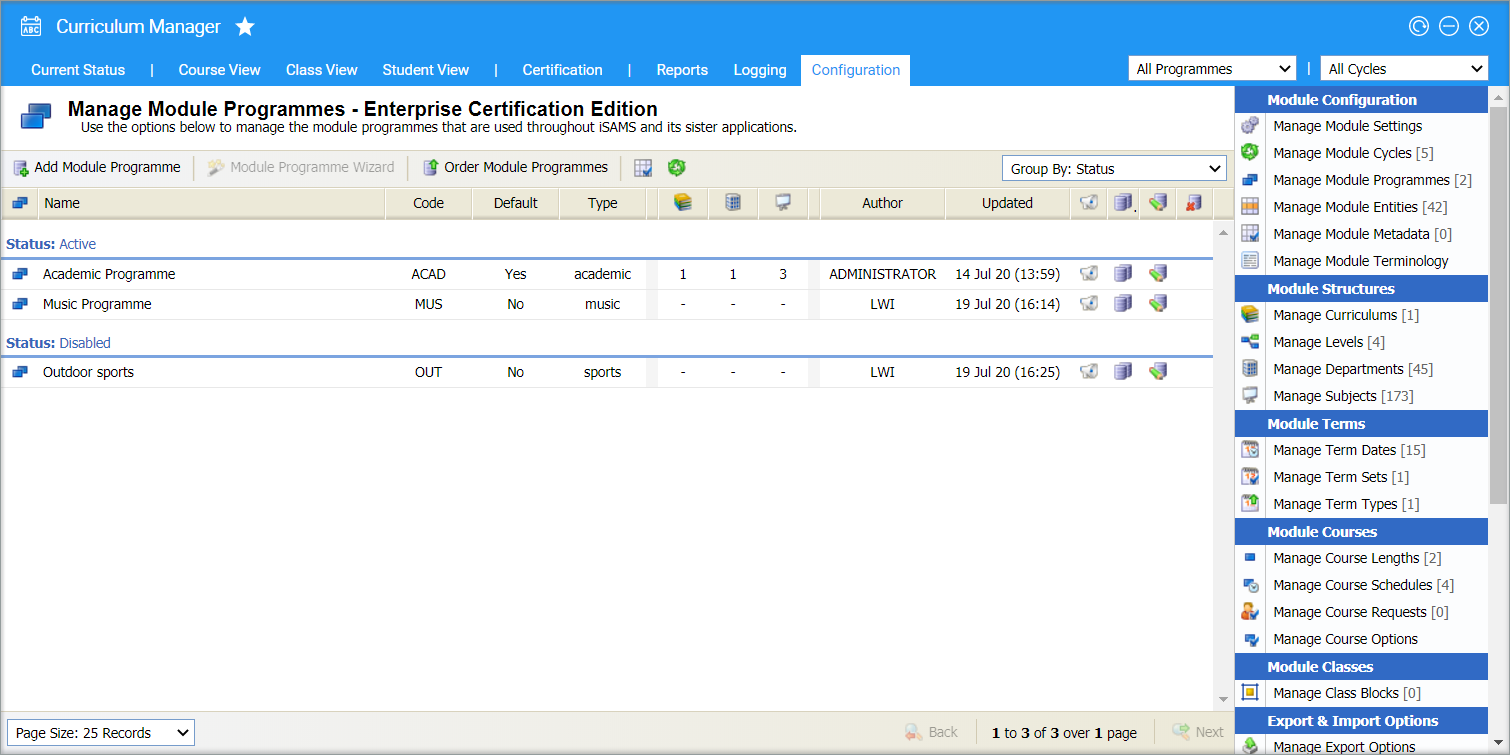
- Select Manage Module Programmes from the right hand menu:
- All programmes are listed here. Each programme must be marked with a status to determine whether it is active or disabled. A default must also be selected.
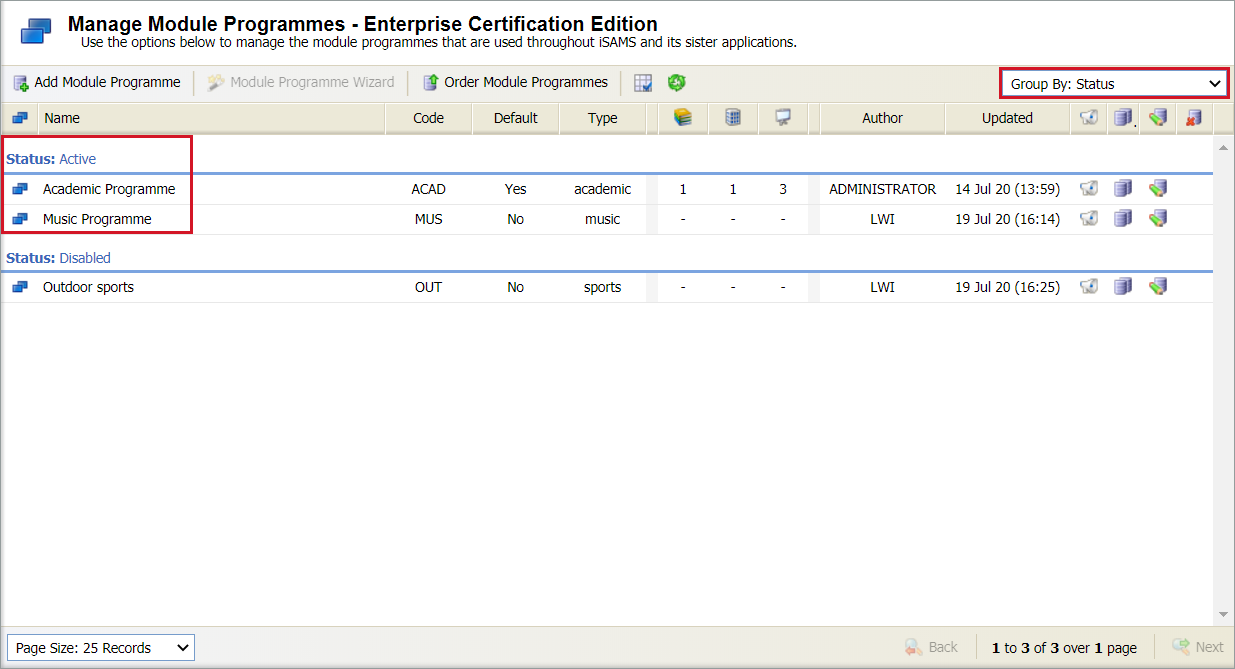
- Use the drop-down in the top right of the screen to change the Group By setting if required.
- Use the navigation tools at the bottom of the screen to display the programmes that you want to work with.
-
Choose to:
- Add a module programme.
- Change the order of module programmes.
- Update module entity preferences. Choose to change the entities displayed in the Manage Module Programmes screen.
- Update programme communication preferences. Select the how information from the programme is communicated and who to.
- Copy a module programme.
- Edit a module programme.
- Delete a module programme.
Add a programme
-
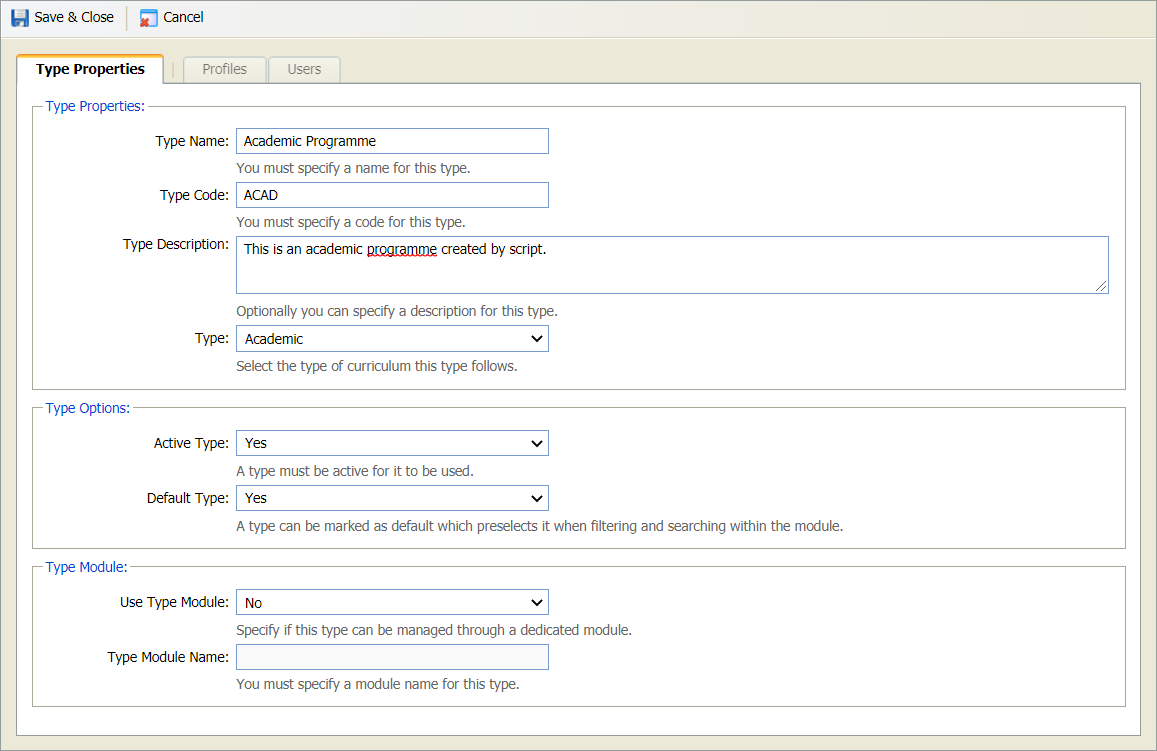
Select Add Module Programme in the top left of the screen to display the Create Module Programme window:
-
Complete the fields displayed in the Properties tab:
Section Explanation Properties Enter a clear and concise name, code and description for the programme.
Type. Use the drop-down list to select a type for the new programme. The options listed are preconfigured for you.
Options Use the drop downs to:
- Set the status of the programme. Only 'Active' programmes can be used.
- Set this programme as the default. Only one programme can be marked as the 'Default'. This programme is preselected whenever a module programme is required to be selected in Ed:gen.
Module Choose for the programme to be displayed and managed as a separate module in Ed:gen, if required, and enter a name for the new module.
The icon displayed for the programme module is determined by the selection made for Type above.
You must finish configuring the newly created module in the Control Panel > Modules & Programmes applet.
- Work through the Profiles/Users tabs using the checkboxes to select the profiles and individual users who can access the programme.
- Select Save & Close. The new programme is listed.
Change the order of programmes
Change the order that programmes are displayed in Ed:gen.
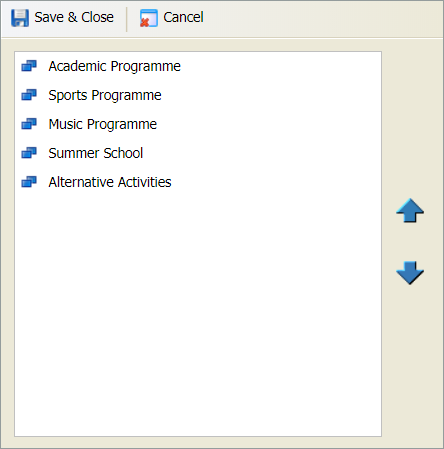
- Select Order Module Programmes. The Arrange Module Programmes window is displayed:
- Select a programme and use the arrows to move it up or down the list.
- Select Save & Close to close this window and return to the Manage Module Programmes screen.
Update entity preferences
Update the entities displayed for programmes. For example, choose to display programme Description in the Manage Module Programmes screen grid.
Your entity preferences can also be configured centrally from the Manage Module Entities option.
- Select the table icon in the header to display the Edit Module Entity window:
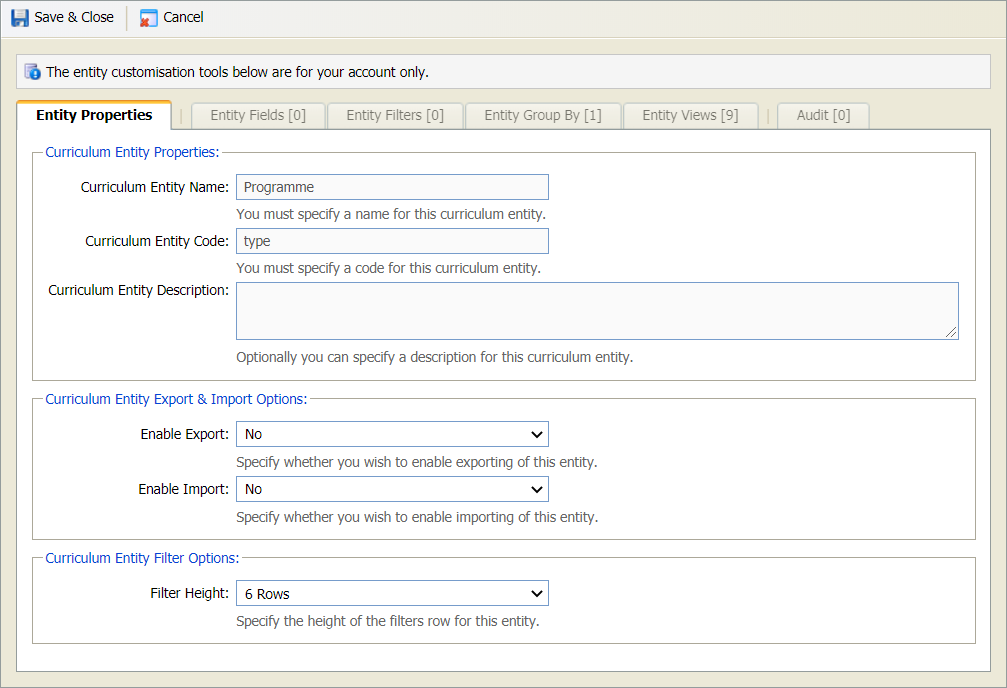
- The Entity Properties tab displays an overview of your entity preferences.
- The four following tabs hold property details for the entity. A count next to the tab title indicates the number of selections made in the tab.
-
In the Entity Properties tab:
- Entity Properties cannot be changed.
- It is not recommended that you make any changes to Export & Import Options.
- Filter Options indicate the number of rows displayed if filters are used for the entity. The example below has 6 rows in the filter:

The Manage Module Programmes screen does not use filters, as indicated in the Entity Filters (0) tab, so this field is not applied in this case.
-
Work through the tabs shown to set details for the entity:
 Entity Fields
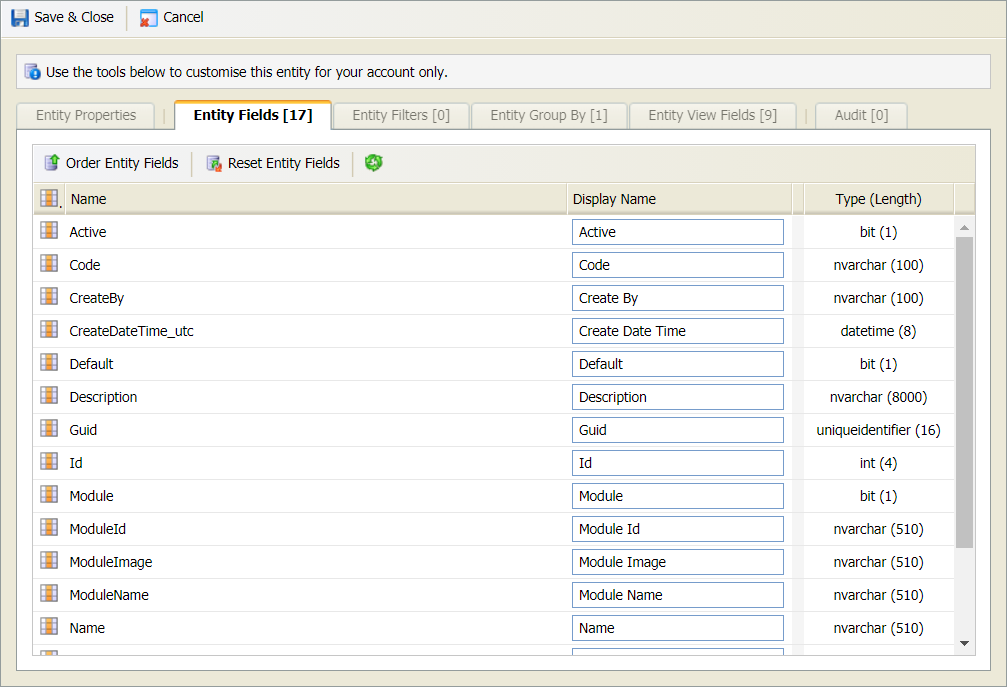
All of the fields that are available for the entity are listed.
Change the Display Names for the fields as required:
 Entity Filters
The Entity Filters tab is not being used for programmes.
 Entity Group By
All of the group by selections that can be made for the entity are listed.
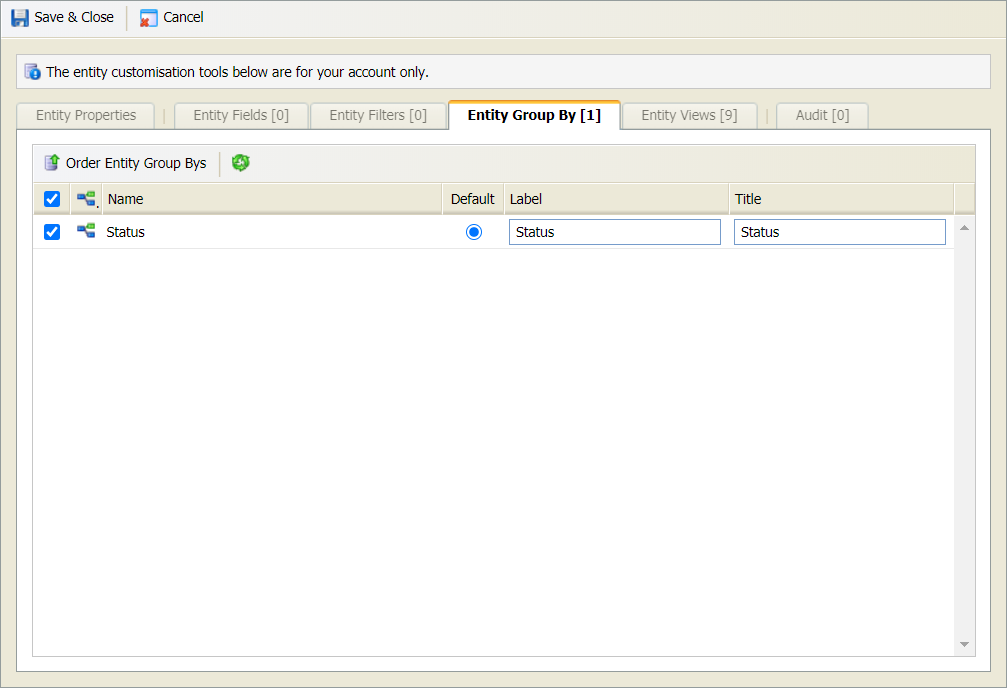
- Use the checkboxes to select the group by selections that you want to include for the entity:
- Select a default if required.
-
Change the Labels and Titles as
required:
- The Label name is displayed in the Group By drop-down menu.
- The Title name is displayed in the screen where data is grouped. An example of how your selections are displayed for the selected entity is shown below:
 Entity Views
All of the information that can viewed for the entity is listed.
- Select the Entity Views tab.
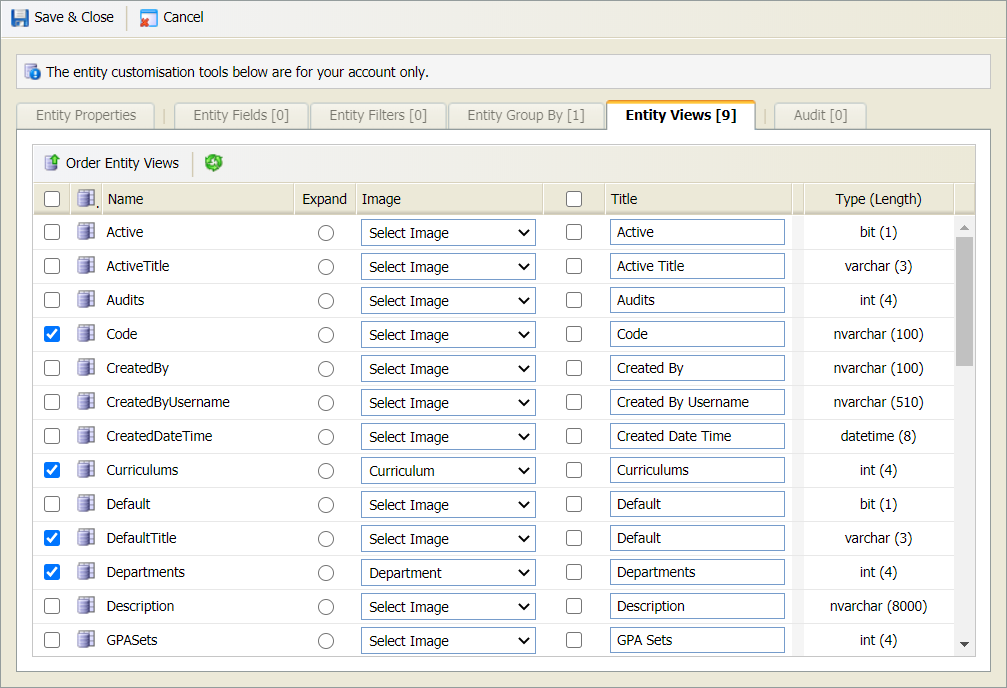
- Use the checkboxes on the left to select the columns that you want to display:
-
Select whether an Image or a Title
are displayed in the header bar for the entity. Either:
- Use the Select Image drop-down to select an image for the entity. An icon is used instead of a column title. or
- Enter a Title for the entity and check the box to the left of the Title. This is useful if you want to customise titles to suit you.
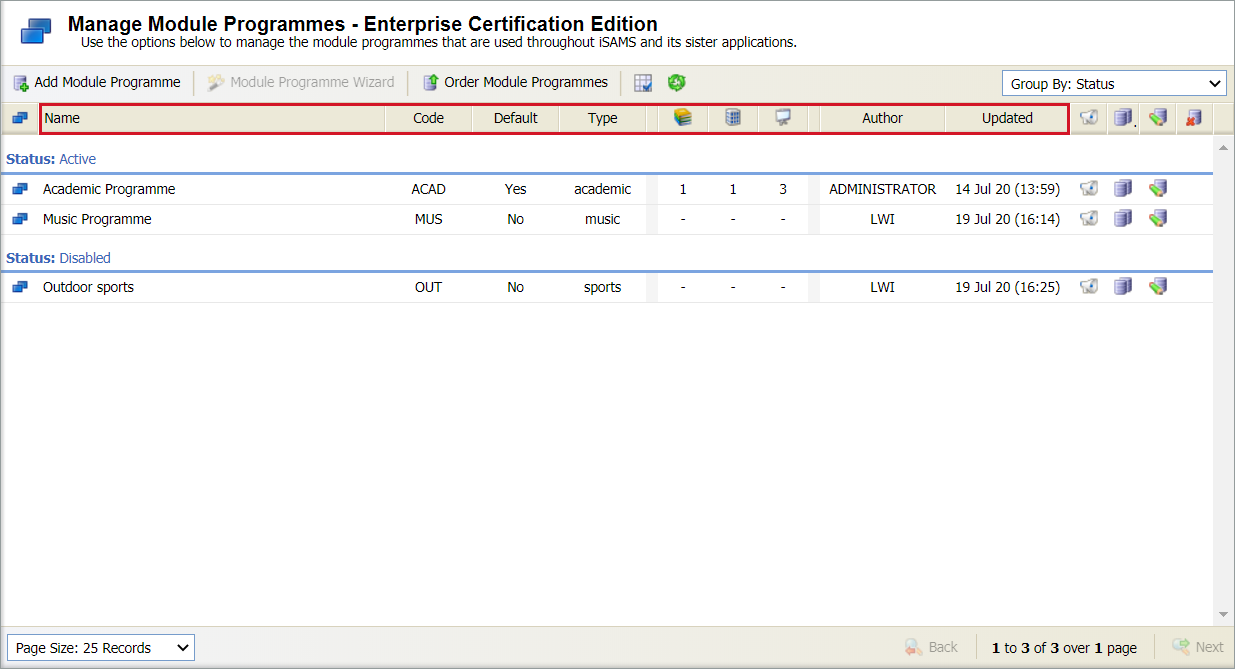
- Your selections determine the columns displayed for the selected entity:
Be aware that the selections made in Manage Module Settings can determine the fields that are displayed regardless of whether they are selected here.
-
Choose to change the order that any of your entity selections are displayed
in the module.
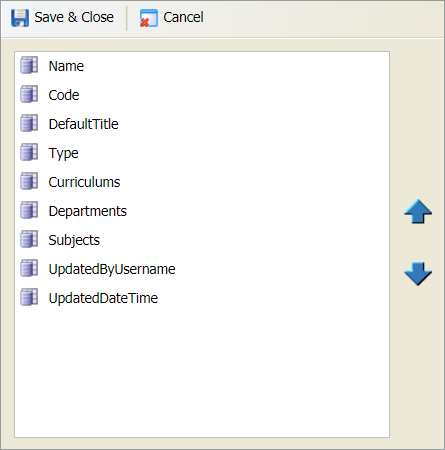
- Select Order Entity xxx in your selected tab. A popup window is displayed, an example is shown below:
- Select to make a selection and use the arrows to move it up or down the list.
- Select Save & Close to close this window and return to the Edit Module Entity window.
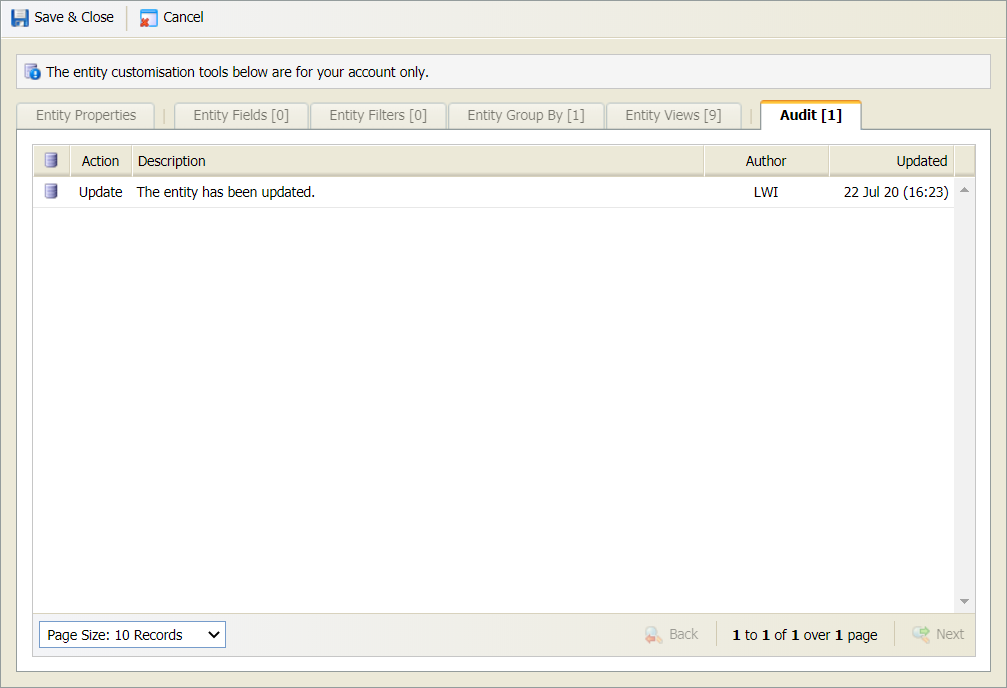
- Any changes made to entities are listed under the Audit tab in the window:
- Select Save & Close to close the Edit Module Entity window. Your preferences are displayed in the Manage Module Programmes screen.
The Audit tab lists any amendments that have been made to the entity.
Update communication preferences
Select who is to receive any communications regarding the programme and how they are to receive it.
This is particularly useful for 'Sports' programmes where a high number of emails are likely to be sent out. Use the communication preferences to only send emails to the relevant people.
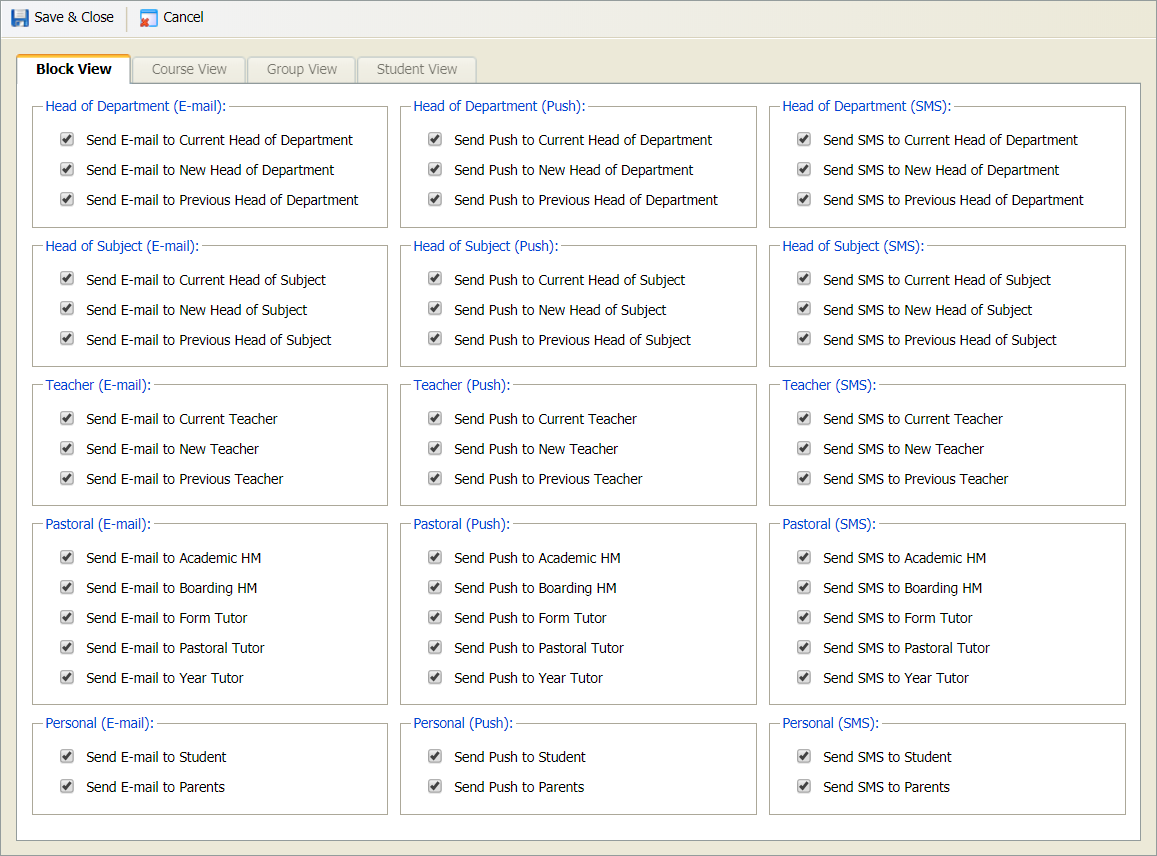
- Scroll to the programme that you want to update and click the module programme communications icon to display this window:
- Work through the tabs and checkboxes shown to select how different viewers of the programme receive communications. For example, in the Course View tab check the boxes under Teacher (E-Mail). When changes are made in the Course View tab, teachers are emailed with updates.
- Select Save & Close.
Copy a programme
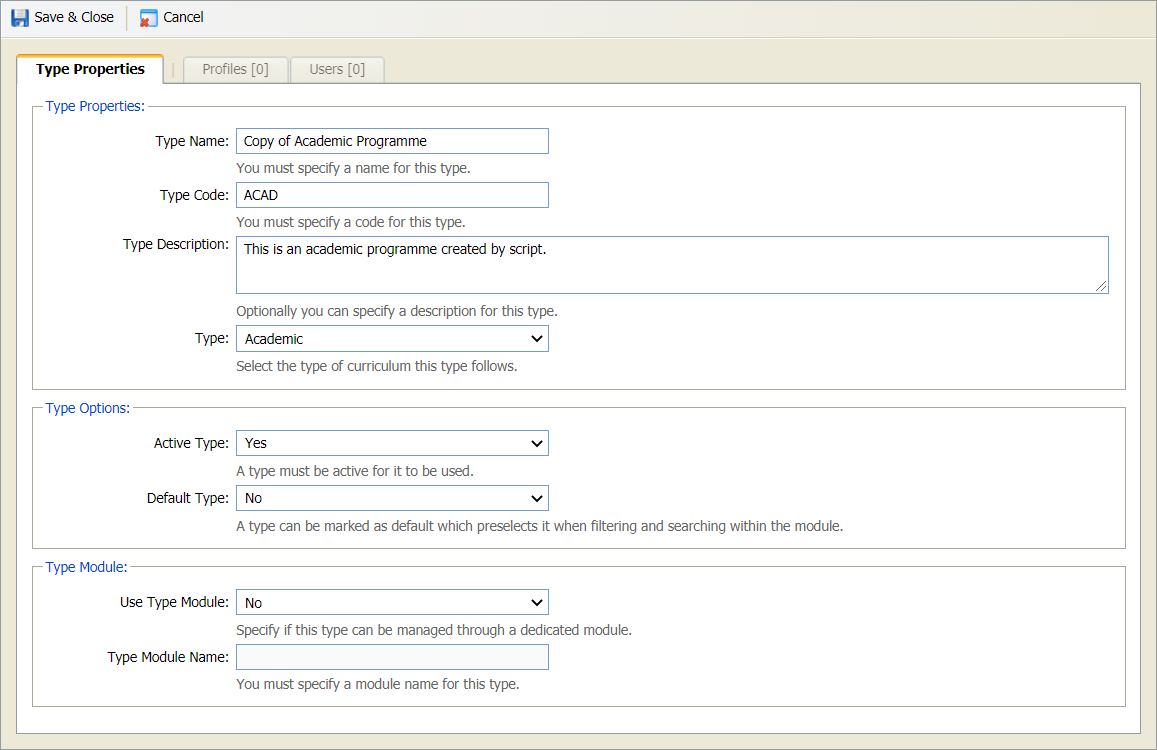
Choose to copy a module progamme. This saves time when recreating a programme.
- Scroll to the programme that you want to copy and click the copy module programme icon. A popup window is displayed:
-
Complete the fields displayed in the Properties tab:
Section Explanation Properties Enter a clear and concise name, code and description for the programme.
Type. Use the drop-down list to select a type for the new programme. The options listed are preconfigured for you.
Options Use the drop downs to:
- Set the status of the programme. Only 'Active' programmes can be used.
- Set this programme as the default. Only one programme can be marked as the 'Default'. This programme is preselected whenever a module programme is required to be selected in Ed:gen.
Module Choose for the programme to be displayed and managed as a separate module in Ed:gen, if required, and enter a name for the new module.
The icon displayed for the programme module is determined by the selection made for Type above.
You must finish configuring the newly created module in the Control Panel > Modules & Programmes applet.
- Work through the Profiles/Users tabs using the checkboxes to select the profiles and individual users who can access the programme.
- Select Save & Close. The programme is displayed in the Manage Module Programmes screen.
Edit a programme
Update the details of a programme if required. For example, change the status of a programme currently marked as 'Disabled' to 'Active'.
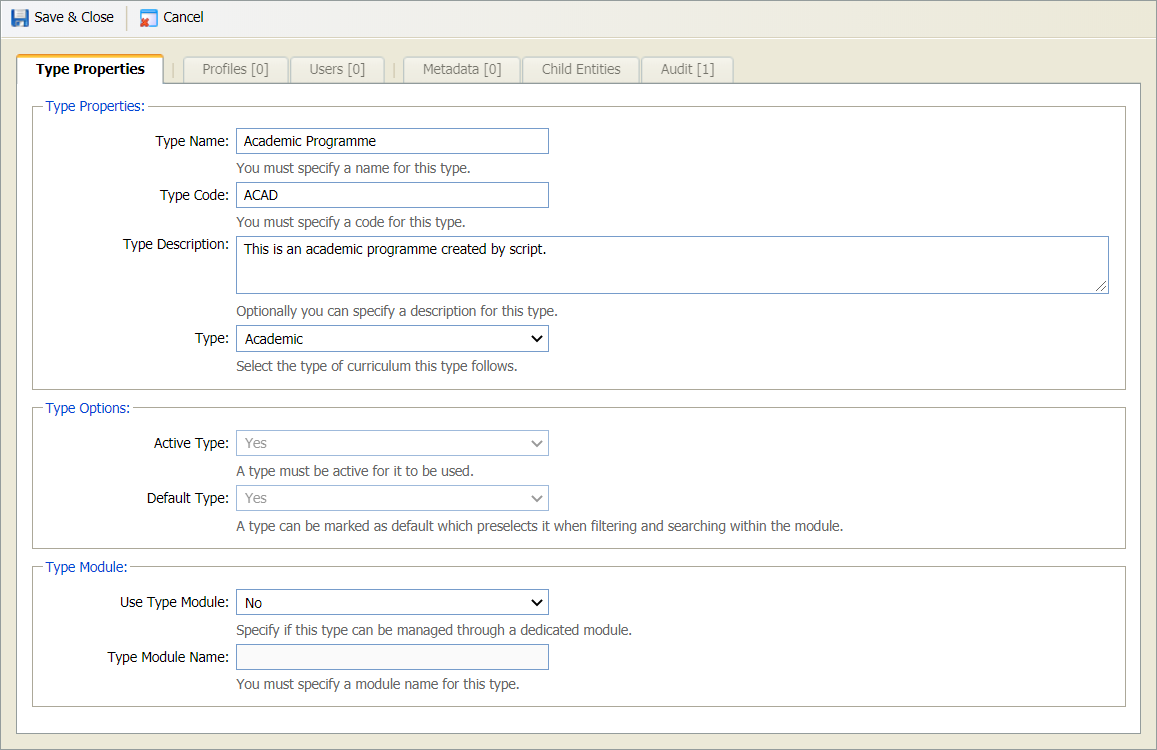
- Scroll to the programme that you want to edit and click the dit icon. The Edit Module Programme window is displayed:
-
Complete the fields displayed in the Properties tab:
Section Explanation Type Properties Enter a clear and concise name, code and description for the programme.
Type. Use the drop-down list to select a type for the new programme. The options listed are preconfigured for you.
Type Options Use the drop downs to:
- Set the status of the programme. Only 'Active' programmes can be used.
- Set this programme as the default. Only one programme can be marked as the 'Default'. This programme is preselected whenever a module programme is required to be selected in Ed:gen.
Type Module Choose for the programme to be displayed and managed as a separate module in Ed:gen, if required, and enter a name for the new module.
The icon displayed for the programme module is determined by the selection made for Type above.
You must finish configuring the newly created module in the Control Panel > Modules & Programmes applet.
-
Three other tabs are available, these are explained as follows:
- Metadata. Any metadata fields set up for module programmes are listed here. Add values for the metadata fields as required.
- Child Entities. Shows a count of areas of the module linked to the selected cycle.
- Audit. Any changes made to the cycle are listed here.
- Select Save & Close. The amended programme is listed.
Delete a Programme
Remove a programme that has been added in error.
You cannot delete a programme which is active or has had curriculum or departments allocated to it.
- Scroll to the programme that you want to delete and click the delete icon. You are prompted Are you sure you want to delete this programme?
- Select Yes.
- The programme is removed. A log is kept under the Logging tab for auditing purposes.