Record timesheet entries (Quick Start)
See full version
You must enter client, job, analysis and time details to complete the timesheet.
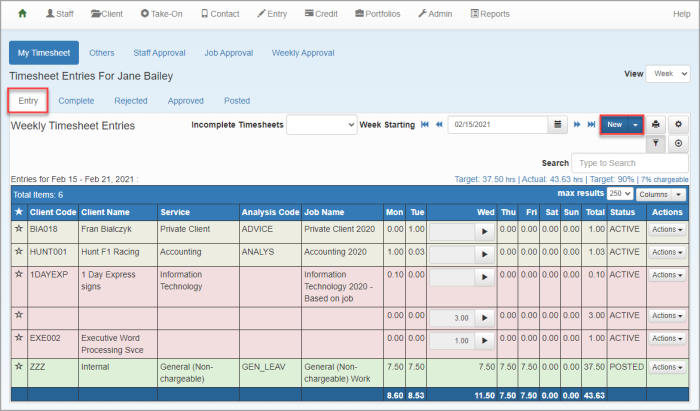
- Select Entry > My Timesheet from the menu.
- From the Timesheet Entries for page and Entry tab, click New Entry. If timesheet entries already exist, click New.

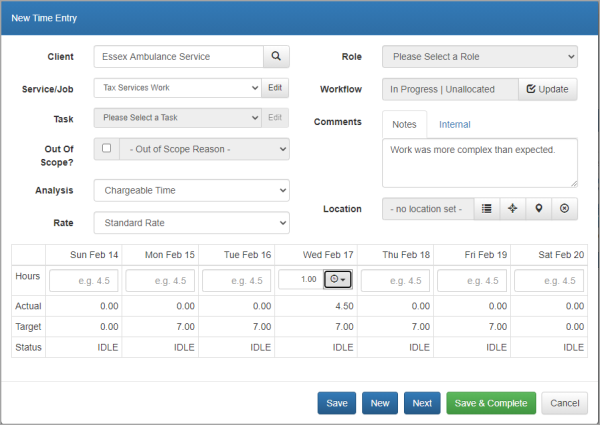
- From the New Time Entry window, enter the client code or name (minimum 3 characters), then select the client from the list.

- Select the Service/Job and Task (if used) from the list.
Tasks are not required for non chargeable time. - Select an Analysis code.
- Select the charge Rate (if you have permission).
- Select a job Role (if used).
- Add any Notes or Internal information in the Comments box.
- In the grid, enter the amount of time spent on this activity in the applicable Hours box for each day. Alternatively, start the timer to record the amount of time being spent.
- Click Save to save the entry and return to the timesheet entries list. Repeat this process for any additional entries.
What happens next
- You can add more entries, copy existing entries, edit entries or delete entries if needed.
- When you have finished recording your entries, mark your timesheet as complete.
- Your timesheet is then reviewed and approved (if used)
- Once approved, the timesheet is then available to be posted to a client for billing.