Record time using the timer
In addition to manually entering time, you can also use our inbuilt timer to record the time you spend on a specific activity, which is then automatically recorded in your timesheet. Once started, the timer will continue to run, even if you navigate away from the page.
Typically, you would create timesheet entries in the usual way to create a work list, then start the timer when you begin each activity. However, you can run the timer with no minimum information required.
The timer function is only available for the current day and only one timer can be running at a time.
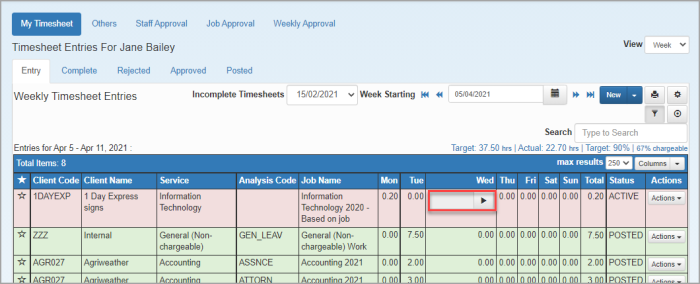
- In most cases, the timer is started from the timesheet as displayed in the grid view.
- alternatively, you can open the required timesheet entry open, click the timer icon, then select Start. The timer can be reset if required.
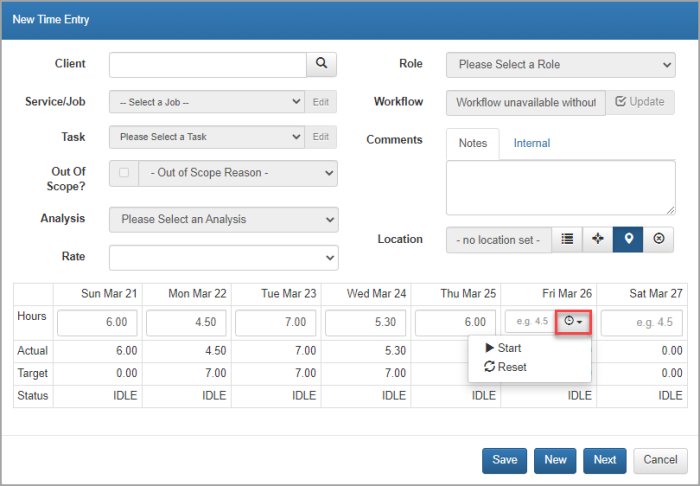
- Click the timer con and select Stop when you have finished the required activity. You can switch the timer on and off as many times as required enabling time to be continued as and when you work on the activity. The timer will be rounded up to the nearest amount (specified in timesheet settings).
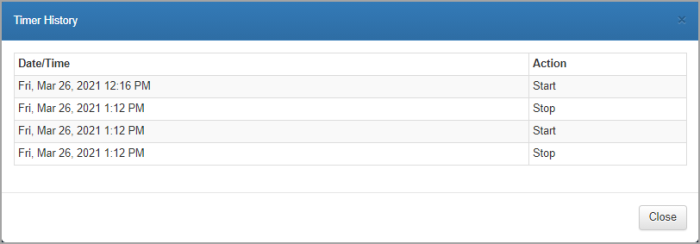
If you start the timer on another timesheet entry, the current timer will be stopped. - You can view a history for any time recordings by clicking the timesheet entry to display the entry inline. Click the timer icon, then select History.

- Click Close to return to the inline timesheet.