Import budgets
Some Of the nominals and ledgers used in this topic may be different to those in your chart of accounts.
This topic applies to non-transactional budgets only. Education customers typically use these budgets.
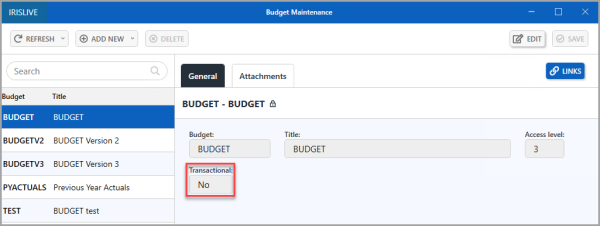
Download the Budget Upload Template and Education Budget Import DTT (Data Transfer Template) files you need to complete the import. After you download them, open the files and change the academic year if needed.
When you create budgets in IRIS Financials, enter values for all required nominals, ledger accounts, and financial periods. These values define what the budget is spent on or received for, where you assign the cost or income, and when you expect to spend or receive it.
Before you start, read Overview of Budgeting Using IRIS Financials.
You can add budget data in two ways:
- Manual entry: enter budget data manually in the Budget Maintenance window. For more information, go to Create a budget framework.
- Import: import budget information into the software.
This topic describes how to import budget data:
Complete the Budget Upload Template
- If you have not already done so, download the Education Budget Upload Template.XLSM file using Education Budget Import Template.
- Open the Education Budget Upload Template.XLSM.
You complete the Year and BudgetCode cells, and the Nominal Code, Ledger Code, Ledger Account Code, Annual Budget, and Profile columns. The template fills the remaining cells automatically, based on what you enter. After the template fills these cells, you can amend the figures if needed. - Enter or amend the applicable Year and BudgetCode.
Enter the BudgetCode in capitals. It must exactly match a code you have already created in IRIS Financials. Otherwise, the budget does not import correctly. - In the Nominal Code column, enter the nominal code you want to enter a budget value for, exactly as it appears in IRIS Financials. To check the code, go to Maintenance, then select Nominals. The Nominal Maintenance dialog opens. The nominal code shows what you spend or receive.
- In the Ledger Code column, enter the ledger that the nominal links to, exactly as it appears in IRIS Financials. To check it, go to Maintenance, then select Nominals. The Nominal Maintenance dialog opens. To avoid mistakes, copy the code. Select the ledger code in the Ledger field on the General tab, then select Ctrl+C. Select the cell in the spreadsheet, then select Ctrl+V.
- In the Ledger Account Code column, enter the code of the ledger account you want to assign the budget value to, exactly as it appears in IRIS Financials. To check it, go to Maintenance, then select Ledgers, then select the ledger you need. The Account Maintenance dialog opens. To avoid mistakes, copy the code. Select the ledger account code, then select Ctrl+C. Select the cell in the spreadsheet, then select Ctrl+V.
- For each nominal and ledger account row, enter the applicable budget value, rounded to the nearest pound. Enter income as a negative value.
You can enter budget values as whole numbers only. The import process removes any decimals and rounds the value. - Use the Profile column to split the amount across the 12 monthly period columns. Select the cell in the Profile column, then select an option from the list.
These options are available:
Profile option What it does Monthly Splits the annual budget amount across all 12 months. For example, £600 becomes £50 for each month. You can overtype any of the monthly values if needed. Quarterly from P1 Splits the annual budget amount into four quarterly amounts, starting in September. For example, £600 becomes £150 in September, December, March, and June. Quarterly from P2 Splits the annual budget amount into four quarterly amounts, starting in October. For example, £600 becomes £150 in October, January, April, and July. Quarterly from P3 Splits the annual budget amount into four quarterly amounts, starting in November. For example, £600 becomes £150 in November, February, May, and August. Specific month Puts the whole annual budget amount in the month you select from the list. For example, select September to put £600 in September. All but August Splits the annual budget amount across every month except August. For example, £600 becomes £55 for each month from September to July, which gives a total of £605. The Check column shows a difference of +5. Edit one or more of the figures to correct this difference. Manual Each month shows the text Enter Value. Enter the values you need for each month. Enter a zero for any month with no value, otherwise the import shows an error. The figures must add up to the annual budget amount. The Check column shows any difference, which you must correct. These images show an example of each option.
Monthly:
Quarterly from P1:
Quarterly from P2:
Quarterly from P3:
Specific month:
All but August:
Manual, before you enter values:
Manual, after you enter values:
- Whichever profile you select, you can overwrite the values if needed. For example, you may need to do this when the annual budget does not divide equally across 12 months. Repeat this process for the remaining budget.
You can use a nominal and account combination once only. If you enter two rows with the same nominal and account combination, the import includes only the first row and the budget is incorrect. Combine multiple entries into a single row.Do not leave any fields blank. Enter a zero in any blank field to prevent import errors.
Create the import file
- When you have completed the Budget Upload Template, select Press to Create PSF Upload Template button . The template creates the budget data for the import on a separate sheet in the workbook called Import Data. When the message dialog opens, select OK.
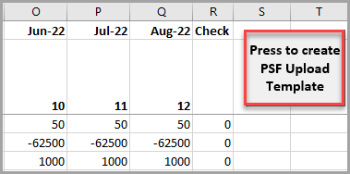
- Save the spreadsheet as a .CSV file before you import it into IRIS Financials. Go to File, then select Save As.
- Enter a suitable file name and make sure the file type is CSV (Comma delimited).
- A warning message appears when you save, because CSV files support only one sheet. Select OK to accept the message. The CSV file comes from the correct Import Data sheet.
Do not reopen the .CSV file after you save it, because you can lose the formatting for financial periods. If you need to adjust the budget, change the Budget Upload Template spreadsheet and create the .CSV file again using the same steps.
Import the Budget Upload Template
- If you have not already done so, download the Education Budget Import DTT file: Education Budget Import DTT.
- Log in to IRIS Financials, go to Modules, then select Data Transformation Tool.
If you have multiple databases or companies, log in to each one to do the import. - The PSF Data Transformation dialog opens. Go to File, then select Open.
- Find and select the Education Budget Import DTT file you downloaded, then select Open.
- Select Browse, then select the budget template CSV file you saved, which contains your budget data.
- The preview panel shows a sample of your budget import. To show more rows, overwrite the number in the Preview rows field.
- Select Next. The Step 3 page opens. Select Next again.
The Database and Company Code fields are blank. The next page shows which database and company you are importing to. - The Step 4 dialog shows a summary of the import. If the database or company is incorrect, close the Data Transformation Tool and change your connection in IRIS Financials. For more information, go to Change connection to your test database or another company.
- Select Post to import the budget.
- When the import completes, the Summary Information dialog opens. Select Close.
If there are any errors, go to Common errors.
Review the budget using the Budget Matrix report in the Reporting Suite. If you need to make changes, update the budget template and import it again. Alternatively, make manual changes to the budget. For more information, go to Amend a posted budget.