Allowing Auditor Access
CUSTADMIN access only
When your auditors have been given a PS Cloud login, they will be able to access your PS Cloud environment using the same remote desktop connection shortcut (RDP) that you use. The PS Financials Support Team will forward them an RDP connection, or you can forward your own and they can enter their own username and password to connect.
You will need to set your Auditors up as a user on PS Financials with Read-only access (to prevent them from posting anything). Please see the Allowing Auditors Read-Only Access to PS Financials on page 2 for more information.
It is recommended you allow your auditors full access to your PS Financials system, with read-only access. This means they can access all of your data, without the risk of anything being inadvertently amended. This will need to be completed by your PS Financials admin user.
Security is comprised of the following:
-
Create user group & user(s)
The following graphics are based on a typical set-up on a PS Cloud environment. If you are a non-PS Cloud customer and are unable to find the applications listed, please speak to your own IT Department/Administrator who will install them for you.
Creating the User Group and User
You will need to create a new user group and audit user in order for them to access the PS Financials software. To create a new user group and audit user:
-
Select Start > PS Financials > Financials Administrator.
-
The PSF Administration Logon dialog is displayed. Enter the applicable Server name. If you are unsure of the server name, please speak to your own IT Department/Administrator who advise you what it is.
-
Enter CUSTADMIN or PSFADMIN in the User field. If you do not have the password for either of these user accounts, please speak to your PS Financials admin user who will need to do this for you.
-
Enter the applicable Password and click the OK button.
-
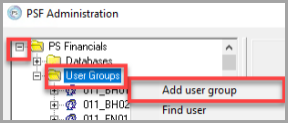
The PSF Administration dialog is displayed. Expand the User Groups folder and right-click on User Groupsthen select Add user group.
-
Enter an applicable user Name and Title and click the Apply button.
-
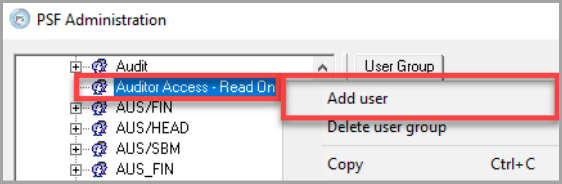
The User group is now created. You now need to add a user to the User group. Find the user group you created and right-click on the title and select Add user.
-
Enter a Name and Title for the user. You do not need to enter an Email address but may wish to do so.
-
Enter a Password and tick the Active check box and click the Apply button. Repeat from step 5 for any additional audit users to add them to the same audit group.
Next steps: Application Access for Auditors