Example pay elements
Need to create a pay element? Refer to Add a new payment, deduction, or pay type.
Screenshots are taken from a test system and may not match your system exactly.
Employees not receiving a basic salary
In My Details > Payroll, the Rate field populates when you create a Basic Rate payment. This is usually for employees not receiving a Basic Salary.
Go to System Tools > Lookups > Payroll > Payments.
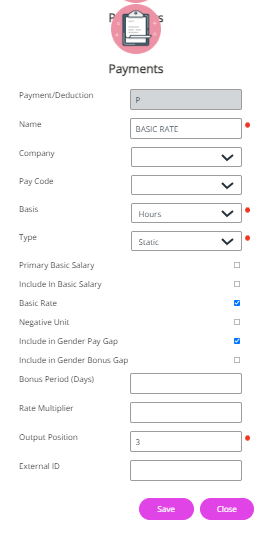
Hourly rate
First create a new Variable Rate pay element. You can then select this as a Payment in My Details > Payroll and input the hours they are paid for the period.
You also need to make sure the employee is on an hours based work pattern on their Contract tab.
Go to System Tools > Lookups > Payroll > Payments.
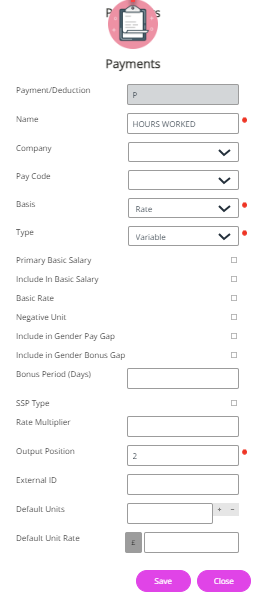
Paying an employee by the hour
Example 1
-
Sign in to IRIS HR Professional.
-
Go to Directories, search for the required employee and select their record.
-
Choose Edit.
You can also select the Edit icon displayed on the employee's name:

Choose the Payroll tab
-
Select the employee's Payroll tab > Create New.
-
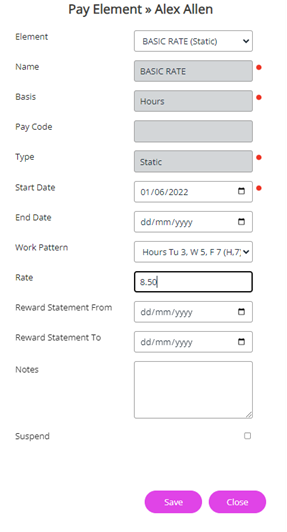
Choose the Basic Rate element you have created and add the Start Date.
-
Leave End Date blank.
-
If the employee has a work pattern assigned, this displays in the Work Pattern field.
-
Enter the Hourly Rate of pay into Rate and Save.
Example 2
-
Sign in to IRIS HR Professional.
-
Go to Directories, search for the required employee and select their record.
-
Choose Edit.
You can also select the Edit icon displayed on the employee's name:

Choose the Payroll tab
-
Select the employee's Payroll tab > Create New.
-
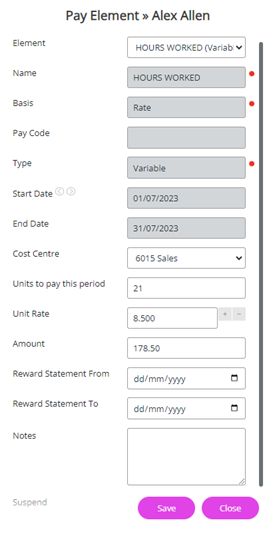
Choose the Hours Worked element you have created.
-
Enter the number of hours worked in this period into Units to pay this period.
-
As the employee has their Basic Rate added in their record, the system automatically calculates and populates the Amount.
-
Select Save.
Day rate
Go to System Tools > Lookups > Payroll > Payments and create a new Variable Day Pay Element.
This allows you to select this as a Payment on the Payroll tab and input the number of days the employee is being paid for the pay period.
Check the employee's Contract tab and ensure sure they are on a Days based work pattern.
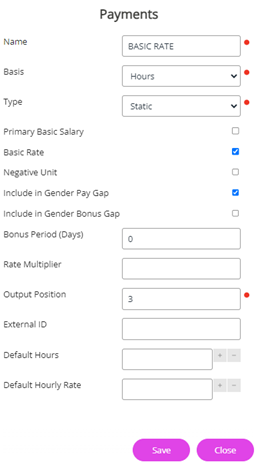
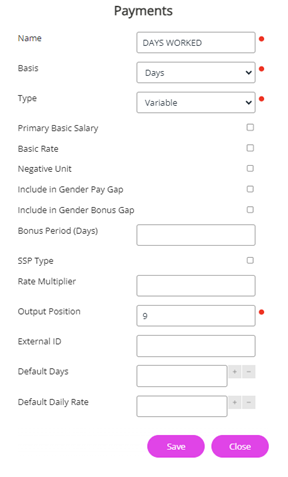
Example paying an employee by the day
Example 1
-
Sign in to IRIS HR Professional.
-
Go to Directories, search for the required employee and select their record.
-
Choose Edit.
You can also select the Edit icon displayed on the employee's name:

Choose the Payroll tab
-
Select the employee's Payroll tab > Create New.
-
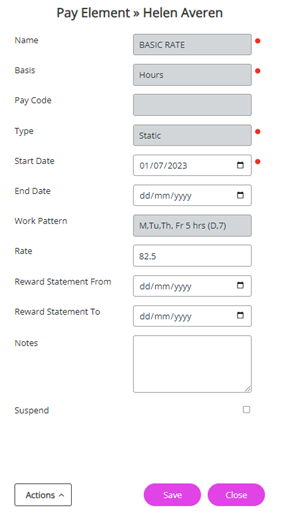
Choose the Basic Rate element you have created.
-
Add the Start Date.
Leave the End Date blank as this is their current Rate.
The Work Pattern field auto-populates if they have a work pattern assigned.
-
Enter the day rate of pay into the Rate field and Save.
Example 2
-
Sign in to IRIS HR Professional.
-
Go to Directories, search for the required employee and select their record.
-
Choose Edit.
You can also select the Edit icon displayed on the employee's name:

Choose the Payroll tab
-
Select the employee's Payroll tab and select Create New.
-
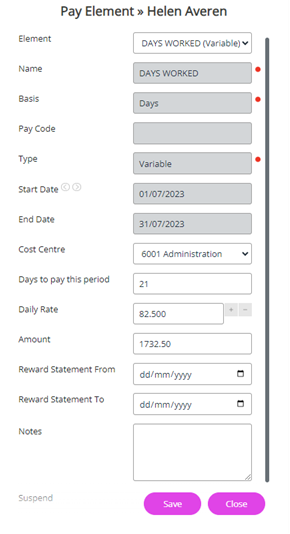
Choose the Days Worked element you have created.
-
Enter the number of days worked in this period into the Days to pay this period.
As the employee already has their Basic Rate added in their record, the system automatically calculates and populates the Amount.
-
Select Save.
Salary increases
For an individual: the date ranges for the Basic Salary or Rate cannot overlap.
-
Sign in to IRIS HR Professional.
-
Go to Directories, search for the required employee and select their record.
-
Choose Edit.
You can also select the Edit icon displayed on the employee's name:

Choose the Payroll tab
-
Select the employee's Payroll tab > Create New.
-
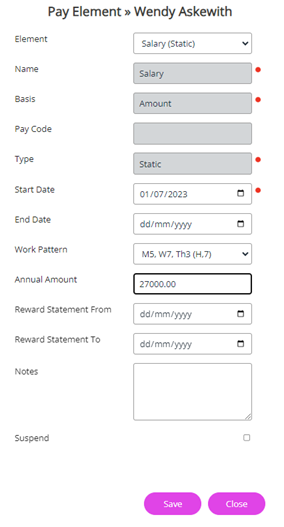
Choose the Salary element and enter the Start date for the new salary.
-
Enter the new salary (Actual Salary) into the Annual Amount and Save.
-
For the system to add the new salary, the previous salary must have an end date.
A pop-up displays advising you that there is an existing open-ended salary element in the system.
-
Select OK to allow the system to automatically add an end date to the existing salary element. This is always the day before the start date of the new salary element you are adding.
Group (multiple employees)
Refer to Salary Modeling for more information (this version in your system could differ depending on your package).
Adding an additional payment or deduction
For an individual:
-
Go to Directories, select the required employee and choose their Payroll tab.
-
Select Payments or Deductions and choose Create New.
-
Choose the element, enter the details as required and Save.
Adding an additional payment or deduction to a group of employees
Refer to Payroll Matrix for more information.