Migrating data stored on a server
It is not uncommon to store data in a location that is different to the location where your desktop accountancy suite software or data migration agent is installed. Typically, this will be a server, which other PCs will access via a network configuration.
While migrating to IRIS Elements, you may experience an issue with data access to Keytime products with the IRIS Data Migration Agent. This topic will help troubleshoot those issues.
These guidelines are designed for customers that use a domain network. If you are unsure what this means, please consult with your IT supplier.
You must have Windows Admin credentials to manage this on your own PC or laptop. If you don't have the right permissions, consult with your IT supplier.
If your PC is not configured for a domain network, we advise installing the Data Migration Agent on the PC or laptop that hosts your PTP data.
Testing the data connection in the DMA:
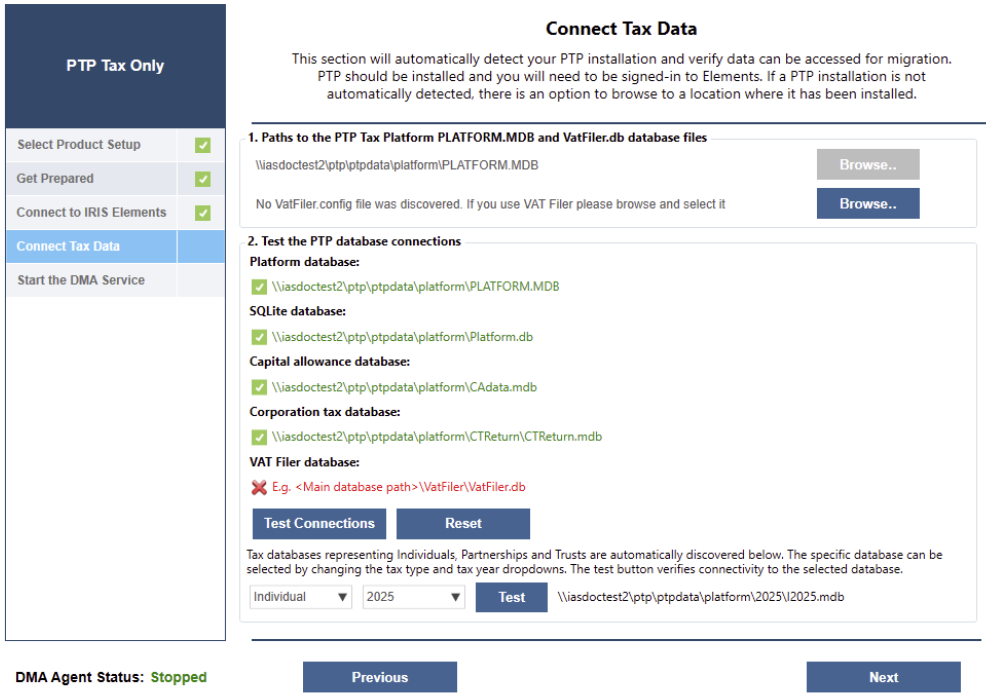
When you get to the Connect Tax Data screen, the DMA will automatically detect your Keytime installation and verify data can be accessed for migration. Each data path will either:
-
turn green where the DMA is able to locate and successfully connect to the data location, or;
-
turn amber where the DMA is able to locate the data, but the data is not stored in the same location that the DMA is installed, or;
-
turn red where the DMA is unable to locate the data in the specified path.
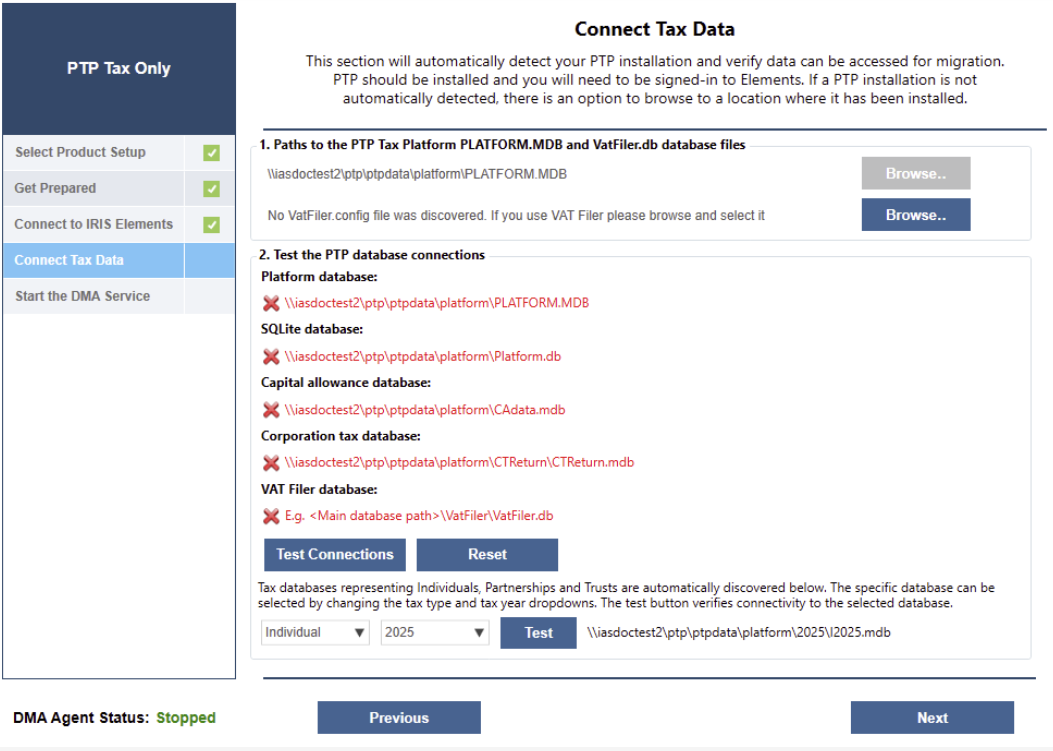
Where the path is red: the DMA did not detect the database in the location specified. In this case, select Browse and navigate to the correct data location.
Go to the location of your Keytime install (this will usually be on your C: drive). Select the Keytime folder and then the CM+ folder. Open the DataManager.exe file. Your data paths are displayed in the pop up.
Where the path is amber: the DMA detected the database in the location specified, however, permission needs to be granted to allow the DMA to access the data. Follow the steps below.
Connecting data stored on a server to the DMA:
-
Go to the server where your Keytime data is stored, right click on the Keytime folder and select Properties.
-
Go to the Sharing tab and select Advanced Sharing.
-
Make sure Share this folder is selected, then select Permissions.
-
Select Add.
-
Enter a group name, such as Everyone and select Check Names. Select OK.
-
Select the checkbox to allow Full Control. Select OK.
-
Make sure to select Apply to save your changes. Select OK to close the window.
-
Go back to the Connect Data screen in the DMA and select Test Connections. If the paths turn green the data connection has been established. Select Next to continue the DMA process.
If you're still experiencing problems, Get help and support from our Support team.