Reconciling Bank Transactions Using an Automated Process
The Bank reconciliation process is made up of five steps:
-
Statement Import
-
Bank Reconciliation
-
Bank Reconciliation - Transaction variances
-
Bank Reconciliation – Report
-
Statement View
This topic assumes you have already set up the automatch in IRIS Financials. Refer to Setting up Automatic Bank Reconciliation for more information.
Statement Import
In order to perform a Bank Reconciliation, a statement file will need to be downloaded from the respective Bank Account. The file will need to be in a .CSV format.
If assistance is needed to import the CSV file, see Importing Bank Statements .
Bank Reconciliation
Once all the Bank transactions have been imported into the system a Bank Reconciliation can be performed.
-
Go to Masters > Bank Accounts > Advanced Reconcile.
-
Click BROWSE and select the Bank Account to be reconciled.
-
Click NEXT.
-
On the left-hand side of the screen all bank statement transactions which have been imported but not reconciled will be listed (these are referred to as open items). On the right-hand side of the screen all currently un-reconciled Cashbook transactions within the system will be listed.
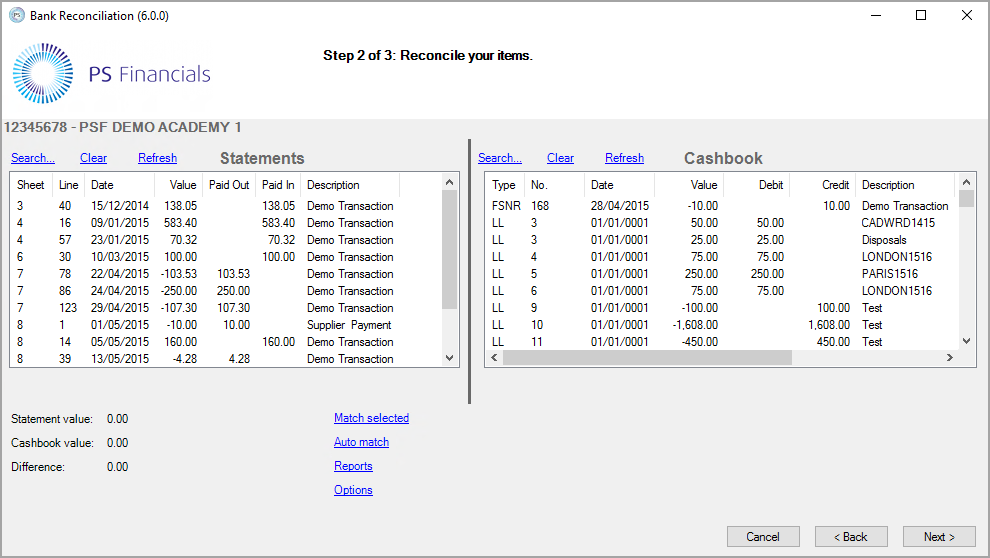
At the top of the Statements and Cashbook areas are a number of headings. The width of these column headings can be adjusted in the same way as column can be manipulated within Excel.
-
To sort the data by a particular column, click on the heading of the respective column. Each click of the mouse will change the order between ascending and descending. Only one column may be sorted at a time.
-
Once the screen has been set up to an individual's requirements the matching of items (reconciliation process) can begin.
The reconciliation process can be carried out in three different ways. The user may wish to also use a combination of these methods for suitable transactions.
Auto Match Method
Instead of matching all of these items manually, the AUTO MATCH feature can be used to clear entries automatically.
This topic assumes you have already set up the automatch in IRIS Financials. Refer to Setting up Automatic Bank Reconciliation for more information.
-
Select AUTO MATCH.
A minimum of three steps should be shown in the Auto-Match screen.
Before beginning, ensure that the CONFIRM EACH MATCH check box is ticked below the AUTO MATCH button.
-
Now click the Auto Match button and the system will search through and select all of the transactions which it believes can be matched together.
-
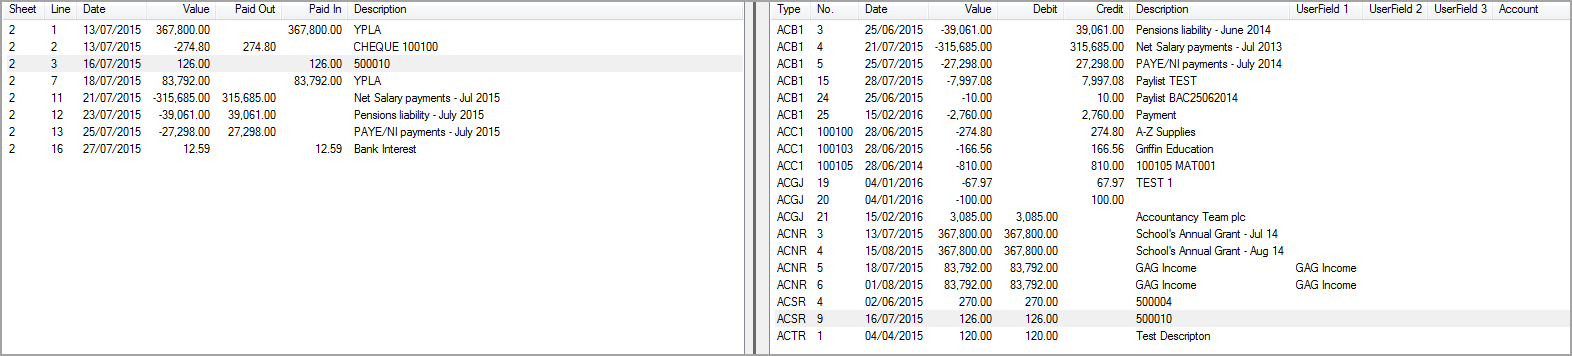
At every match, a screen will appear (screen shot 1) advising that two items can be matched. Each transaction will be highlighted in the Statements and Cashbook area (screen shot 2). If the transactions shown do match, select Yes otherwise, select No. The auto-match routine will then move on to the next match.
-
When the process is complete click Next and a report displaying the items reconciled will be generated. This should be printed or emailed.
-
At the end of this process, there will always be recent items left unreconciled on the Cashbook however; unreconciled Statement items can be reconciled by creating manual Cashbook entries. This is dealt with later in this document.
Alternative Auto Match Method
This method of reconciliation is exactly the same as the above Auto-Match Method however, this method will automatically match items using the created steps but, without offering a Yes or No option for each matched item. Therefore users must be satisfied that the Auto-Match steps created allow for every possible scenario.
To use this method, follow the above steps involved in setting up the Auto-Match Method but remove the tick from the box at the side of Confirm each match.
Again, when the process is complete click Next and a report displaying the items reconciled will be generated. This should be printed or emailed if required.
Bank Reconciliation-Transactional Variances
If a transaction appears on the Bank Statement which is missing from the Cashbook, or if a transaction has been posted for the wrong value, (for example, penny differences) this can be posted directly to the Cashbook during the reconciliation process enabling all Bank Statement items to be reconciled without having to finish the process with items un-reconciled.
-
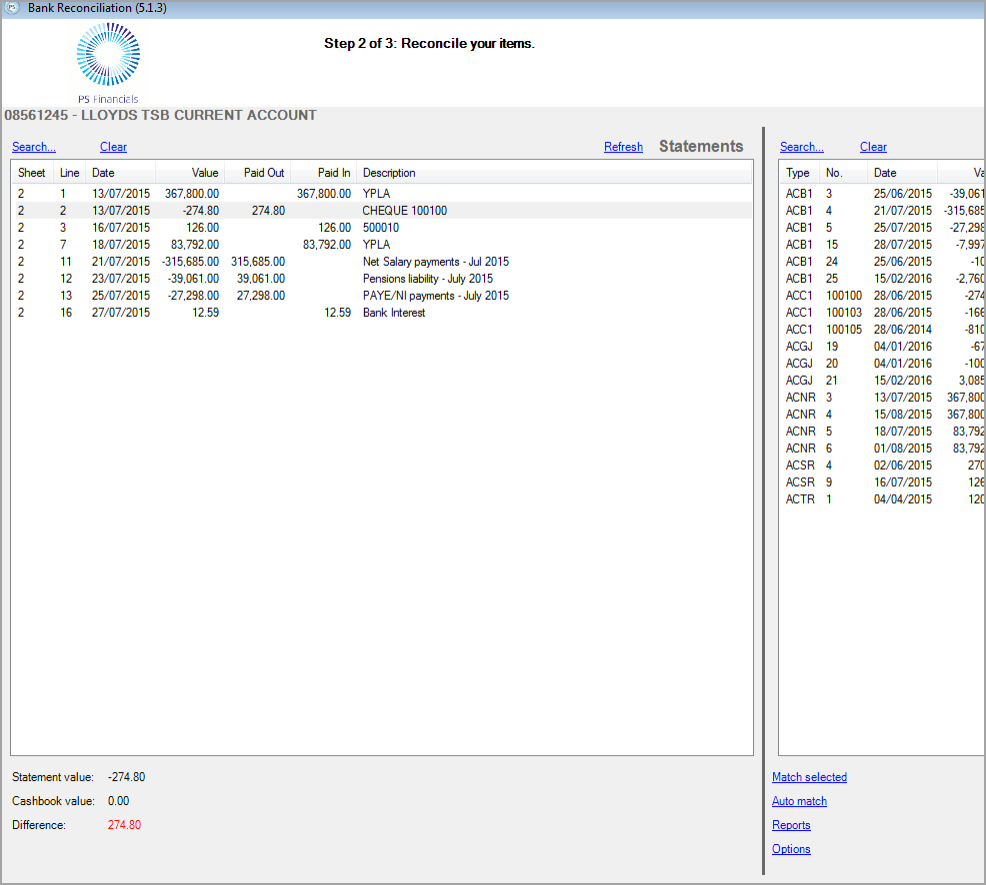
Select the item to be reconciled from the Bank Statement.
If there is an item to be reconciled against on the Cashbook select this item.
-
If there is no matching item on the Cashbook, select Clear.
-
In the bottom left hand corner the difference between the entries selected is displayed in red.
-
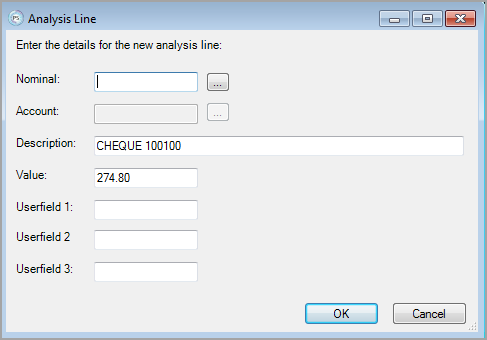
Select Match Selected and the Analysis window will be displayed.
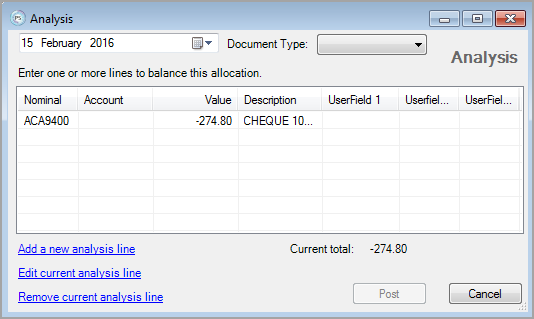
The system will automatically enter the details for the existing transaction.
-
Select a Document Type for the new transaction.
-
To enter the Cashbook reconciliation entry, select Add a New Analysis line.
-
Enter the relevant Nominal to be used.
-
Enter the COSTCENTRE in the Account field. The Description field pre-populates with the Nominal Description. Over type this if necessary.
-
The remaining User fields should remain blank. Once the above fields have been populated, select OK.
-
The items in the Analysis window should now show a Current total of zero. Click Post to complete this process.
Bank Reconciliation - Report
Once the Reconciliation process is complete, a separate Bank Reconciliation report can be run.
This can be run via Options > Bank Reconciliation or Reporting Suite > Bank Reconciliation.
Statement View
It is possible to view any Bank Statement which has been uploaded into the system.
-
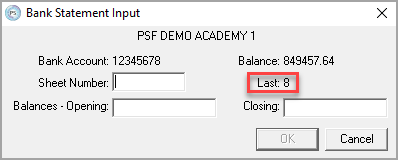
From the Main Accounting Application select Masters and then Bank Accounts.
-
Select the relevant Bank Account.
-
In the Sheet Number field enter the sheet number to be viewed. The Last statement number will also be displayed.
-
Select OK.
-
The statement will then be shown on screen.
-
Using the F6 and F7 buttons to scroll through the pages of the statements imported to view other statements.