View and print student timetables
Use the Pupil Manager module to access student timetables in bulk. This saves time as you do not have to access the Timetable Manager module.
Choose to either:
View student timetables
It is not recommended that you edit timetables from the Pupil Manager module. Only edit timetables in the Timetable Manager module.
- Open the Pupil Manager module, select the Current Student/Pupils tab.
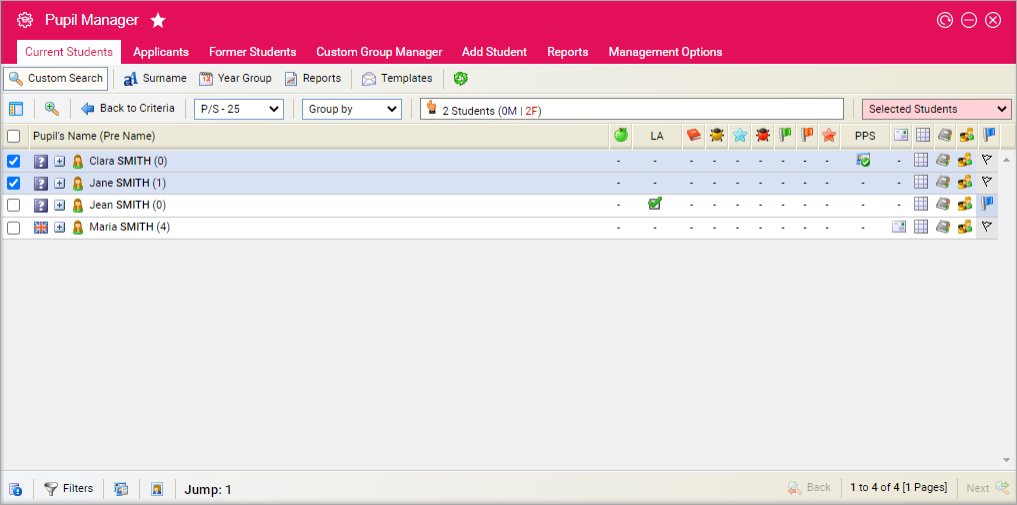
- Use your preferred search method to find the student records that you want to work with. The Student/Pupil Records List is displayed:
- Either:
- Select student records using the checkboxes next to each Student/Pupil's Name. Check the box in the header bar to select all the records displayed.
-
In the pink drop-down list, select View Timetables.
or
- Click on a selected student's name to display their record.
- Click Student Timetable above the student's name.
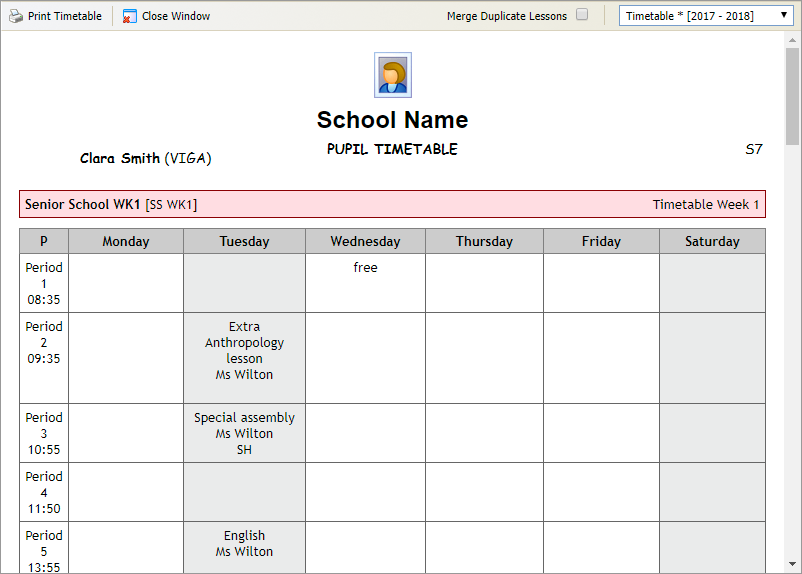
- Scroll through the window to view all student timetables.
- Use the drop-down list in the top right of the window to change the timetable displayed.
-
Use the icons available in each period box, if required:
 E-mail students in a set or form
-
Click the envelope icon in a lesson period. The Create Group E-mail window is displayed. A number of tabs are available for you to work with.
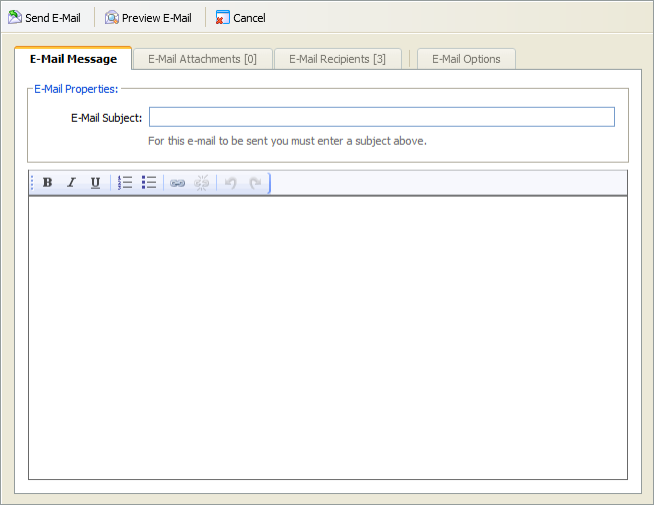
- Click the E-Mail Message tab:
- Enter an E-Mail Subject.
- Enter the e-mail text. Apply text formatting and links, if required.
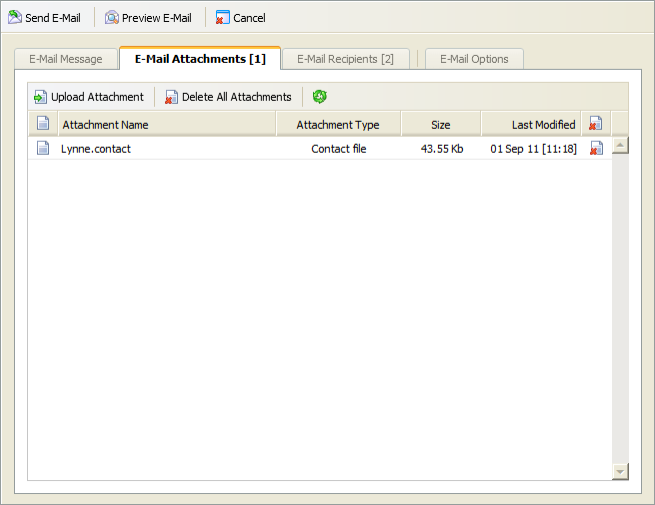
- Click the E-Mail Attachments tab to attach files, if required. This is an example of the E-Mail Attachments tab:
- Click Upload Attachment.
- Click Browse and select a file.
- Click Upload Attachment. The attachment is listed.
-
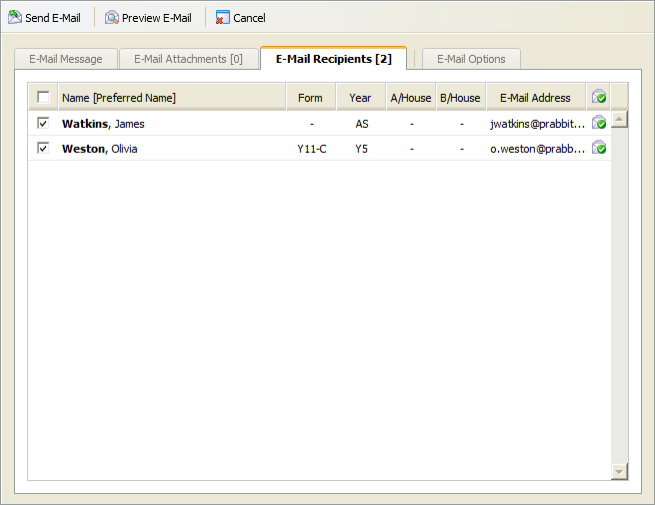
Click the E-Mail Recipients tab:
-
Either:
-
Check the boxes next to student's names to select those who are to receive this e-mail.
or
-
Check the box in the tab header bar to select or deselect all students listed.
The green tick icon indicates that the e-mail address is valid.
The yellow warning icon indicates that the e-mail address is not valid and no message will be sent to this address.
-
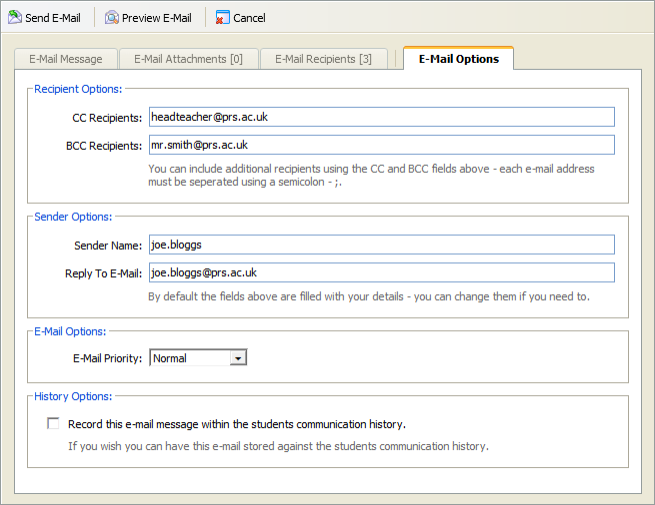
- Click the E-Mail Options tab:
- Enter Recipient Options to CC and BCC recipients.
- Enter Sender Options. By default this is filled with your details.
- Select an E-Mail Priority from the drop-down list.
- Check the History Option box to keep a record of the e-mail. This is stored in the student's Communication History in the Pupil Manager module.
- Click Preview E-Mail, to check through the e-mail before it is sent.
- Click Send E-Mail.
- Click Close Window.
 Send an SMS message to students in a set or form
- Click the phone icon. The Create Group SMS Message window displays two tabs for you to work with.
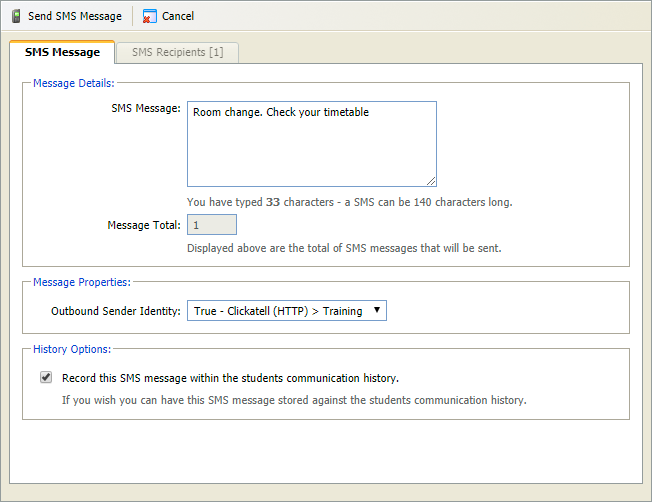
- Click the SMS Message tab:
- Enter the SMS Message in the field shown. This will be divided into a number of messages if it is over 140 characters long. The Message Total is displayed.
- Use the Outbound Sender Identity to select the caller ID of the message. If a virtual number is selected here, the recipient only sees the number in caller ID (the message may need to be clear that it is from your school). Use virtual numbers if you want the recipient of the message to reply.
- Check the History Option box to keep a record of the SMS message. This is stored in the student's Communication History in Pupil Manager module.
- Click the SMS Recipients tab:
-
Check the boxes next to student's names to select those who are to receive this message.
or
-
Check the box in the tab header bar to select or deselect all students listed.
-
Click Send SMS Message.
- Click Close Window.
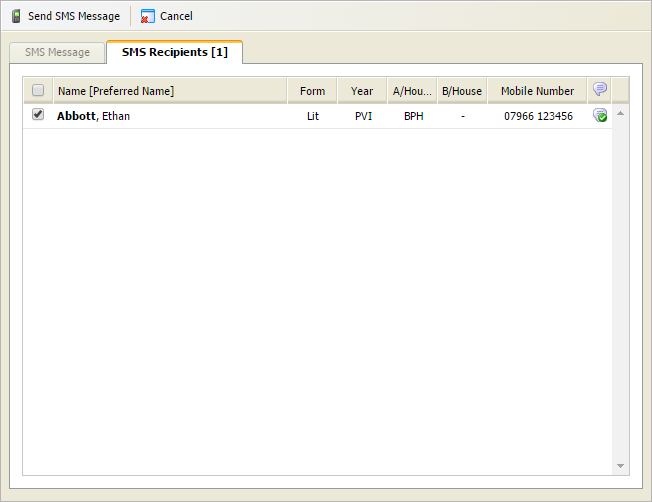
The green tick icon indicates that the mobile number is valid.
The yellow warning icon indicates that the mobile number is not valid and no message will be sent to this number.
 View a set/form list
-
Click the list icon in a lesson period. The Field Selection window is displayed:
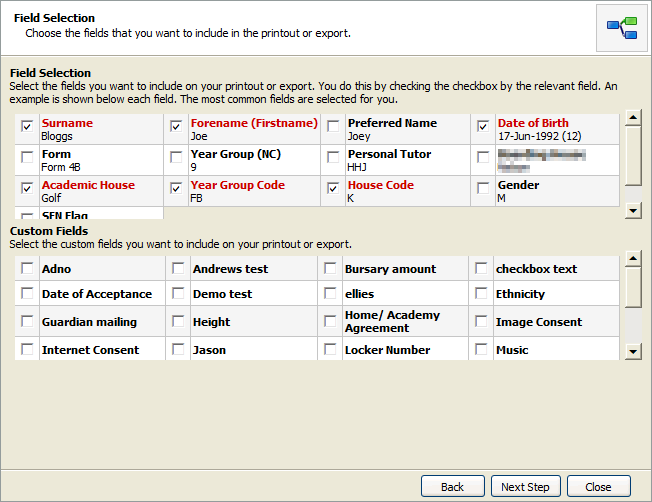
- Check the boxes to select the fields that you want to include in your set list.
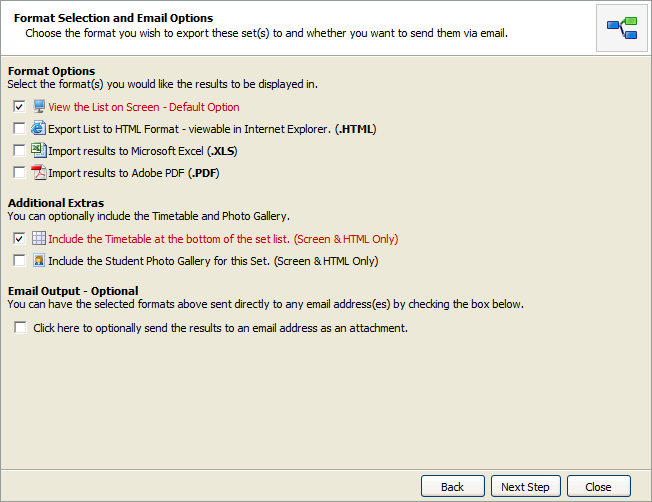
- Click Next Step. The Format Selection and Email Options window is displayed:
- Check the boxes to select a format for your set list. More than one format can be selected.
- Check the boxes to select the Additional Extras that you would like to display in your set list. This is optional.
-
Check the Email Output box to
send the set list to another email address. This is optional.
- Enter Recipient Name.
- Enter Recipient Email Address.
- Click Next Step.
- Either:
-
Your set list is displayed, ready for printing.
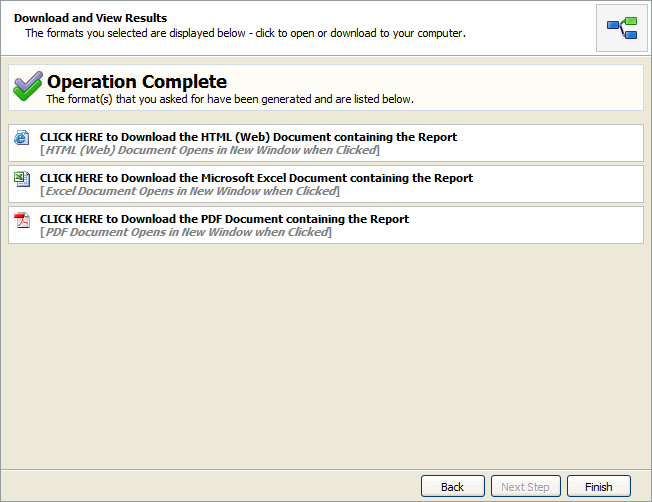
or - The Download and View Results window is displayed, see below for an example:
-
Your set list is displayed, ready for printing.
- Click on a link to view the set list in your chosen format.
- Click Close Window.
-
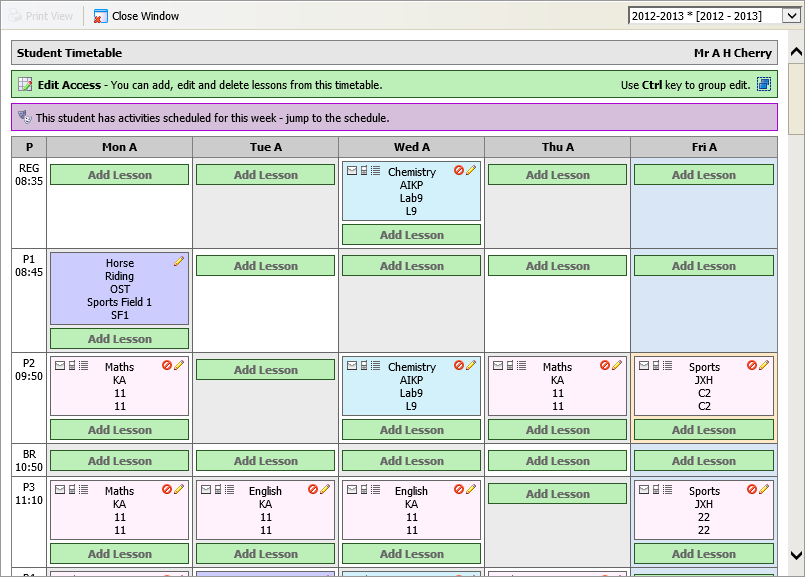
Multiple timetables are displayed in a single window for convenience.
Print Student Timetables
Use the Print Timetables option in the pink drop-down list to print student timetables from the Pupil Manager module. Your select timetables are printed in a single document.
To print student timetables, follow the steps below:
- In the Pupil Manager module, select a student records tab.
- Use your preferred search method to find the student records that you want to work with. The Student/Pupil Records List is displayed:
- Select student records using the checkboxes next to each Student/Pupil's Name. Check the box in the header bar to select all the records displayed.
- In the pink drop-down list select Print Timetables. An example of the window displayed is shown below:
- Scroll through the window displayed to view all the timetables you have selected to print.
- Use the drop-down list in the top right of the window to change the timetable displayed.
- Check Merge Duplicate Lessons to merge lessons being taught in the same period. This saves space when printing. Ensure that lessons are still clearly recognised if you merge lessons.
- Click Print Timetable.

