Add Products in IRIS FasTrak
The Products section of FasTrak Admin is used to create, edit and delete products and product categories for use with your IRIS FasTrak catering system.

Only Administration logins can create products. Other logins may not create any products, and cannot see the products section in FasTrak Admin.
Creating a product
To create a new product, go to the Products section and select Add Product from the toolbar. The following window will appear:
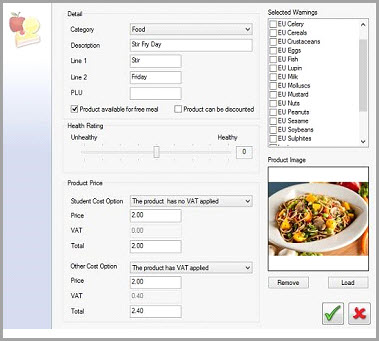
Product Options
Description — Add a description for the product you're adding.
Category — Select which category the product should be in. See the following section of this document for more details.
Line 1 / Line 2 — When you add products to the till, these two fields are displayed as shown in the following image:
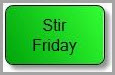
Enter a short description of the product in each line. Only Line 1 is mandatory, however using both lines can allow for a better description of the product on the till.
PLU — Enter the price look-up code, if required.
Product available for free meal — If you want the product to be available to people qualifying for free school meals, tick this option (enabled by default).
Product can be discounted — When this option is enabled, a discount can be applied to the product by the till operator.
Health Rating — If you want to set a health rating for the product, you can use the health rating slider to indicate how healthy/unhealthy the product is.
Student Cost Option — Choose whether the product is free or paid, and if it has VAT applied. This option only applies to students.
Priced at till — If you set the product as being priced at till, the till operator is required to enter the price of the product when it is purchased.
Price — Enter the price that you want to charge for the product (disabled if no cost or priced at till).
VAT — The VAT is automatically calculated. You can edit this from FasTrak Admin's Maintenance section or remove it as required. The value entered here will be added to the price you set for the product.
Other Cost Option — Set the price of the product for non-students, e.g. staff members. You can use the same price as set for students, or set a different price as needed.
Selected Warnings — Tick any warnings that you want to apply to the product. This list is populated from the warnings added in the Products section and includes the current EU standard allergens. View Add Product Warnings to IRIS FasTrak for further details.
Product Image — You can attach images to a product. To do this, select the Load button in the Product Image section, and browse to the image you want to use. Note that there is a size limit set by default for product images; you can change this limit by navigating to Maintenance – Admin Setup – Max Image Size (View IRIS FasTrak Settings for further information).
Select OK to save the product, or Cancel to discard your changes and return to the administration window.
Editing a product

To edit a product, you can either double-click it in the product list, or select Edit Product from the toolbar. You can edit all options apart from the internal product code.
Deleting a product

To delete a product, select it from the product list and then select Delete Product from the toolbar. You will be prompted to confirm that you want to delete the product.
Only delete products that are not in use. The product code used by a deleted product will not be made available again. If you want to re-use a product code, edit the product using it instead.