Add a new task to a job
Practice Admin Managers Partners Job Admin
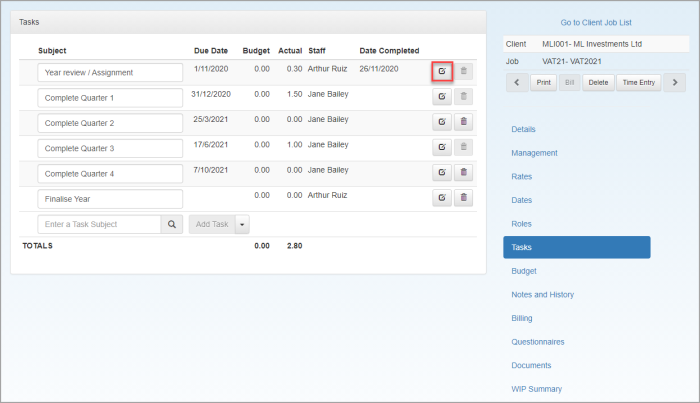
Select the required job, then select the Tasks tab. A list of any existing tasks added to the current job is displayed including any budget and WIP information allocated against each task.
The Tasks tab is not available for standard tax jobs.

There are three ways in which tasks can be added:
-
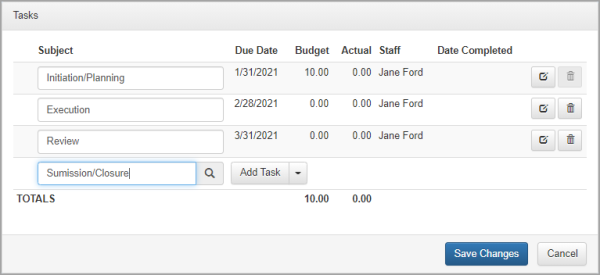
Enter a name for the task, then click Add task - further detail can be added later as described in the next section.

- Select Add Detail Task from the Add Task drop-down to create a task and add full information.
-
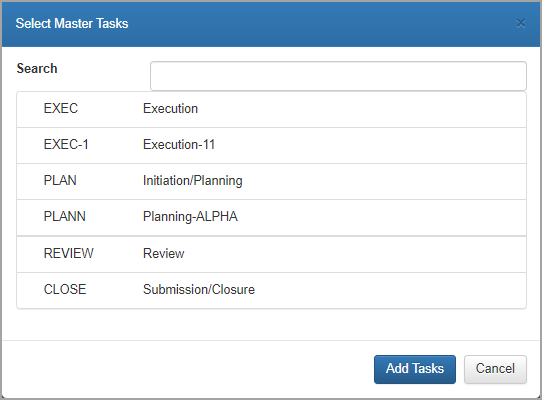
If the task is to be based on a previously created master task, select Add Master Task from the Add Task drop-down. Select the required master task, then click Add Tasks.

Record the task detail
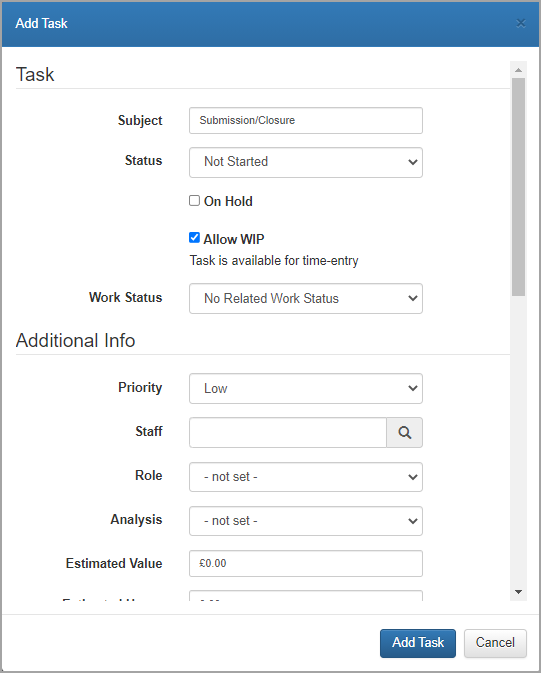
Whichever method is used, you can add further detail to the task via the Add Task/Edit Task window. If a simple task was created, you will need to click the Edit icon.
![]()

Complete the following information:
| FIELD | DESCRIPTION |
|
Subject |
Name of task. |
|
Status |
Choose the current status of this task which defaults to Not Started. |
|
On Hold |
Select this check box if the task can't be started, perhaps because you are waiting for some information. It is unlikely that you would select this at the point a task is created, but it may be required at a later date. |
|
Allow WIP |
This is selected by default and enables time to be entered against this task. There may be occasions when you want to add a task to record a milestone rather than to record time against. In this case, this check box should be deselected. |
|
Work Status |
If used, a required status can be selected from the drop-down list and is for information/reporting purposes only. |
|
Priority |
Any priority selected here can be added as a column to task lists. |
|
Staff |
Enter the first three characters of the person who will be responsible for the task, then select them from the list. |
|
Role |
If in use, roles are used to specify the default role when a task is selected. For budgeting purposes, any time assigned to the task is allocated to the selected role. |
|
Analysis |
The analysis code selected here will be automatically populated when selecting a task for timesheet entry, preventing the need to manually enter the code each time. |
|
Estimated Value/Hours |
Any values entered here are for information or reporting purposes only. |
|
Task Code |
Any task code entered here can be used for grouping and reporting. |
|
Note |
Any notes entered here are visible to anyone who views or edits the task via this screen. In addition, if you use the Department Schedule at task level, the notes will be visible via the schedule item. |
|
Due Date Period/Interval/From |
These are used in conjunction to determine when the task is due. The following example shows that the task is due 2 weeks from the Period End.
You can enter a specific Due Date instead if preferred. |
|
Due Date Fixed |
Select this check box if any Due Date From has been chosen (such as Actual Start) to indicate that even if that date slips, the original date must be adhered to for this task. |
|
Due Date |
As an alternative to using the period/interval/from fields, you can enter a specific date for the task to be completed here. |
|
Start Target/Date Started/Completed |
The Start Target is the date you would ideally like the task to be started. The Date Started is automatically updated when either the task is marked as In Progress or time is allocated to the task via a timesheet entry. The Date Completed is automatically update when the task is marked as complete. |
|
Parent/Predecessor |
These options enable tasks to be daisy chained. For example, if you've completed all the predecessor tasks, the parent task is automatically marked as completed. If you complete the parent task, the predecessor tasks are automatically marked as completed. |
