Create master tasks
Practice Admin Managers Partners Job Admin
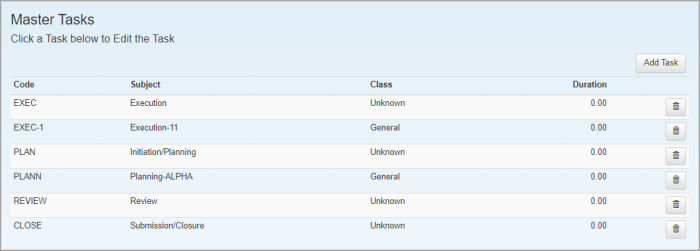
Master tasks can be used to create default information for tasks that are frequently used, preventing the need to repeatedly add the same information.
All of the information entered for master tasks is optional.
-
Select Admin > Task Pad from the menu, then select Master Task Definition.
-
Any existing master tasks are listed and can be edited by clicking anywhere on the applicable line. Any unwanted master tasks can be deleted by clicking the applicable Delete icon.
-
Click Add Task.
-
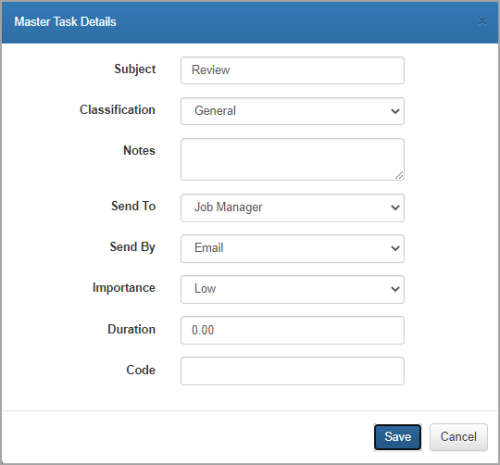
Enter a name for the task in the Subject field.
-
Select a Classification from the drop-down list
 (if used). Classifications are used to categorise tasks for reporting purposes.
 -
Enter any default Notes. These will appear in any task based on this master task. Notes can be viewed via the Add Task window. In addition, if you use the Department Schedule at task level, the notes will be visible via the schedule item.
-
You can enable feedback to sent to a job partner, manager or both (these can be the same as, or different to the client's partner/manager). Select the required option from the Sent To list, then select Email from the Send By list.
-
You can set a level of Importance. You can then add this column to applicable grids to enable more important jobs to be worked on.
-
If this master task has a typical Duration, you can enter it here.
-
Finally, enter a code for the master task which can be used for grouping and reporting purposes, then click Save.