Create a Time Type
-
You can set up Time Types to allow employees to record their hours worked without applying Time Rules to them. This page describes how to set up your Time Types.
-
For help creating and linking your Time Types to a rule, refer to Create a Time Rule.
-
Screenshots are taken from a test system and may not match your system exactly.
Create a Time Type 1
-
Sign in to IRIS HR Professional.
-
Go to System Tools > Lookup Tables > Time and select Time Type 1.
-
On the Time Type 1 screen, select Create New.
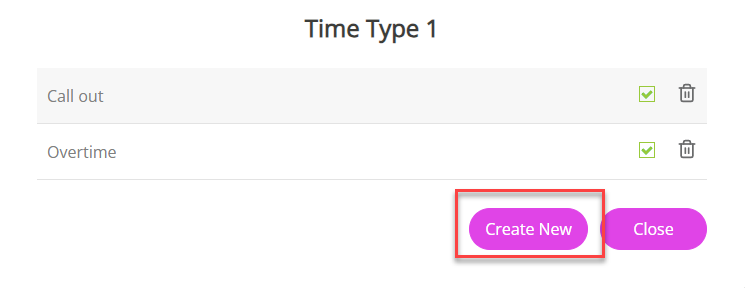
The Time Type 1 screen
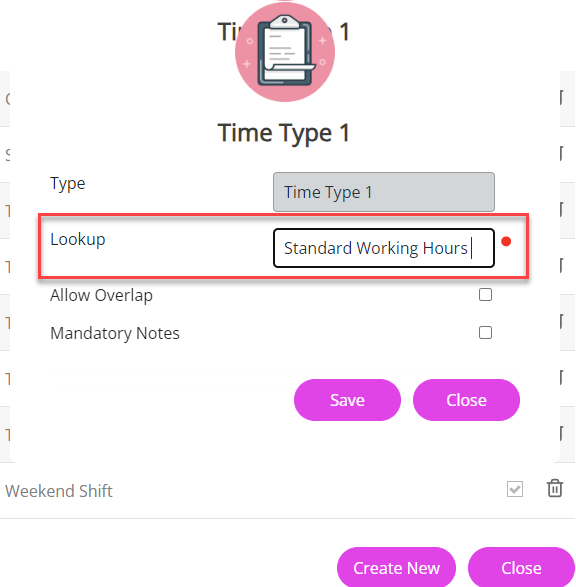
The Type field populates automatically - you cannot update this.
-
In Lookup, enter a name to display in the Type dropdown on the Time tab.
For example, you may add a lookup for Standard Working Hours.
-
Select Allow Overlap if you want to use this Time Type alongside another Time Type for a time period.
-
To make it compulsory for employees to add a note when adding an entry for this Time Type, select Mandatory Notes.
-
Select Save.
-
You have successfully created your first Time Type 1.
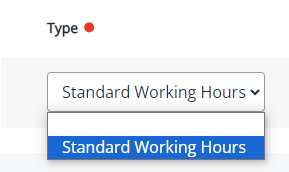
This lookup displays in the Type dropdown on the Time tab:
-
To add more Time Type 1s, select Create New and repeat the same steps.
The Time Type list updates with each one you add.
Delete, Activate or Deactivate a Time Type 1 Lookup
-
If required, you can activate/dectivate or delete this lookup by selecting/deselecting the tick/bin icon on the required lookup:
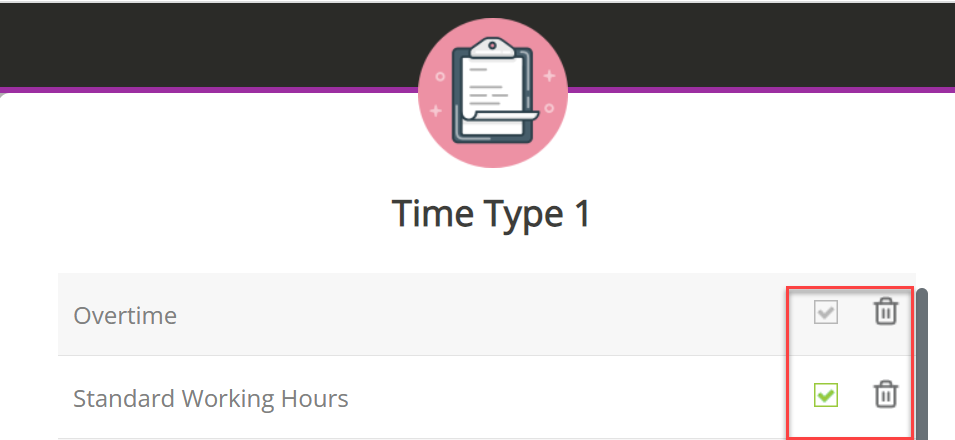
Only select Delete if you wish to permanently remove this option and any of its associated records.
If you have previously used this option, we recommend hiding it rather than deleting it, as this means any historic associated records remain in the system and are available for reporting purposes. -
After creating your Time Type 1 lookups, the next step is to label the dropdowns displayed on the Time tab.
Create Time Type Labels
-
Go to System Tools > Utilities > Tools > Time Types.
Here you can enter up to 5 Time Type labels and create them as a Free Text field or Lookup.
For example, in the Type 2 Name field, you could enter an option for Customer and choose Lookup from the Type 2 Field.
-
Select the Mandatory checkbox to make it compulsory for employees to choose an option.
-
Add a label for all the required Time Types and select Save.
-
After creating your Time Types, you need to populate the options available for employees to choose from when selecting the dropdown.
Populate the options displayed in Time Types
-
Go to System Tools > Lookup Tables > Time and select Time Type 2.
The name you added for the Time Type should also display next to the title, for example, Time Type 2 (Customer).
-
Select Create New.
-
Choose an option from the dropdown if you only want to display this lookup for a specific Time Type 1.
In this example, we have labelled the Time Type 1, Standard Working Hours and Time Type 2, Customer, so in the Time Type 2 Lookup, we would add the customer's name, in this case, Akme.
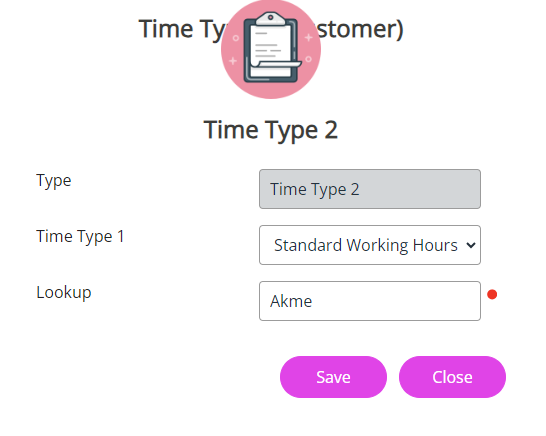
This means only the customer, Akme, displays in the Customer dropdown when an employee chooses Standard Working Hours from the Type dropdown.

If you want all options to display in the Time Type 2 lookup regardless of what the employee chooses from Type on the Time tab, leave the Time Type 1 field blank.
-
Select Save after adding the Lookup.
The Time Type screen updates with the lookup options you have created.
-
Select Close.
-
Repeat the above for Time Type 3 if you want to specify the options an employee can choose when selecting Time Type 2.
To do this:
-
Select Time Type 3 > Create New.
In our example, it says Time Type 3 (Project), as this is the name we added for this lookup in System Tools > Utilities > Tools > Time Types.
-
From the Time Type 2 dropdown, select the option you want this lookup to apply to.
In our example, we would select Akme from Time Type 2, as this means when an employee selects Akme from the Customer dropdown on the Time tab, the Time Type 3 (Project) dropdown populates with the Lookup information you have added.

Remember, you do not need to link the Time Types and Lookups. If you want all options to display in the dropdowns on the Time tab, regardless of the option chosen from Type, leave this blank.
-
Repeat the above for Time Types 4 and 5 if you have added them.
-
After setting up the Time Types, employees can add their Time entries.
Refer to Create a Time Rule for information on linking your Time Types to a Time rule.
This means on the Time tab, when an employee selects Add, a Customer label and dropdown display next to Type.
