Configure the Expense module
Before employees can create and submit expenses in the system, you must complete the steps detailed in this topic.
Step 1: Configure employees' access to the Expense module | Step 2: Configure expense items | Step 3: Configure Lookup Tables for Expense (optional) |
To use the Expense module, you need to buy licences for the appropriate number of users. To buy licences or add more users, contact your Account Manager.
Step 1: Configure employees' access to the Expense module
These steps explain how to give an employee access to the Expense module via their Set Rights Set Rights are the system permissions you allocate to employees to control the information available to a user about other employees..
To learn more about Set Rights and how to create a role allowing you to assign the same Set Rights permissions to multiple employees at once, refer to Create Set Rights Roles
-
Sign in to IRIS HR Professional.
-
Go to Directories and select the employee you want to configure to use the Expense module.
-
Select the employee’s Personal tab.
-
Select Actions > Set Rights.
-
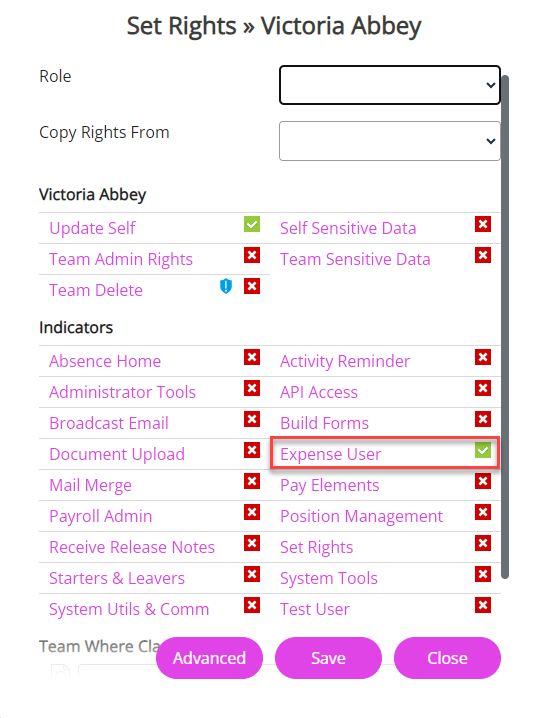
On the Set Rights screen, select Expense User.
-
Choose Save.
-
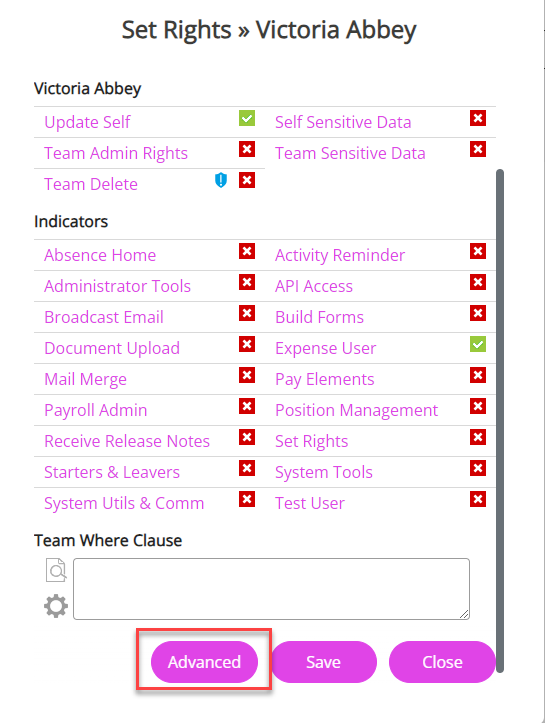
Select Actions > Set Rights.
Choose Advanced .
-
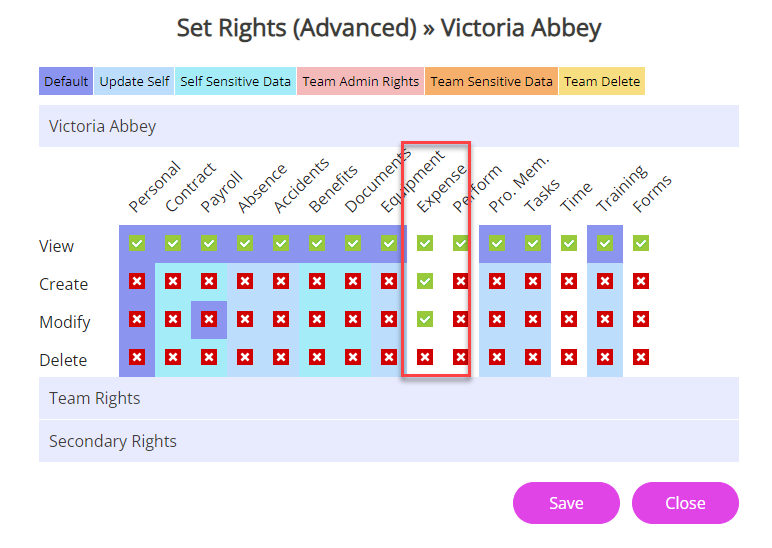
Select the following recommended settings for Expense:
-
Employee Set Rights: View, Create, Modify.
-
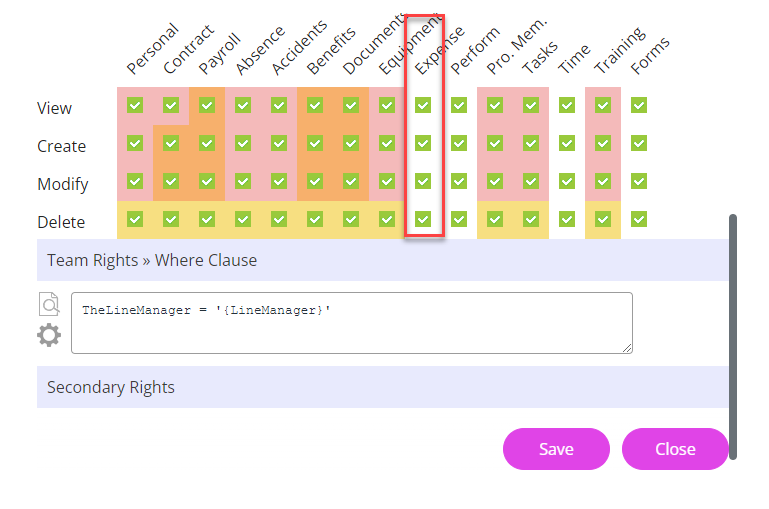
Team Rights (for line managers/approvers): View, Modify, Create, Delete.
-
-
At the bottom of the screen, select Save.
Step 2: Configure Expense items
Example Expense Type 1s:
| Type | Detail |
| Type 1 |
Accommodation, Evening Meal, Lunch, Taxi, Mileage.
|
To configure expense types
-
Go to System Tools > Lookup Tables > Expense > Expense Type 1.
-
Select Create New.
-
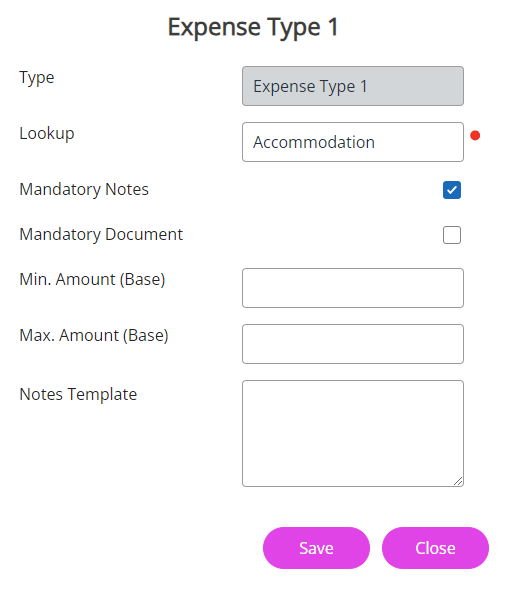
Enter a name for the expense item in Lookup. For example, Accommodation.
-
Select the Mandatory Notes checkbox if you want employees to add a note to support their expense claim (optional),
-
Select the Mandatory Document checkbox if you want employees to add a document to support their expense claim (optional).
-
In Min. Amount (Base), enter the minimum amount employees can claim for this item (optional).
-
In Max. Amount (Base), enter the maximum amount employees can claim for this item (optional).
-
Use the Notes Template to add a note to help employees add the information needed to support their claim for this item (optional).
-
If you have the Payroll integration, select the Element dropdown and choose a variable pay element from the list to link with the expense type.
-
Select Save.
Step 3 (optional): Configuring other Lookup Tables for Expense
In System Tools > Lookup Tables > Expense, in addition to expense items, you can configure:
-
Accrual for the calendar year or tax year.
-
Zones, including a default tax rate (for example, 20% for the UK).
-
Tax rates that can override the default tax rate for a zone (for example, you could create a zero tax rate for rail fares, which are tax free).
-
Units used in expense calculations (for example, different rates for business mileage and personal mileage).
Zones
The system uses the current exchange rate from a web service and converts any figures an employee adds in the Zone field.
For example, if an employee creates an expense in My Details > Expense and chooses an option from Zone, for example, Europe (EUR) and adds 10 or any other figure in Total, when they submit the expense, this figure converts to GBP, providing the base currency in the system is GPB.

If there is no multi-currency active, this defaults to GBP. However, if you have multi-currency and a different currency selected as the base, the system uses this to convert the figure to the correct currency.