Integrate IRIS HR Professional with Synel
Screenshots are taken from a test system and may not match your system exactly.
Step 1: Initial Setup in IRIS HR Professional
-
Sign in to IRIS HR Professional.
-
In the API User topic, complete these sections, and return to this topic once complete:
Step 2: Update the API user's Set Rights permissions (optional)
-
Set Rights Set Rights are the system permissions you allocate to employees to control the information available to a user about other employees. define the level of access the API user has to system data. By default, the API user has full Set Rights permissions, but you may restrict access if needed.
Ensure Absence When an employee or worker is absent from work. This can be for a variety of reasons. Home and Set Rights are always active.
To update the API user's Set Rights permissions:
-
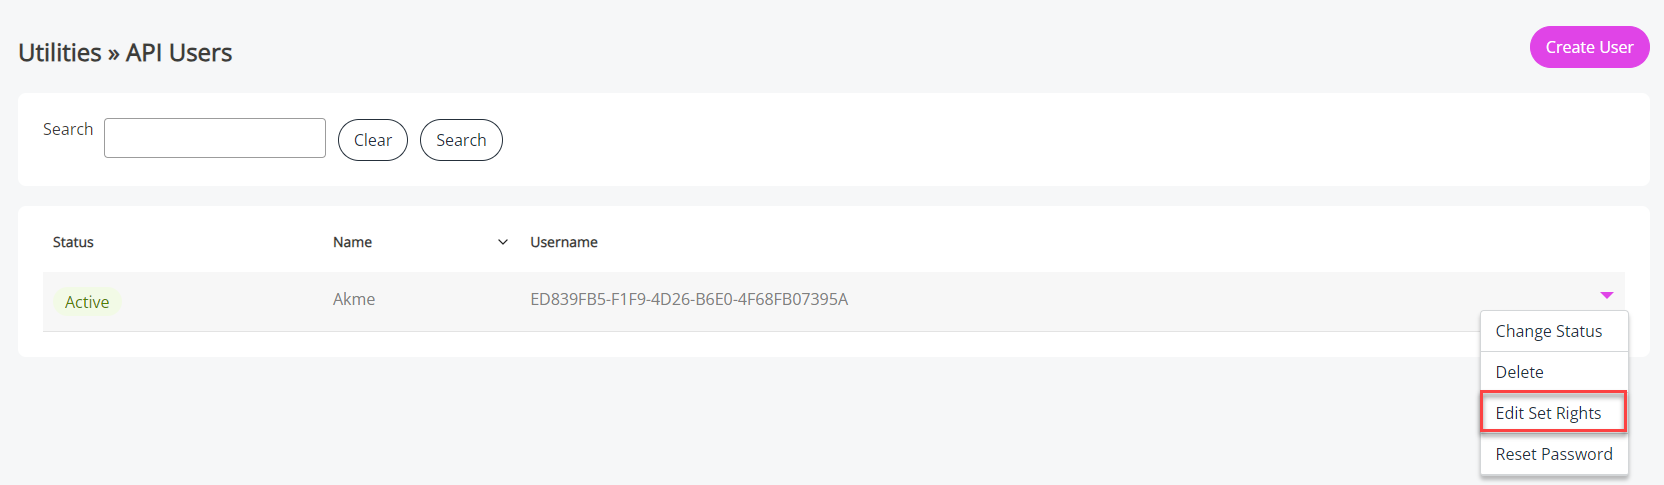
Go to System Tools > Utilities > Company > API Users. Find the required API user, choose the drop-down, and select Edit Set Rights.
-
On the Set Rights screen, select Advanced to configure the API user's Self and Team Rights.
-
For this integration, set the following Self Set Rights permissions:
| Personal | Contract | Payroll | Absence | Accidents | Benefits |
Docum-
ents
|
Equip- ment |
Perform | Pro. Mem. | Tasks | Time | Training | Forms | |
| View |
Mandatory |
Mandatory |
Mandatory |
Mandatory |
Mandatory |
Mandatory |
Mandatory |
Mandatory |
Optional |
Mandatory |
Mandatory |
Mandatory |
Mandatory |
Optional |
|
Create |
Mandatory |
Optional |
Optional |
Optional |
Optional |
Optional |
Optional |
Optional |
Optional |
Optional |
Optional |
Mandatory |
Optional |
Optional |
| Modify |
Mandatory |
Optional |
Mandatory |
Optional |
Optional |
Optional |
Optional |
Optional |
Optional |
Optional |
Optional |
Mandatory |
Optional |
Optional |
| Delete |
Mandatory |
Optional |
Optional |
Optional |
Optional |
Optional |
Optional |
Optional |
Optional |
Optional |
Optional |
Mandatory |
Optional |
Optional |
-
For the integration, set the following Team Rights permissions:
Personal Contract PayrollAbsence Accidents Benefits Docu-
ments
Equip-mentPerform Pro.Mem.
Tasks Time Training Forms View 
Mandatory
Mandatory

Optional
Mandatory
Optional
Optional
Optional
Optional
Optional
Optional
Optional
Mandatory
Optional
Optional
Create
Optional
Optional
Optional
Optional
Optional
Optional
Optional
Optional
Optional
Optional
Optional
Mandatory
Optional
Optional
Modify
Optional
Optional
Optional
Optional
Optional
Optional
Optional
Optional
Optional
Optional
Optional
Mandatory
Optional
Optional
Delete
Optional
Optional
Optional
Optional
Optional
Optional
Optional
Optional
Optional
Optional
Optional
Mandatory
Optional
Optional
-
After setting up the API user, sign into Synel and enter the API user information. Then return to IRIS HR Professional and your create Time Type 1s.
-
Sign into IRIS HR Professional.
-
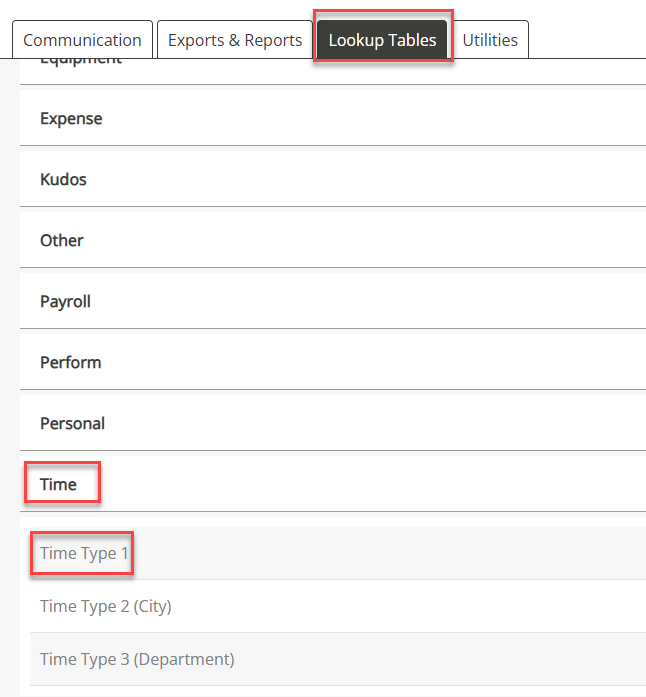
Go to System Tools > Lookup Tables > Time > Time Type 1.
-
Select Create New and add a Time Type 1 with the same name as used in Synel's TLW.
-
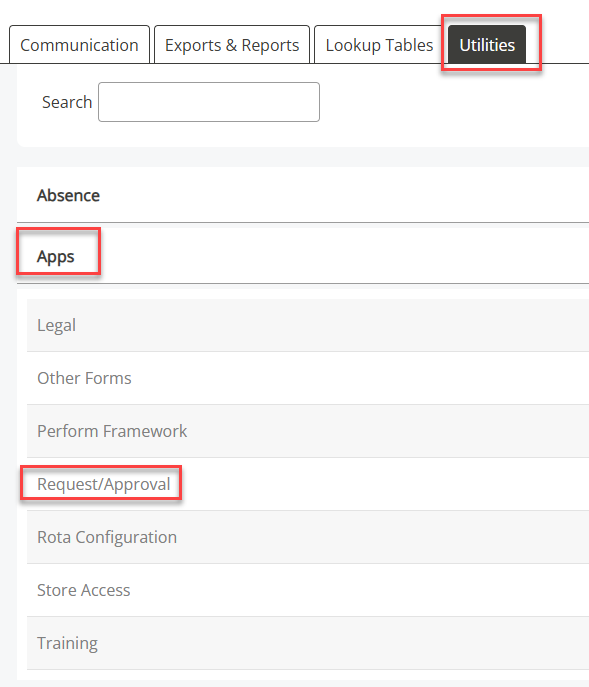
In IRIS HR Professional, go to System Tools > Utilities > Apps > Request/Approval.
-
Select Time and choose Create New.
-
In the Employee dropdown, choose the API user created earlier.
-
In the Stage field, enter the number 1. Leave other fields blank or at their default settings.
-
Select Save.
Learn more about setting up the Request/Approval route for Time.
-
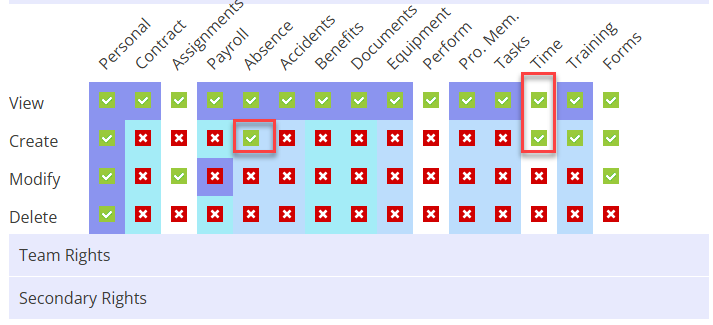
In IRIS HR Professional, ensure employees have the required Set Rights permissions:
-
In the Absence column of their self-rights, select Create.
-
In the Time column, select View and Create.
This means in employees' Set Rights records, in their self rights, in the Absence columns, you must select the Create checkbox, and in the Time column, you must select the View and Create checkboxes.
-
Team Rights
Step 3: Enter API User Information in Synel
Step 4: Create Time Type 1s in IRIS HR Professional
To ensure the sync works correctly:
Step 5: Configure the Request/Approval Route
At present, only Support can configure the Request/Appoval route. Please contact them (opens in a new tab/window) to complete this section for you.
Step 6: Update employee Set Rights permissions
If using Set Rights Roles, update the permissions for the Employee role and reassign it to relevant employees. Without Set Rights Roles, update permissions for an individual employee, then use the Copy Rights From dropdown to apply the updated permissions to other employees.