Set up API access and create an API User
To work with our APIs you need to:
Enable API access
-
Sign in to IRIS HR Professional.
-
Go to System Tools > Utilities > Tools > System Configuration > Modules and make sure API is selected:

If you cannot see this option or it is disabled, contact our Support team to enable it for you.
Create an API user
You need an API user for authentication with the API.
You can create an API user as a Test user in the system; this has advantages because:
-
A Test user does not appear in any Exports/Reports.
-
A Test user is only visible in Directories for Set Rights users.
-
You can create a maximum of 5 Test users, which you can use for other purposes.
To create an API user:
-
Sign in to IRIS HR Professional.
-
Go to Directories, select Create New.
-
Add details for your API user as if you were adding a new employee into the system.
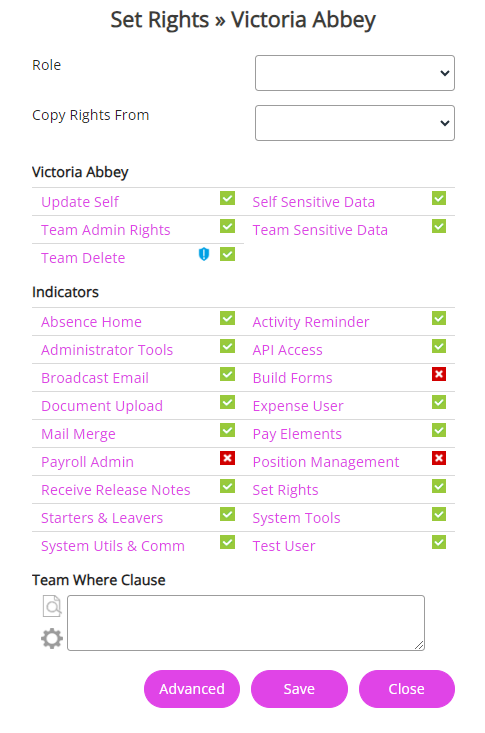
Next, allocate the API user the correct Set Rights. These settings determine the level of access the API user has to your system's data. Typically, an API would have access to all data and we suggest giving full access as described in example 1 below. However, if you want to limit access, follow the steps outlined in example 2.
To do this, go to their My Details, then:
-
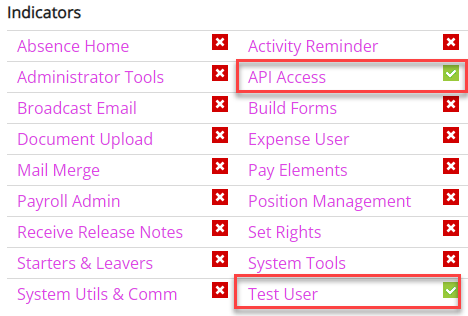
Select Personal > Actions > Set Rights Set Rights are the system permissions you allocate to employees to control the information available to a user about other employees. and from the Indicators section, select API Access and Test User.
-
Select Save on the Set Rights screen.
-
Reopen the API user's Set Rights screen from Actions > Set Rights.
-
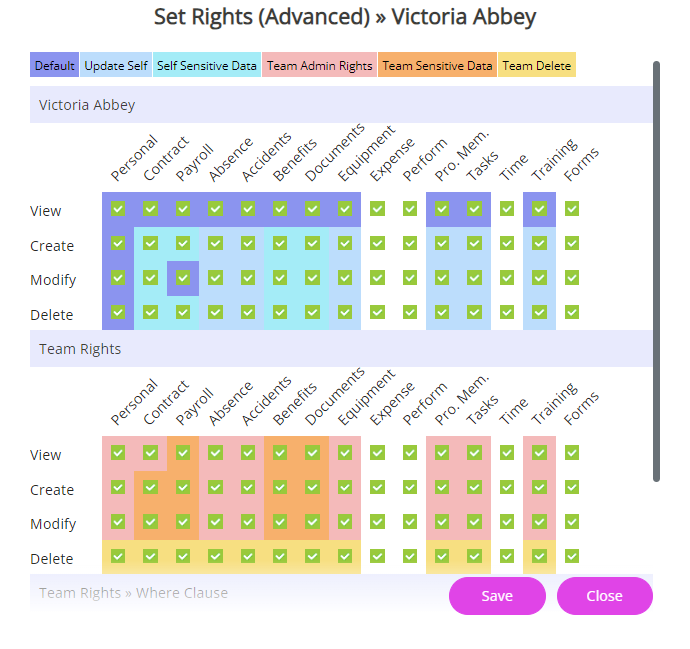
Select Advanced and select the checkboxes as you require in the API user's Self Set Rights, Team Rights and Secondary Rights, as shown in the examples below.
-
Select Save on the Advanced screen and again on the Set Rights screen.
-
Example 1
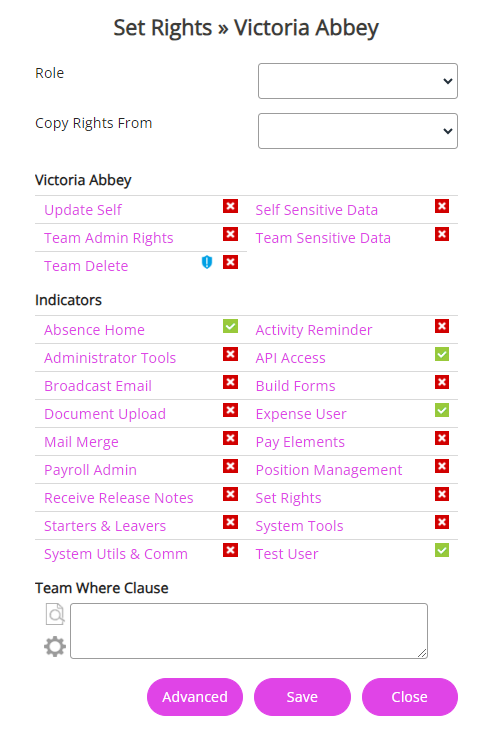
Example 2
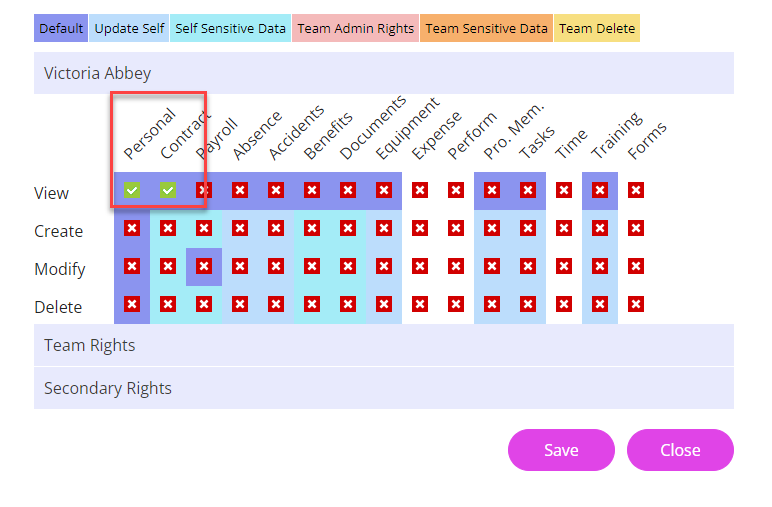
Restrict the API user to read-only access to the Personal and Contract tabs. This allows the API to do GETs on the data in those two screens, but no POST, PUT, DELETE etc.
Learn more about Set Rights. Contact our Support team if you need help to set up a particular scenario.
-
Go to the Personal tab and enter an email address into the Work Email field to receive the invitation email to create login details.
To keep this secure, we suggest using ‘email plus addressing’. This is a way of changing an email address and making it unique, but still ensuring the emails go to the same email account.
After the main part of the email address, before the @ sign, enter a ‘+’ sign then some text.
E.g. with an email address such as myname@gmail.com, you could enter: myname+hrapi@gmail.com
The Work Email address is unique for login purposes, and emails are still sent to your main account of myname@gmail.com
This ensures its uniqueness and makes easier to access the invitation email.
-
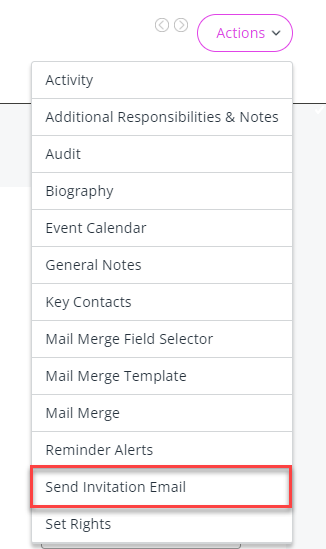
Select Save on the Personal tab then choose Actions > Send Invitation Email:
-
Check your personal email inbox and select the received link.
-
Your email should have populated in Username.
You can now remove the email address and add a different one, if required. If it is in the format of an email address, the system should accept anything you input here. Just remember what you have used for authentication and logging in purposes.
-
Enter a Password and select Set.
You have successfully created your API user.