Importing Budgets
Some Of the nominals and ledgers used in this topic may be different to those in your chart of accounts.
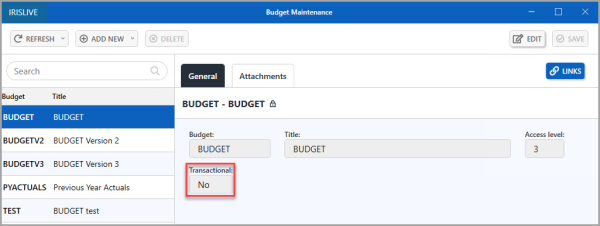
This article is applicable for non-transactional budgets only, which are typically used by our Education customers.

We recommend you download the Budget Upload Template and Education Budget Import DTT files that you need to complete the import.
When creating budgets in IRIS Financials, values need to be entered for all required nominals, ledger accounts, and financial periods. This defines what the budget is being spent on (or what the budget is being received for), where the cost/income is being assigned and when the cost/income is predicted to be spent/received.
Before beginning this process, we recommend reading Overview of Budgeting Using IRIS Financials.
There are two ways that this can be achieved:
Manual entry - budget data is entered manually into the Budget Maintenance window. For more information, please see Creating a Budget Framework.
Importing - budget information is imported in to the software.
This topic describes how budget data can be imported and consists of the following:
Completing the Budget Upload Template
Creating the Import File
Importing the Budget Upload Template
Completing the Budget Upload Template
- If you have not already done so download the Education Budget Upload Template.XLSM file - Education Budget Import Template.
- Open the Education Budget Upload Template.XLSM.
The cells highlighted in yellow are the cells that require completion. The remaining cells are automatically populated based on what is entered in the yellow area. Once populated, the figures in these remaining cells can be amended if necessary. - Enter/amend the applicable Year and Budgetcode.
The BudgetCode entered must be in capitals and must exactly match the previously created, or existing code in IRIS Financials, otherwise the budget does not import correctly. - In the Nominal Code column, enter the nominal code that you wish to enter a budget value for, exactly as it appears in IRIS Financials. If required, this can be checked in the Nominal Maintenance dialog (by selecting Maintenance > Nominals). This determines what is being spent or received.
- In the Ledger Code column, enter the ledger that the nominal is linked to exactly as it appears in IRIS Financials. If required, this can be checked in the Nominal Maintenance dialog (by selecting Maintenance > Nominals). The safest option is to highlight the ledger code (displayed in the Ledger field on the General tab), press Ctrl + C to copy, then select in the spreadsheet cell and press Ctrl + V to paste.
- In the Ledger Account Code column, enter the code of the ledger account that you wish to assign the budget value to exactly as it appears in IRIS Financials. If required, this can be checked in the Account Maintenance dialog (by selecting Maintenance > Ledgers, then selecting the required ledger). The safest option is to highlight the ledger account code, press Ctrl + C to copy, then select in the spreadsheet cell and press Ctrl + V to paste.
- For each nominal/ledger account row, enter the applicable budget value figure rounded to the nearest pound. Income should be entered as a negative value.
Budget values can only be entered in whole numbers. Any decimals used are removed and rounded during the import process. - The Profile column is used to apportion the correct amount across the applicable periods on the right-hand side. Select the required option by selecting the cell in the Profile column and selecting an option from the drop-down list.
The following options are available:
Monthly
Quarterly from P1
Quarterly from P2
Quarterly from P3
Specific Month (choose the required month)
All but August
Manually - Whichever profile is selected, values can still be manually overwritten if required. This will be required for example, where the annual budget cannot be apportioned equally across 12 months. Repeat this process for the remaining budget.
A nominal and account combination can be used only once. If you enter two rows in the spreadsheet with the same nominal/account combination only the first will be imported rendering the budget incorrect. Consolidate any multiple entries into a single row.It is essential that no fields are left blank. Any blank fields must be populated with a zero to prevent any import errors.
Creating the Import File
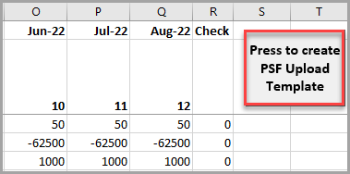
- When the Budget Upload Template has been completed, select the Press to Create PSF Upload Template button on the top right of the template. This will generate the budget data required for the import onto a separate sheet within the spreadsheet workbook entitled Import Data. Select the OK button on the message dialog when complete.

- The spreadsheet now needs to be saved as a .CSV file before being imported into IRIS Financials. Select File > Save As from the spreadsheet menu bar.
- Enter a suitable file name and ensure that CSV (Comma delimited) is selected as the file type.
- A warning message is displayed when you save. This is because CSV files cannot be created from spreadsheet workbooks with multiple sheets. Select the OK button to accept the message as the CSV file will be processed from the correct Import Data sheet.
Please do not reopen the .CSV file once it has been saved as it can cause the formatting to be lost for financial periods. If you need to make any subsequent adjustments to the budget, please do so via the Budget Upload Template spreadsheet and recreate the .CSV as previously described.
Importing the Budget Upload Template
- If you have not already done so, download the Education Budget Import DTT file Education Budget Import DTT.
- Log in to IRIS Financials and select Modules > Data Transformation Tool.
If you have multiple databases or companies you will need to log in to each one to do the import. - The PSF Data Transformation dialog is displayed. Select File > Open.
- Navigate to, then select the Education Budget Import DTT file you downloaded from this article then select Open.
- Select the Browse button then select the previously saved budget template CSV file containing your budget data.
- The Preview panel displays a sample of your budget import. You can increase the preview rows by overwriting the number in the Preview rows field.
- Select Next. The Step 3 page is displayed. Select the Next button again.
The Database and Company Code fields will be blank. You can see which Database and Company is being imported to on the next page. - The Step 4 dialog is displayed with a summary of the import. If the Database or Company are incorrect, please close the DTT and change your connection in IRIS Financials. For more information, please see Changing Connection to your Test Database or Another Company.
- Select Post to import the budget.
- When the import has completed the Summary Information dialog is displayed. Select Close.
If there are any errors, please see the Common Errors topic.
It is recommended you review the budget using the Budget Matrix report on the Reporting Suite. If you need to make any changes you can do this on the budget template and re-import. Alternatively you can make manual changes to the budget. For more information, please see Amending a Posted Budget.