Client contact roles allow you to assign tasks or send communications to different client contacts depending on their role. This is really helpful when working with clients that have multiple points of contact.
For example, your primary contact for a company might be a partner, but you offer their firm a payroll service that is managed by another member of staff. Using client contact roles will enable you to set the firm's payroll manager as a primary contact for all payroll-related jobs, without having to think about it every time you need to send an email.
- Set up client contact roles
- Using client contact roles to send emails
- Using client contact roles to assign tasks in the client portal
- Referencing client contact roles in placeholders
Set up client contact roles
Client contact roles are all added and stored centrally in the Client details master form. You can add contact roles for any contact type that you might come across in your day-to-day work, e.g. payroll, management accounts, billing, etc.
- Select the Admin settings cog icon.

- Select Forms from the Configuration sub-menu. Select Contact details from the Master forms subheading.
- Select Add tab to create a new section in the Contacts tab in the client record. This will hold all of your new contact types.
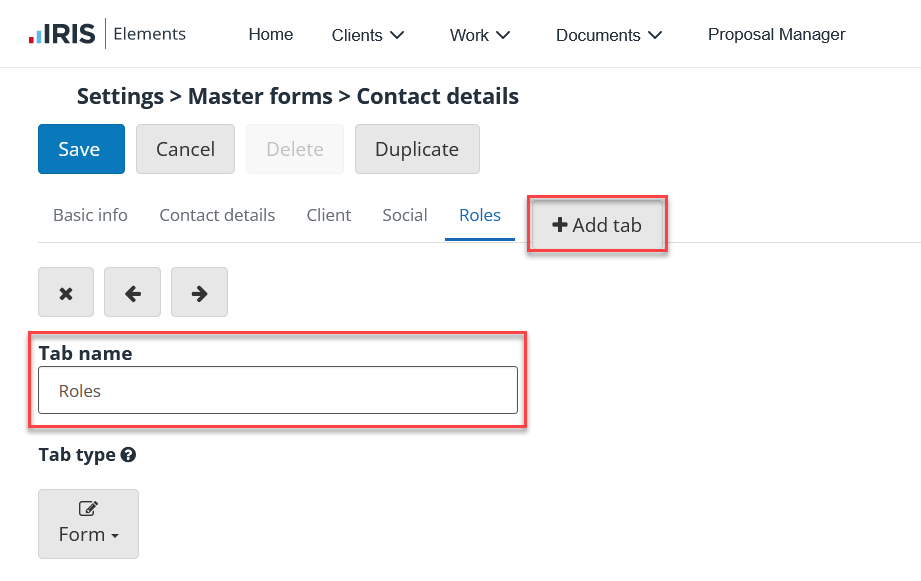
- Enter the Tab name that will appear as the field name in the client record. In this example we're using the name Roles.
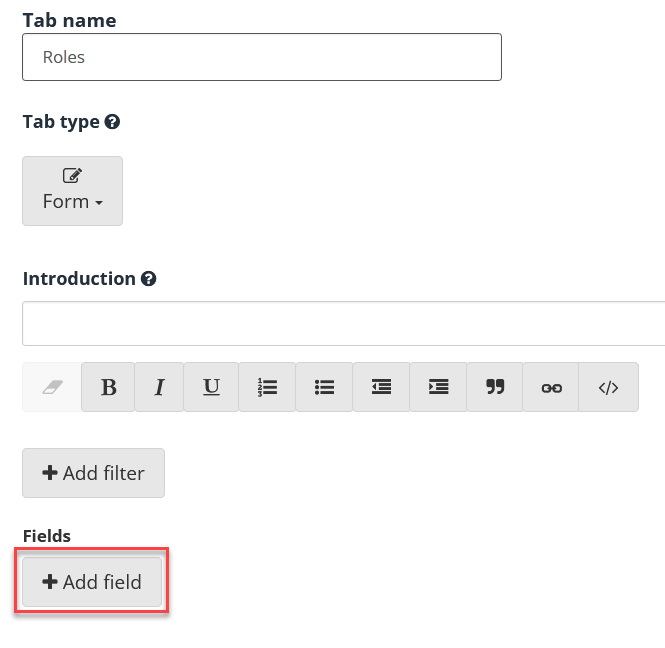
- You now need to add a field for each role type you wish to add. To do this, select Add field.
- Enter the Field label. This is to indicate the contact type you are adding, e.g. Payroll, Billing, etc. You can add Optional tooltip text that will appear when you hover over the contact type, if desired.
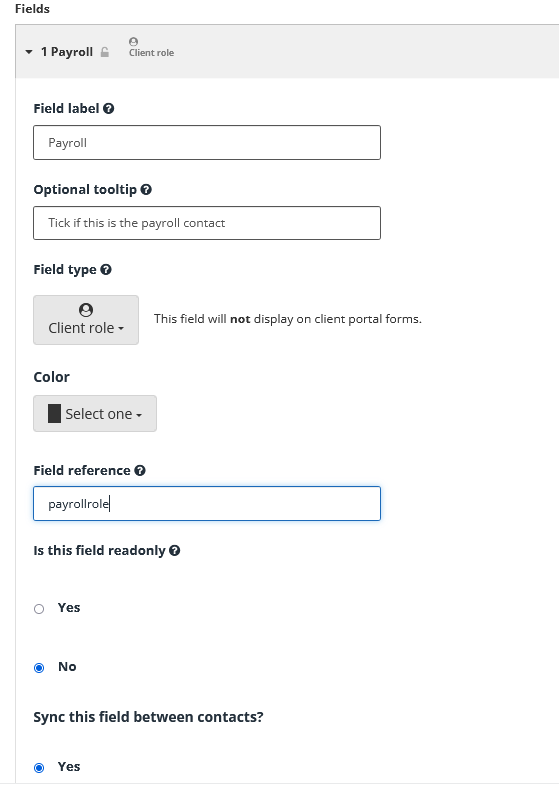
- Select Client role from the Field type menu.
- Enter a Field reference, if using.
- Select Save. You can add as many role types as you wish using this process.
The contact roles added now appear on the client record. Simply select the correct role for each of your contacts in a client record.

Using client contact roles in emails
Once your roles have been set up, you can add them to specific jobs that require emails to be sent.
- Select the Admin settings cog icon.
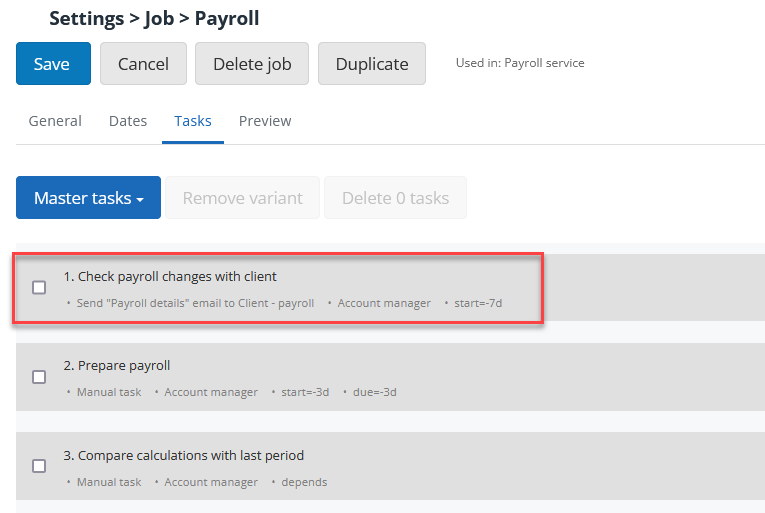
- Go to Settings > Jobs and choose the job you'd like to assign a contact role to. For example, if you have set up a new payroll contact role, you will probably want to add it to the Payroll job.
- Select the Tasks tab to view all the tasks for this job. Select the email task from the list.
- Select the Email tab. On the Recipient list, you now see a list of all of the contact role types that have been added. For this example, select the Payroll contact.
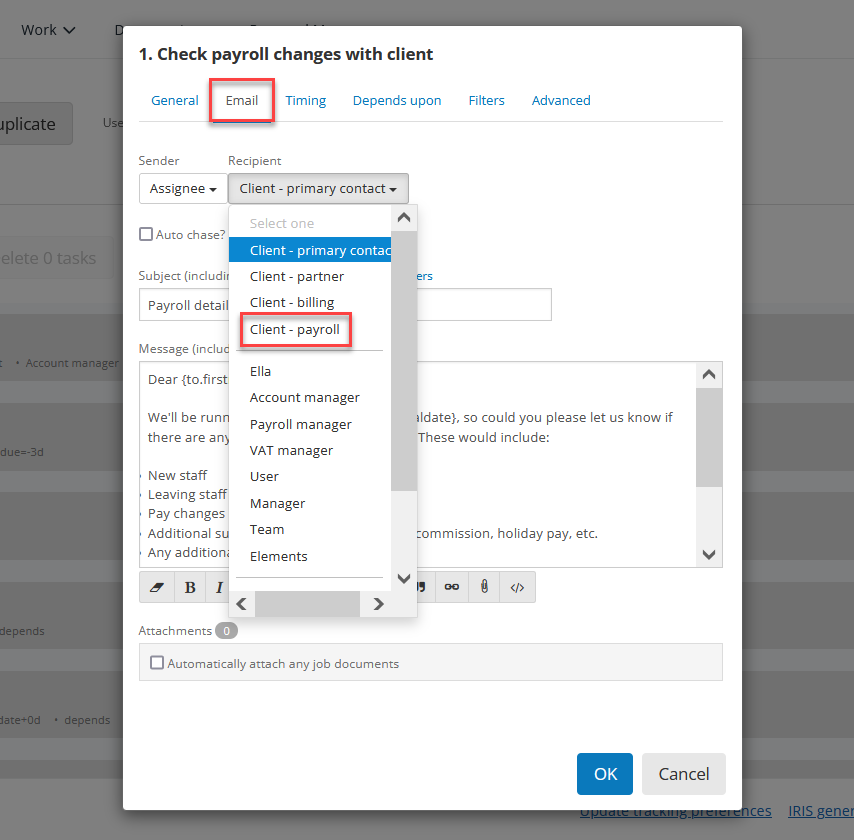
- Select Okay. Any contacts that have the Payroll contact role ticked in their client record will be automatically set as the recipient in your Payroll job.
Not all contacts need to have roles assigned to them once you start using contact roles. If you are performing a payroll job for a client without a specified payroll contact, the primary contact in the client record will receive the email instead.
If multiple contacts in a client record have been selected as a particular contact type, the primary contact will be the main recipient of an email and the other contacts will be CC'd.
Using client contact roles to assign tasks in the client portal
Once your client contact roles are set up, you can use them to assign tasks to your clients through the client portal. Find out more in our topic on generating client tasks.
Referencing client contact roles in placeholders
If you have provided a field reference for your created role, you can use this within a placeholder. We will use the example of the Payroll role from above which has the field reference payrollrole.
To use this in a placeholder, use the client prefix, followed by the client contact role field reference (payrollrole), followed by the field reference from a field from the Contact details form. Here are some examples:
- {client.payrollrole.firstname}
- {client.payrollrole.utr}
- {client.payrollrole.mobile}