Creating a New Bank Account
The nominals and ledgers used in this topic may be different to those in your chart of accounts.
To add a new bank account in PS Accounting, you need to prepare a suitable bank nominal which the new bank account will be assigned to. The article will advise how to do this and also set up the new bank account.
Choosing a nominal to assign to the new bank account
Before creating a new bank account, you need to ensure you have an applicable nominal code set up to assign to the new account.
Do not use a nominal that is or has already been used for a bank account. If a bank nominal has postings against it, it should not be used.
To create a new bank nominal In IRIS Financials:
-
Select Masters > Nominals from the menu bar and find the
-
-
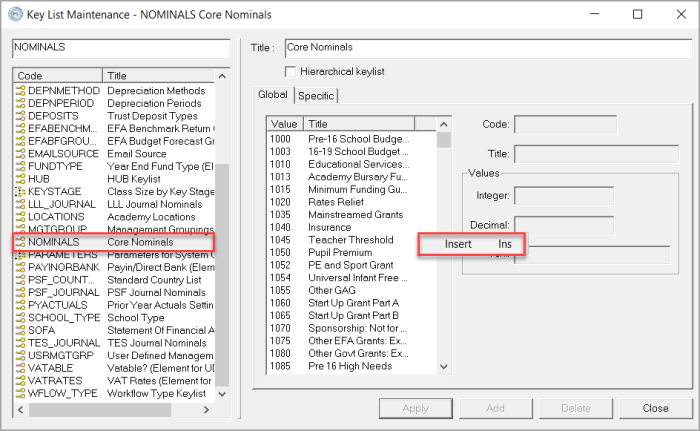
The Key List Maintenance dialog is displayed. Select the NOMINALS – Core Nominals key list then right-click anywhere in the Value panel and select Insert from the pop-up menu.
-
The word NEW will appear in the Code Overtype this with the core nominal code (
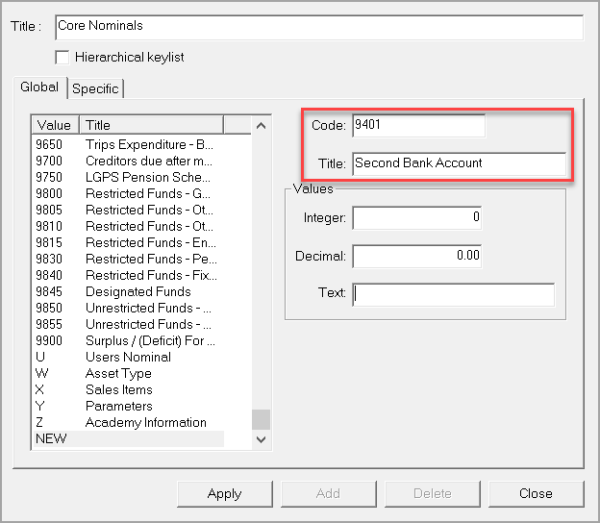
- The remaining fields can be left blank. Click the Apply The Core Nominal has now been added to the key list. Once the core nominal has been created, you can now proceed to create a new nominal.
- Select Masters > Nominals from the menu bar.
- The Nominal Maintenance dialog is displayed. Click the Add button.
-
Select the location you are adding the bank account nominal for from the Location drop-down list.
-
Select the Core Nominal previously created from the drop-down list. This automatically updates the New Nominal Code field with the full nominal code (location plus the core nominal).
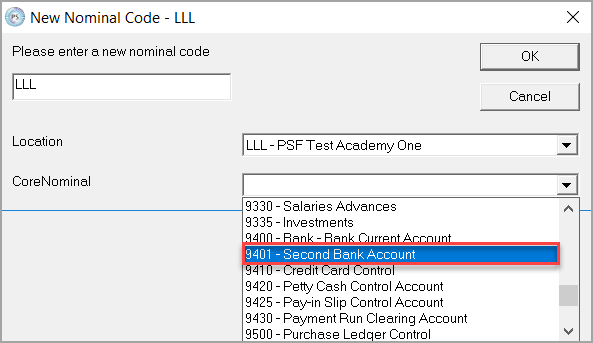
- Click the OK button. You will be returned to the Nominal Maintenance dialog. Enter the name of the nominal in the Title field.
-
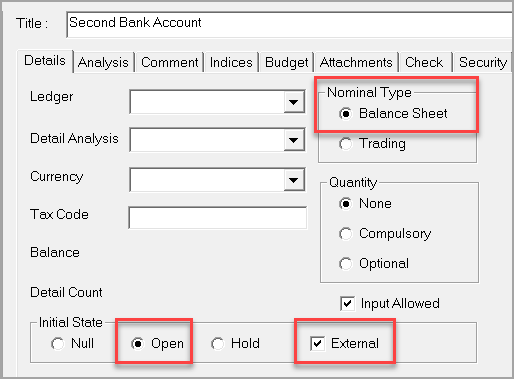
Set the Nominal Type to Balance Sheet, set the Initial State to Open and tick the External tick box.
- The Ledger drop-down must be left blank. Click the Analysis tab and complete all fields. The following graphic is an example of suitable analysis codes to use for a bank nominal. Please check with your own organisation if you are unsure of the correct codes to use.
-
Click the Indices tab. If you have the latest EFA Budget Forecast index, select this and choose the Cash at Bank in Hand option from the drop-down list.
- Set the NOMTYPE index to B/S - Balance Sheet.
- Finally, click the Security tab which enables access to the ways in which the nominal can be maintained (i.e. whether the data can be viewed, modified or posted) to users with specific security roles. If no roles are applied on this tab then any user with the access level defined on the General tab (set to level 3 by default) can carry out all these functions.
- From the applicable drop-down list, select the required security role to View, Modify, Post and Add Ledger (enables the ledger to which the nominal is linked to be changed).
- When finished, click the Apply button to save the new bank nominal.
Creating a new bank account
There are three ledgers where the new bank account must be created. Please ensure you complete all steps as this will ensure it can be fully utilised in PS Accounting. The three ledgers are:
Bank Accounts - Allows you to import and reconcile the new bank account.
BANK Ledger - Allows you to make payments from the new bank account via Media Exporter.
Location Bank Ledger - Allows you to post accounting transactions (e.g. Nominal Receipt) to the new bank account.
Bank Accounts
To create a new bank account:
- Select Masters > Bank Accounts from the main menu bar.
-
The Bank Account Maintenance window is displayed. In the blank field at the top of the window, enter the new bank account number as shown in the following graphic.
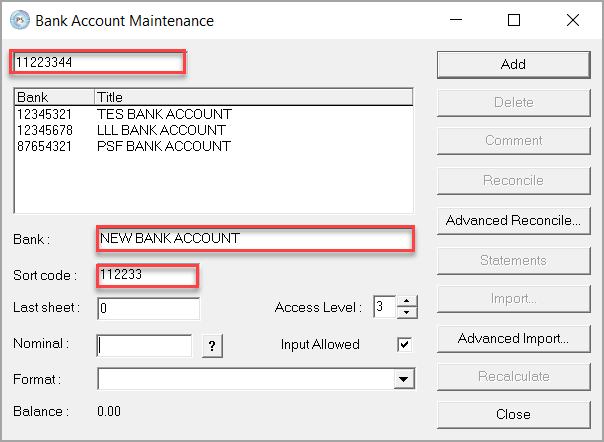
- Enter the title of the bank account in the Bank field and also enter the Sort Code (no spaces or hyphens).
-
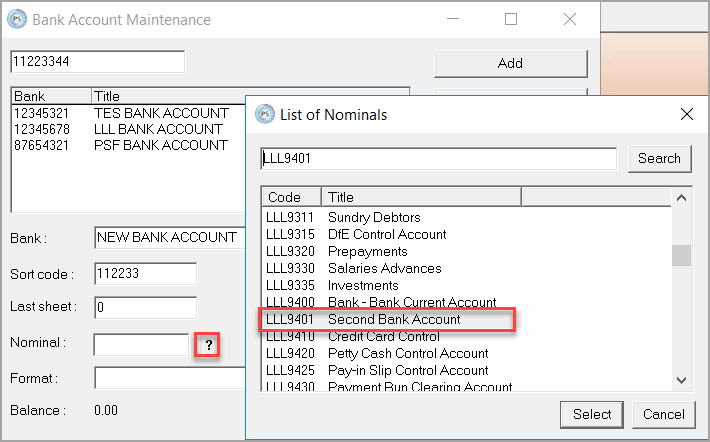
Click the ? button next to the Nominal field and choose the nominal that is being used for the new bank account.
Use the ? button and choose the nominal from the list, rather than type in the nominal as an incorrect nominal will cause an error.
Do not use a nominal that is or has already been used for a bank account. If a bank nominal has postings against it, it should not be used.
- Choose a bank statement Format from the drop-down list. This has no impact on the account, it simply determines which bank statement form is displayed when clicking the Statements button.
- Set the Access Level to the required value to determine who can see the account. For more information on access levels, see Overview of Security Access Levels
- Click the Apply button to save the new bank account.
BANK Ledger
On order to create a BACS file from Media Exporter, the new bank account needs to be added to the BANK ledger.
-
Select Masters > Accounts > BANKS from the main menu bar.
-
Click the Add Button to display the New Account prompt. Enter the new bank account number and click the OK button.
- Enter the name of the new bank account in the Title field.
- Click the Indices tab and set a suitable Fund Type. If you are unsure what to choose, select XNODET.
- Finally, click the Security tab which enables access to the ways in which the nominal can be maintained (i.e. whether the data can be viewed, modified or posted) to users with specific security roles. If no roles are applied on this tab then any user with the access level defined on the General tab (set to level 3 by default) can carry out all these functions.
From the applicable drop-down list, select the required security role to View, Modify, Post and Add Ledger (enables the ledger to which the nominal is linked to be changed). - When finished, click the Apply button to save the new bank account.
Location Bank Ledger
In order to post accounting transactions, such as nominal receipts and paying in slips to the new bank account, the account needs to be added to the specific location bank ledger. To do this:
-
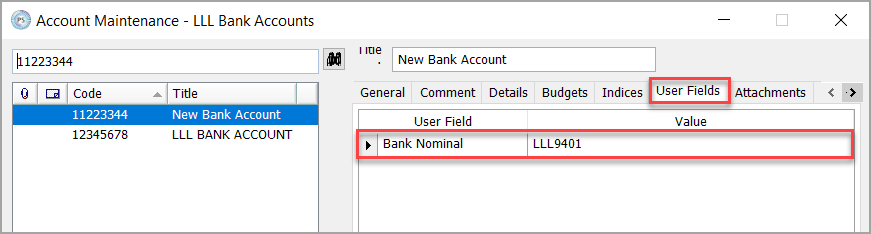
Select Masters > Accounts and click the location specific Bank ledger. In our example the bank account has been created on the LLL location, so we need to select the LLL_BANK ledger.
- The Account Maintenance window displays. Click the Add button and enter the new bank account number.
- Enter the name of the new bank account in the Title field.
- Click the Indices tab and set a suitable Fund Type. If you are unsure what to choose, select XNODET.
-
Click the User Fields tab and enter the nominal that has been assigned to the new bank account in the Bank Nominal field.
- Finally, click the Security tab to assign applicable security roles to the new account.
- Click the Apply button to save the settings and complete the setup of the new bank account.
Setting the new bank account as your default bank account
If the new bank account is going to be the main bank account, you can set it to be the default account that appears when posting banking transactions in PS Accounting. To do this:
-
In IRIS Financials , select Masters > Ledgers > PARAMETERS.
-
Select the two-letter location code where the bank account is located. In our example it is the LLL location, so we need to select LL from the list.
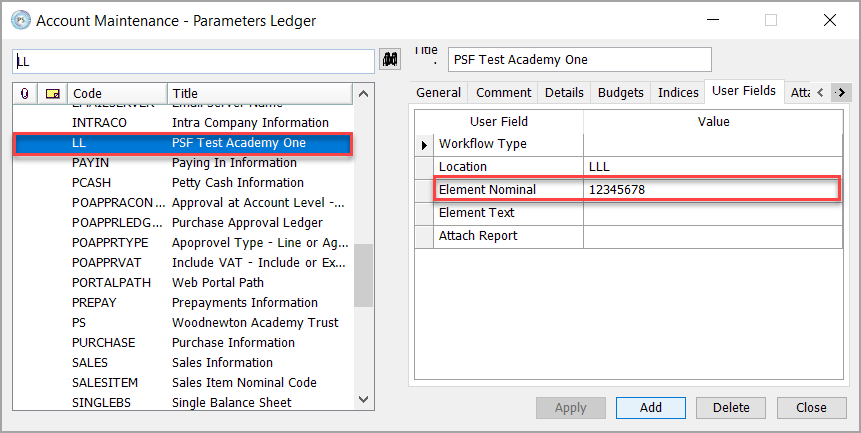
- Click the User Fields tab and enter the bank account number in the Element Nominal field.