Cancelling a Supplier Payment
Some Of the nominals and ledgers used in this topic may be different to those in your chart of accounts.
BACS payments made to suppliers need to be cancelled if the instruction to make a payment has been rejected by the bank after they have received the payment file.
You have two ways of cancelling a BACS payment:
Cancel Payment option - automatically posts reversing lines on the existing payment document.
Manually reverse the paymentThe payment is reversed/cancelled by posting a Cancelled BACS Payment document, which is allocated to the original payment leaving the invoice(s) available for payment again.
Reversing (cancelling) a supplier payment consists of the the following:
Running a Document Enquiry to find the Document to be Cancelled
Reversing the Supplier Payment
Running a Document Enquiry to find the Document to be Cancelled
- In order to reverse/cancel the payment, you must identify the applicable BACS payment document. Select Enquiries, then select Document Enquiry from the menu.
- The Document Enquiry Criteria dialog is displayed. On the General tab, select Equals from the Document Type drop-down list, then select Drill (...) in Value 1 to select the required document type.
- Double-select to select ASB1 - BACS Payment (where AS represents the location code of the document type) from the Select a document type dialog.
- If the payment document number is known, select Equals from the Document Number drop-down list, then enter the document number in Value 1 (if it is not known, select OK at this point).
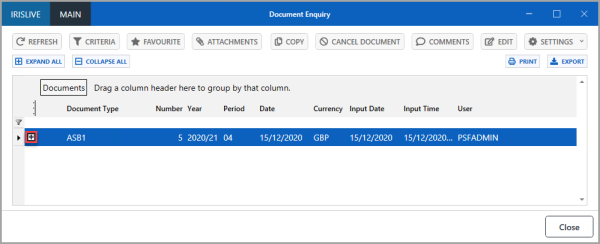
- Select OK to confirm your selections. The Document Enquiry window is displayed. If a document number was not specified in the criteria, a list of all documents of the chosen document type are displayed.
Reversing the Supplier Payment
Reversing (cancelling) a supplier payment can be cancelled using an automatic system rule, or manually. Please follow the instructions for the applicable method:
Automatically Reversing the Supplier Payment
Manually Reversing the Supplier Payment
Automatically Reversing the Supplier Payment
- Find the required document. If you want to view the individual transactions included in the document, select Expand (+) adjacent to the Document Type column for the selected document to display the details panel.
- Select the document to be reversed (cancelled), then select CANCEL DOCUMENT. If CANCEL DOCUMENT is greyed out, the payment has been allocated to the document. You are not able to reverse/cancel that payment until the payment allocation has been removed from the document. For more information, please see Removing a Payment Allocation from a Document.
Alternatively, right-select on thedocument to be cancelled, then select Cancel Payment from the pop-up menu. If you use the cancel payment function, the document is automatically unallocated but you need to allocate the cancelled payment document to the original document. For more information, please see Cancelling Payments. - A Cancel Document message is displayed. Select Yes to confirm the cancellation.
- The Document Cancelled success message is displayed. Select OK to return to the Document Enquiry window.
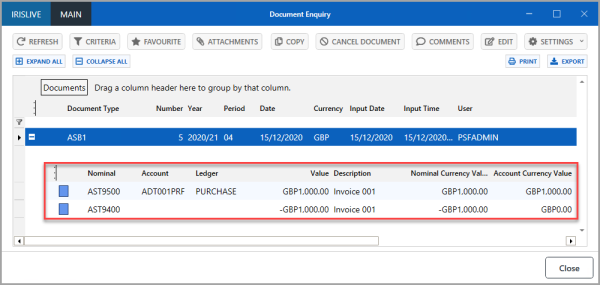
- The cancelled documents are displayed immediately after the original document details, as shown in the following graphic.
Manually Reversing the Supplier Payment
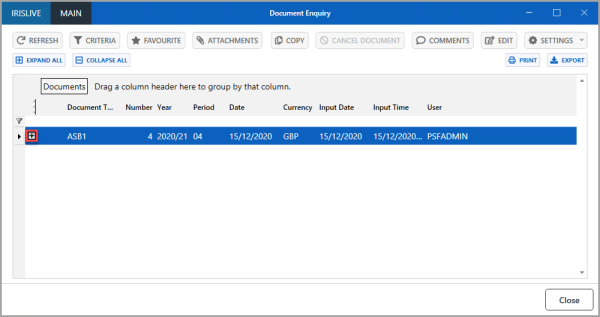
- The Document Enquiry window is displayed. If a document number was not specified in the criteria, a list of all document of the document type are displayed. Find the required document, then select Expand (+) adjacent to the Document Type column for the selected document to display the details panel.
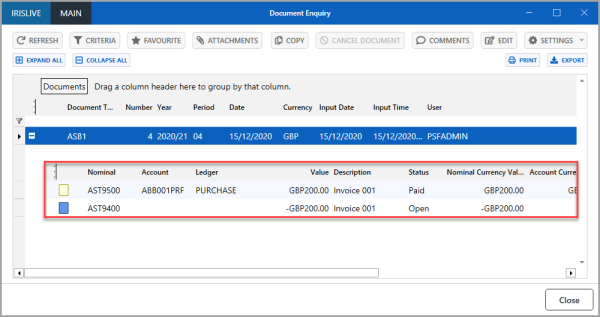
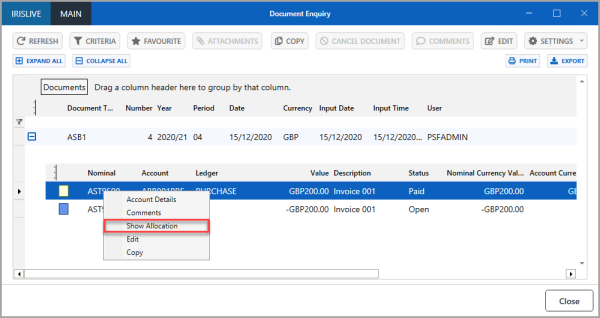
- Next, check the status of the document. In the Status column of the detail line, if the document has the status Paid, it means the document is allocated to a payment. The document allocation must be cleared before reversing (cancelling) the document.
If you cannot see the Status column, the status of the document, depending on your system settings, may be indicated by the detail line being coloured, or a colour box present in the Status Indicator column. Alternatively, use the scroll bar at the bottom of the window to check if it is further along, or right-select the column header, then select status from the pop-up menu. - Next, right-select the transaction with Paid status, then select Show Allocation from the pop-up menu.
- The Allocation window is displayed. In the left-hand side panel the allocated documents are displayed. Select Undo, then select SAVE.
- The unallocated documents are displayed in the right-hand side panel. Select X to close the Allocation window and return to the Document Enquiry window.
- On the Document Enquiry window, select on the document to be reversed (cancelled), then select COPY.
- The Document Input window is displayed pre-populated with the document type, input form, date, and period. Select Reverse Values.
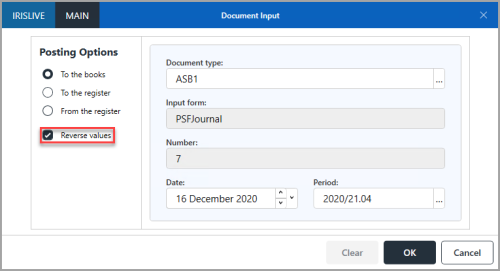
- Next, select a journal document type. Select Drill (...) in Document Type.
- The Select a document type window is displayed. Select ASGJ - Journal (where AS represents the location code of the document type), then select OK.
- The Date and Period default to the date and period that you are entering the information, i.e. today's date. The date and period must be the same as the date and period that the document was originally posted with, where possible. To change the date, select the up-down buttons, select a date from the calendar, or over-type the date using a DD Month YYYY format, for example, 15 December 2020. To select a different period, select Drill (...) in Period, then select the required period from the Select a period window, then select OK. On the Document Input window, select the OK to confirm your selections.
- The System Journal Input document input form is displayed pre-populated with the details entered in the Document Input window and the details of the original document. Select VIEW AFTER POSTING, then press F5 or select POST to post the journal.
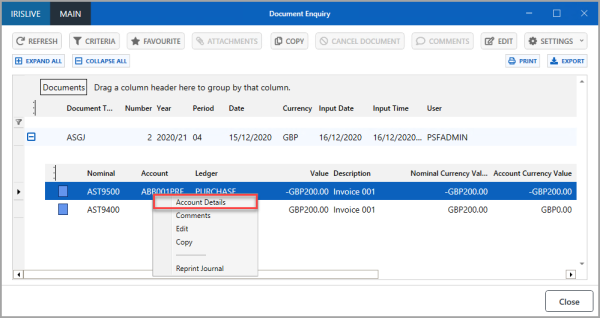
- A new Document Enquiry window is displayed with the System Journal Input (ASGJ) document selected. The journal document now needs to be allocated to the original document. Right-select the detail lines, then select Account Details from the pop-up menu.
- The Detail Enquiry window is displayed. Select the System Journal Input (ASGJ) document, then select Allocation.
- The Allocation window is displayed. Select the original document (ASB1) from which the journal was created to allocate to the journal from the right-hand side panel. Then drag the selected document (ASB1) onto the document (ASGJ) in the left-hand side panel to group the documents for allocation.
- The documents to allocate are grouped in the left-hand side panel. Allocate is automatically selected. Select SAVE. The document is they available again for payment.
- The Show Allocated Items message window is displayed. Select Yes, to display a new Detail Enquiry window with the allocated items.