Allocating Documents
Some Of the nominals and ledgers used in this topic may be different to those in your chart of accounts.
Where documents are attached to an account (such as a supplier account), they can be allocated at the point the document is posted. Alternatively, you can find the applicable document using a detail enquiry after posting, then allocate to the applicable payment transactions.
Allocations are performed at nominal and account level therefore the nominal and account must be same on each individual document (including the payment transaction document) in order for them to be successfully allocated.
Allocating Documents When Posting
Allocating Documents After Posting
Removing a Payment Allocation from a Document
Allocating Documents when Posting
When you have entered the details of a payment transaction in a document input form, you can allocate the payment when you post the document.
- On the document input form, select ALLOCATE, then select POST (alternatively, hold Shift and press F5).
- The Allocation window is displayed. Multiple payment transactions can then be allocated to the required document.
Allocating Documents after Posting
Where documents have been posted but not allocated, you can subsequently find the required document, then allocate. Documents can be viewed either from the supplier account or using a detail enquiry.
-
From the Detail Enquiry window, select the document you want to allocate, then select ALLOCATION.
Tip: To select more than one document at a time for allocation, press and hold the Control (Ctrl) key, then select the documents.
- The Allocation window is displayed.
Allocating the Payment Transactions to Documents
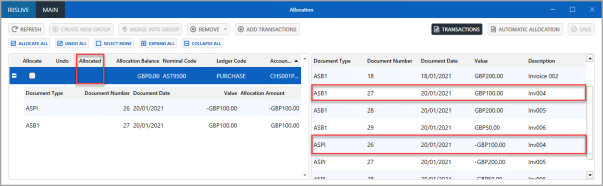
- The Allocation window lists documents with a balance in the left-hand panel (such as supplier invoices), together with related transactions in the right-hand panel (such as BACS payment documents, cheque payment documents, etc.) Drag the applicable payment transactions from the right-hand panel onto the balance document header in the left-hand panel
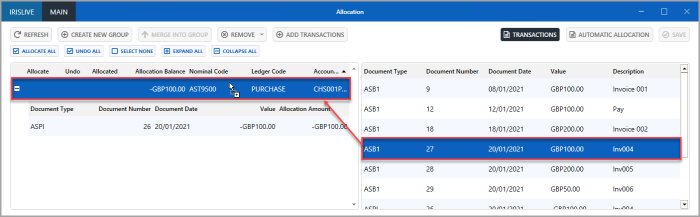
- Repeat this process for any other payment documents that need to be allocated to the balance document. The payment documents are shown immediately below the balance document in the left-hand panel.
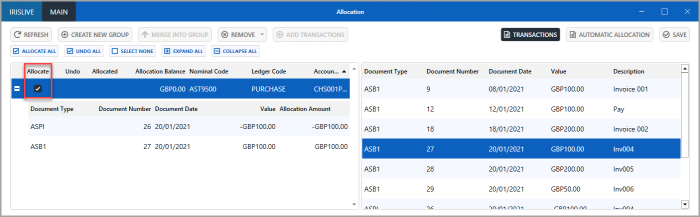
- If the documents balance to zero then Allocate is automatically selected
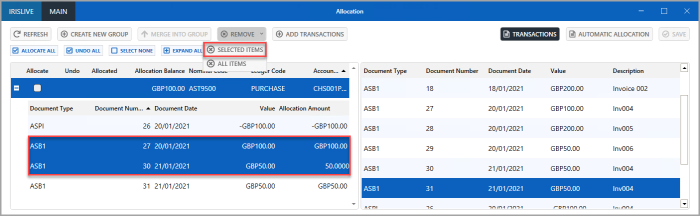
- If you accidentally drag an incorrect document, the transaction line can be removed from the left-hand panel by selecting the transaction (hold down Ctrl to select multiple transactions), then select REMOVE > SELECTED ITEMS.
If you are part allocating a payment for an invoice, you need to amend the Allocation Amount for the document. - To confirm the allocation, select SAVE.
- A Show Allocated Items message is displayed. Select Yes to view the allocated items in a Detail Enquiry window, or select No to return to the Allocation window.
Adding Additional Documents for Allocation
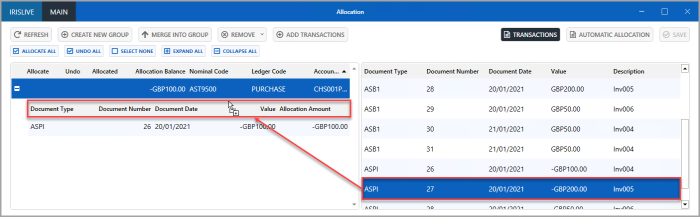
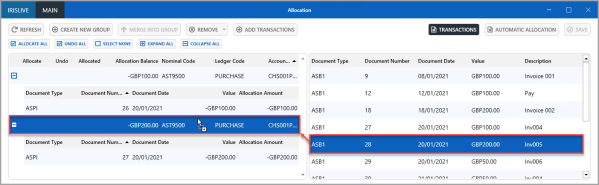
- On the Allocation window, select the additional document(s) you want to allocate from the right-hand side panel, then drag the document on to the document header in the left-hand side panel.

- The additional document to be allocated is displayed under the existing document. Transactions can now be added from the right-hand side panel to the document to which they are to be allocated. To select the additional document, select the allocation balance line, then select the document you want to allocate from the right-hand side panel. Drag the document to be allocated on to the allocation balance line of the document to which it is to be allocated in the left-hand side panel.
- If the documents balance to zero, Allocation is automatically selected. Select SAVE.
Removing Allocations from a Document
When you have found the document you want to remove allocation for from either viewing the document on the supplier account or by running a Detail Enquiry, the allocation can be removed.
Allocation cannot be removed or undone for documents included on a payment run.
- On the Detail Enquiry window, right-select on the document allocation needs to be removed from, then select Show Allocation from the pop-up menu.
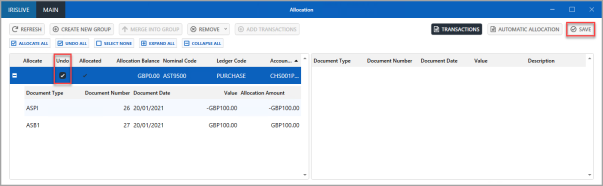
Allocated documents have a status of Paid in the Status column. If the status column is not displayed, you may need to scroll further along the window or right-select the column header bar and select Status from the pop-up menu. - The Allocation window is displayed. The allocated transactions are displayed in the left-hand side panel. Select Undo, then select SAVE to confirm.
- On the Allocation window, the documents are displayed in the left-hand panel as no longer allocated and the right-hand panel contains all transactions, including the transactions that have been allocated, as available again for allocation.