Recording an Individual Cheque Payment
Some Of the nominals and ledgers used in this topic may be different to those in your chart of accounts.
This topic assumes that you are familiar with the completion of document input forms. If you need more detailed instructions (such as the selection of dates, periods, and accounts, etc. please see Completing Document Input Forms.
When an individual payment has been made by cheque, it needs to be recorded in the system using a Cheques document input form.
- Select Documents, then select Document Input from the menu.
- The Document Input dialog is displayed. Select Drill (...) in Document type, then double-select to select
- A number of different input forms are available, which depend on the reason the cheque was written. Select Drill (...) in Input form, then double-select to select the required input form from the Select an input form dialog, based on the following options:
Item Description Only select this option if you are raising a cheque for a customer who has an account in your Sales ledger, and who has had a sales invoice raised against their account. An applicable sales credit note must have been recorded so that the payment can be successfully allocated. Deposit Refund Select this option if you are refunding a deposit that has been recorded in the system. Imprest Petty Cash Select to raise a cheque to top up a petty cash tin with an imprest limit. Select this option if the cheque is for an ad-hoc payment, for example to reimburse a staff member. The payment can be coded to any control nominal and account. Multi Petty Cash Reimbursement Select to raise a cheque to top up multiple petty cash tins. Petty Cash Reimbursement Select to raise a cheque to top up a single petty cash tin. Used to issue a single cheque to pay a supplier. -
The name of the selected form is displayed in Input Form. The Number defaults to the next available number for this document type and needs to be overwritten with the number of the physical cheque.
Cheque document types are usually set with a controlled number range. If the cheque number being entered is different to the numbers in the set range, the range must be updated.
- The Date defaults to the current date and the Period defaults to the current accounting period. The date/period should reflect the date on the physical cheque.
- Select OK to confirm your selections. The selected input form is displayed populated with the details entered in the Document Input dialog.
- Double-select in Bank, then double-select to select the bank from which the payment was made from the Select bank account dialog.
- Double-select in Account, then double-select to select the required account (supplier, customer, or student depending on the input form selected) from the Select account dialog.
- Enter the Value of the cheque, (do not enter any currency symbols £, $, etc.) and a Description to help identify the payment. Any outstanding balance is shown under Account Summary. Hold Shift and press F5 to post the document and allocate the payment.
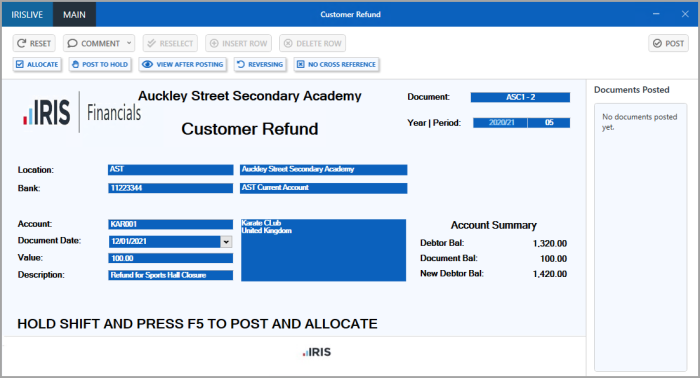
-
A link to the posted document is then displayed in the Documents Posted panel.
- Selecting the link displays the transactions posted for the document in a Document Enquiry window.