Manage custom fields
Use the Management Options tab in the Pupil Manager module to work with custom fields in student records. This is useful if you want to customise student record information to suit you. The information held in custom fields can be exported into Excel reports, if required.
Custom fields can be added under a selected section within student records or student contact records.
To work with custom fields, follow the steps below:
- In the Pupil Manager module, select the Management Options tab. A number of options are displayed for you to work with:
-
Select Custom Fields.
-
Click and select either:
-
Pupil Custom Fields to work with custom fields in student records.
or -
Contact Custom Fields to work with custom fields in student contact records.
-
- Choose to:

-
- Add a custom field.
- Copy a custom field. Copy a custom field into a different section of student contact records. The original custom field remains in the original location. Copying custom fields saves time when you want to use the same field in current student, applicant and former student records.
- Arrange a custom field. Change the order that custom fields are displayed throughout student contact records. You may want to arrange fields into a more logical order after adding a new custom field.
- Edit a custom field. Edit a custom field if you want to change the name of the field or use a default value in the field.
- Delete a custom field. Delete a custom field if it is not being used, this is a useful housekeeping tool.
Add a Custom Field
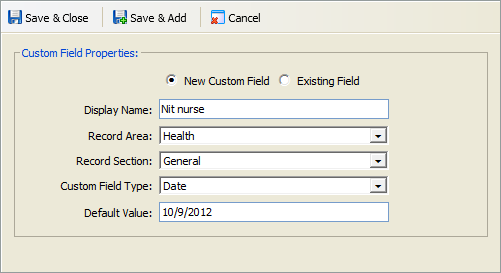
- Click Add Custom Field. The Add Custom Field window is displayed:
- Select New Custom Field and enter a Display Name. This is displayed in student records to identify the field.
- Select a Record Area from the drop-down list. Your selection determines which tab or option the new custom field is listed in. The selections available depend on whether you are working in Pupil Custom Field or Contact Custom Field. You cannot add custom fields to all areas of the Pupil Manager module.
- Select a Record Section from the drop-down list. You selection determines where the custom field is displayed within the selected Record Area. The selections available depend on the Record Area you have selected.
- Select a Custom Field Type to suit the information to be entered in your custom field.
- Use the List drop-down to select a predefined list of options for the custom field, this is only displayed for selected Custom Field Types. The values in the List are set up in Control Panel > Global Lists. The button and checkbox displayed next to the List field are not currently in use.
- Add a Default Value, this is optional. This saves time if most entries for the field are the same.
- Either:
-
Click Save & Close.
or - Click Save & Add to add another custom field.
The custom field is displayed in your selected area of the Pupil Manager module. It is also listed in the Custom Fields screen under the Record Area selected. The properties you have selected are displayed to help you:
-
Click Save & Close.

Copy a Custom Field
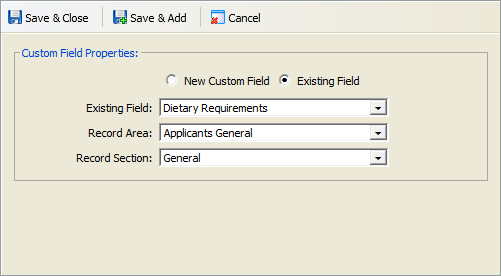
- Click Add Custom Field.
- Click the Existing Field radio button and select the Existing Field you want to copy from the drop-down list:
- Select a Record Area from the drop-down list. Your selection determines which tab or option the copied custom field is listed in in the student record. The selections available depend on whether you are working in Pupil Custom Field or Contact Custom Field. You cannot add custom fields to all areas of the Pupil Manager module.
- Select a Record Section from the drop-down list. Your selection determines where the copied custom field is displayed within the selected Record Area. The selections available depend on the Record Area you have selected.
- Either:
-
Click Save & Close.
or - Click Save & Add to add another custom field.
The custom field is displayed in your selected area of the Pupil Manager module. It is also listed in the Custom Fields screen under the Record Area selected. The properties you have selected are displayed to help you:
-
Click Save & Close.
Arrange Custom Fields
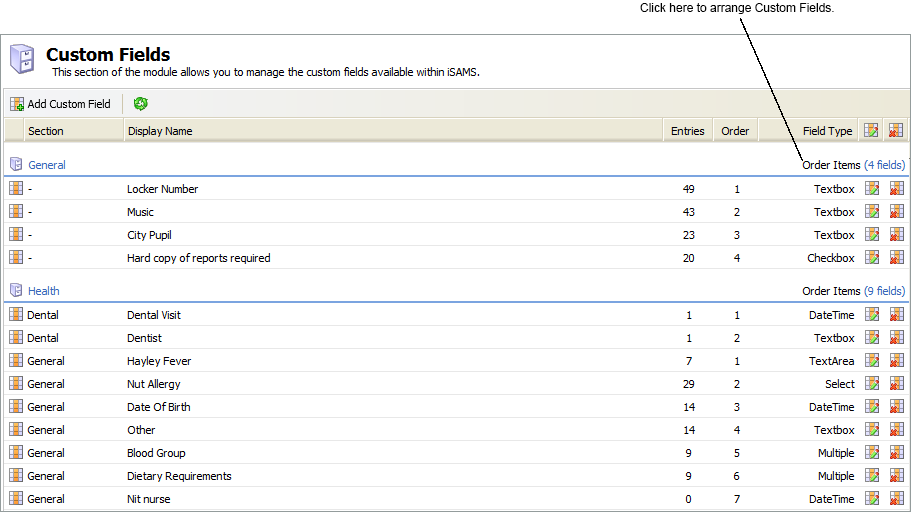
- Click Order Items in the section containing the custom fields that you want to arrange. The Order Items button is highlighted for you in the example below:
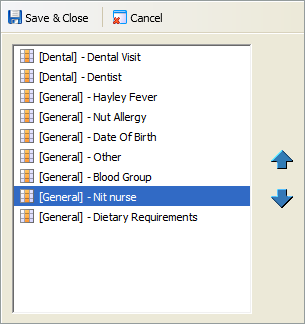
- The Arrange Custom Fields window is displayed:
-
Select a custom field and use the arrows available to move it up or down the list, as required.
The record section that the custom field is located in is shown in brackets. You can only order custom fields within the same record section. This sometimes means that you are arranging custom fields for different record sections within the same Arrange Custom Fields window.
- Continue to move custom fields up and down the list until you are satisfied with the order.
- Click Save & Close. The custom fields are now displayed throughout the Pupil Manager module in the revised order. Custom fields are always listed in alphabetical order in the Custom Items option in student records.
You can also arrange custom fields within custom sections from the Custom Sections tab. Select the blue arrows next to the custom section to display the Arrange Fields window.
Edit a Custom Field
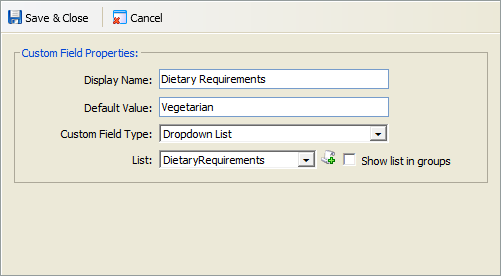
- Click the edit icon in your selected custom field. The Edit Custom Field window is displayed:
- Edit the Display Name, if required. This is displayed in student records to identify the field.
- Add a Default Value for the custom field, this is optional. The Default Value must be compatible with the Custom Field Type you select. For example, for the Custom Field Type of 'Date' the Default Value must be a date and for the Custom Field Type of 'Dropdown List' the Default Value must match a value in the drop-down list. Adding a Default Value saves time if most entries for the field are the same. Default Values do not work for the Custom Field Types of 'Multiple Select' and 'Checkbox'.
- Select an appropriate Custom Field Type to suit the information to be entered in your custom field.
- Use the List drop-down to select a predefined list of options for the custom field, this is only displayed for selected Custom Field Types. The values in the List are set up in Control Panel > Global Lists. The button and checkbox displayed next to the List field are not currently in use.
- Click Save & Close. The custom field is displayed in your selected area of the Pupil Manager module. It is also listed in the Custom Fields screen under the Record Area selected. The properties you have selected are displayed to help you:

Delete a Custom Field
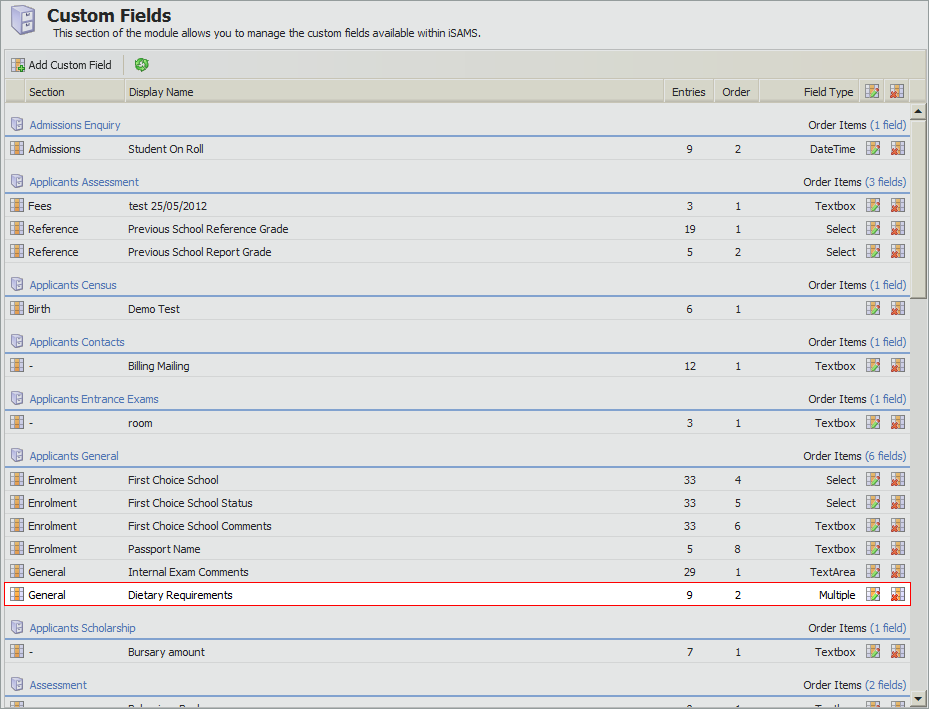
Refer to the Entries column in the Custom Fields screen to check if a custom field has been used. The Entries column is highlighted for you in the example below:
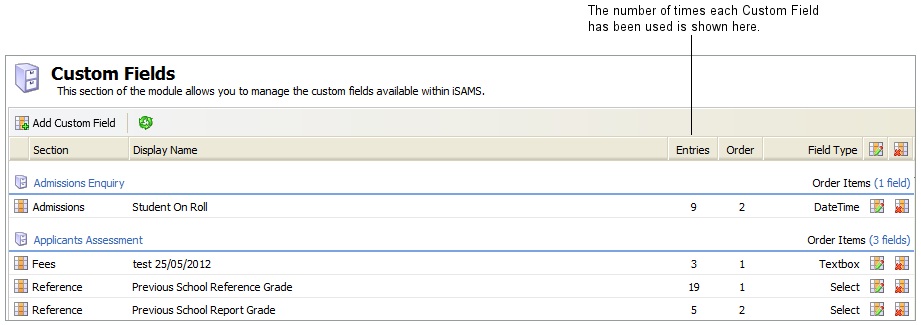
Deleting a custom field which has been used removes the field, and all related data, from all student records.
To delete a custom field,
-
Click the delete icon in your selected custom field. You are prompted either:
- Are you sure you want to delete this custom field?
or - There are saved values against this custom field. Are you sure you want to delete it? All data will be lost. You may prefer to select Cancel at this stage.
- Are you sure you want to delete this custom field?
- Click OK. The custom field is removed from the Pupil Manager module.