Send an an SMS message
Use the Pupil Manager module to send a text message to a selected group of students. You can also choose to send your message to student contacts. This is a useful tool for forwarding information quickly.
To send a text message to a group of students, follow the steps below:
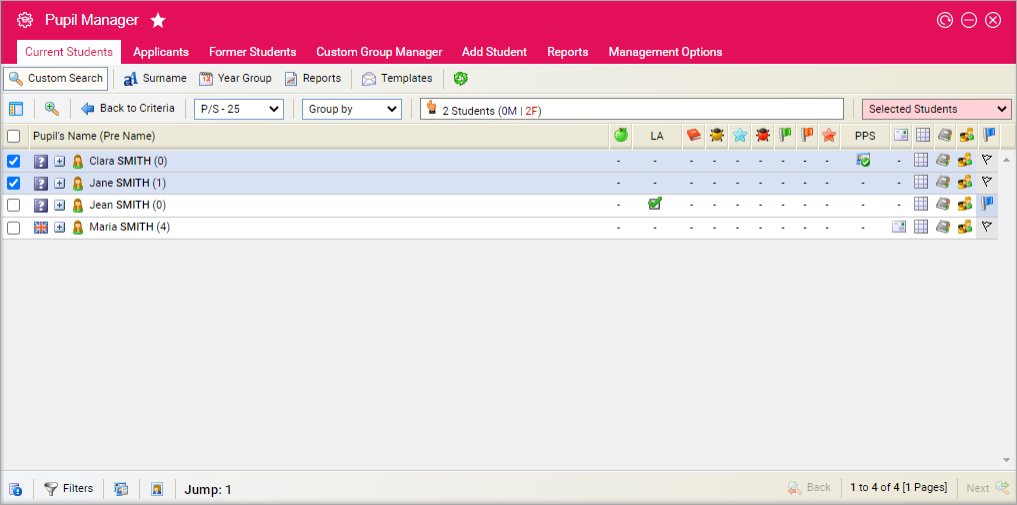
- In the Pupil Manager module, select a student records tab.
- Use your preferred search method to find the student records that you want to work with. The Student/Pupil Records List is displayed:
- Select student records using the checkboxes next to each Student/Pupil's Name. Check the box in the header bar to select all the records displayed.
- In the pink drop-down list select SMS Wizard. Step 1 of the SMS Wizard is displayed:
-
Choose to send SMS messages to:
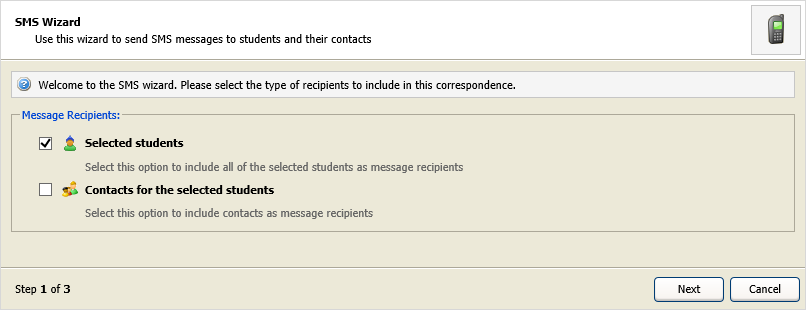
Send an SMS message to students
- Select the Selected students checkbox and select Next. A popup window is displayed. You are prompted The wizard is complete based on your selections. Do you want to continue with these choices?
- Click Yes. The Send SMS window is displayed:
-
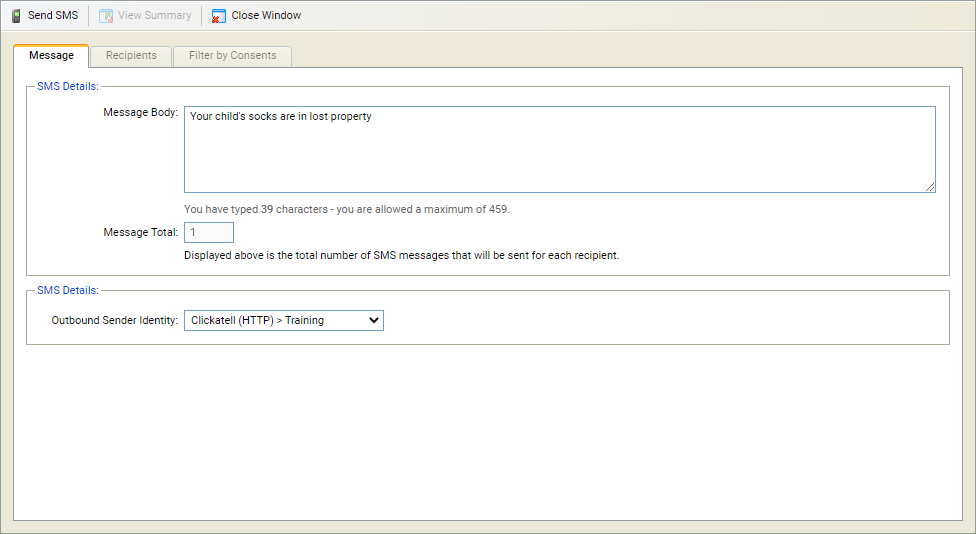
Select the Message tab:
- Message Body. Enter the body of your text message. You are limited to 160 characters per text message. If your text message exceeds the character limit it spans across a number of separately sent messages.
- The Message Total box shows the total number of separate text messages sent.
- Outbound Sender Identity. SMS message recipients see the selected Sender Identity as the caller ID. If a virtual number is selected here, the recipient only sees the number in caller ID (the message may need to be clear that it is from your school). Use virtual numbers if you want the recipient of the message to reply.
- Select the Recipients tab. Use the checkboxes available to select the recipients of your message. A key is displayed in this tab to help you.
- Select the Filter by Consents tab. Use the checkboxes to filter any opted in/out consents selected by students in the Student Portal (over 16s only) or student contacts in the Parent Portal (under 16s).
- Click Send SMS. A Communication Summary is displayed for you to check that your message has been sent.
- Click Cancel to return to the student records list.

Send an SMS to student contacts
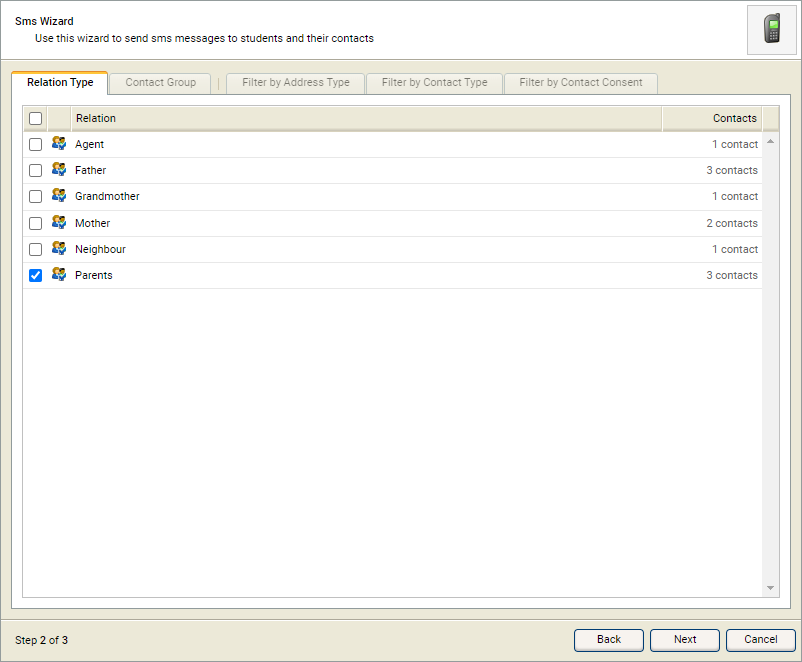
- Check Contacts for selected students and select Next.
- Use the tabs to select the contacts you wish to send the message to. The tabs in Step 2 of the SMS Wizard are grouped together. The first tabs are used to select message recipients. The second group of tabs are used to filter the selected message recipients, this is optional.
- First, use the checkboxes in the recipient tabs. You can make selections in both of these tabs, they operate independently. All of your selections are included in the message recipient list. For example, if you select 'Guardians' in Relation Type and 'Dance Contact Group' in Contact Group, your message will be sent to all guardians and all contacts linked to 'Dance Contact Group' for the selected students.
-
 Relation Type
The selections available are the Contact Types listed for your selected students.
Contact Group
The selections available reflect the Custom Groups linked to student contacts for your selected students.
-
Use the second group of tabs in Step 2 of the SMS Wizard
to filter the recipients you selected in the Relation Type
and Contact Group tabs. This is optional but advised.
Three tabs are available:
Filter by Address Type
The Address Type here refers to the Contact Location checked for contacts in student records:
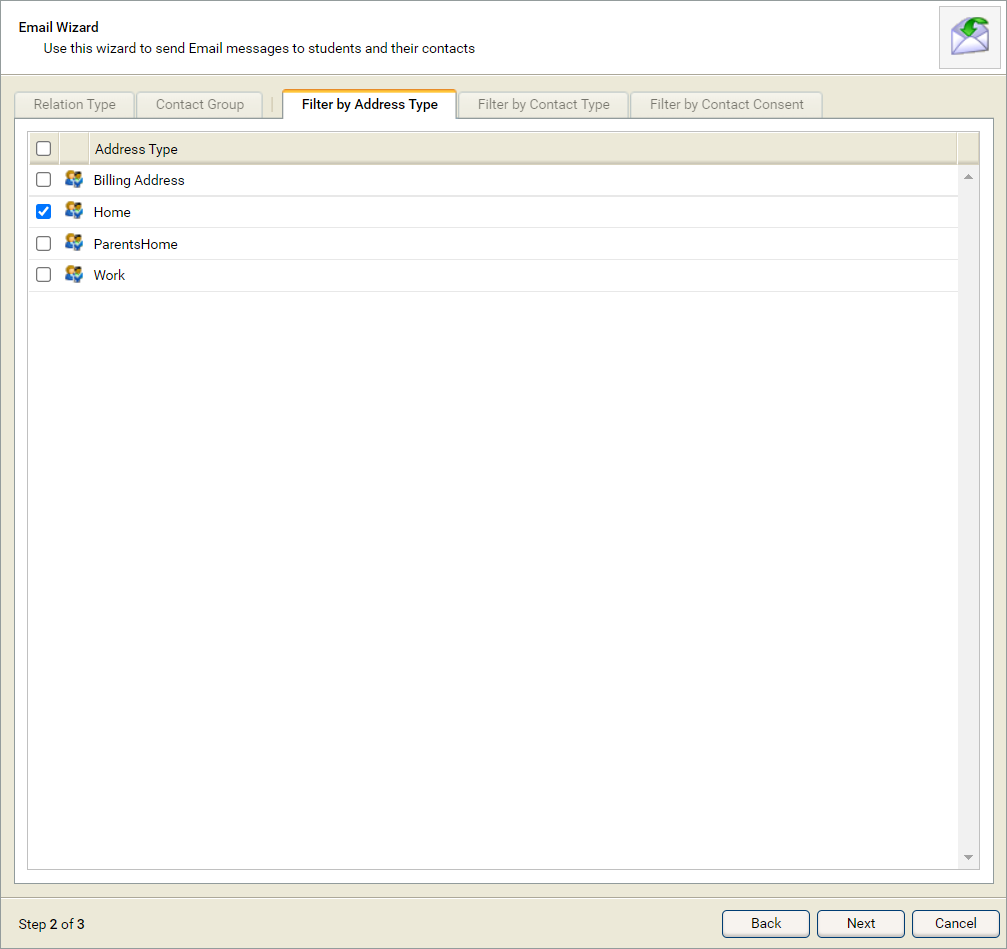
If you select 'Home' here, only your selected recipients with a Contact Location address marked as 'Home' are sent the e-mail. If you do not make a selection here all recipients are sent the e-mail regardless of Contact Location.
Filter by Contact Type
The Contact Type here refers to the Mail Option checked for contacts in student records:
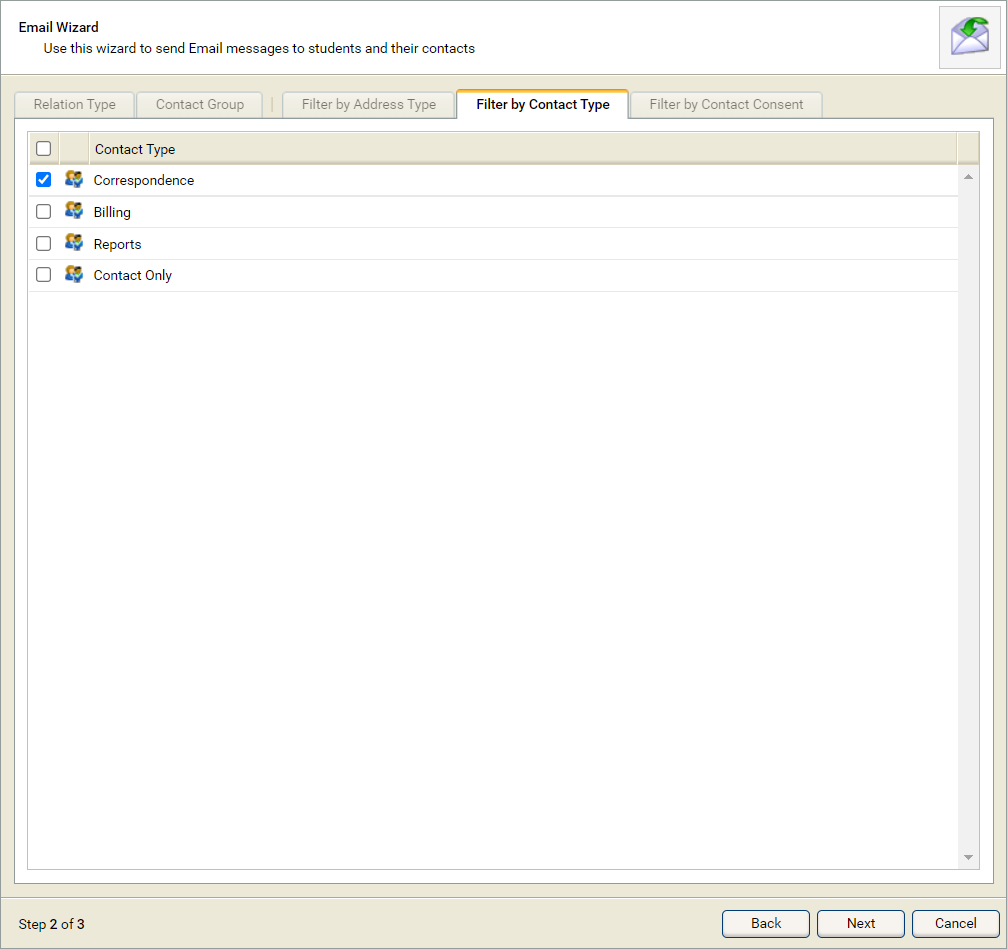
If you do not make a selection here all recipients are sent the e-mail regardless of the Mail Option they have checked in student records.
Filter by Contact Consent
The Contact Consent here refers to any opted in/out consents selected by students in the Student Portal (over 16s only) or student contacts in the Parent Portal (under 16s).
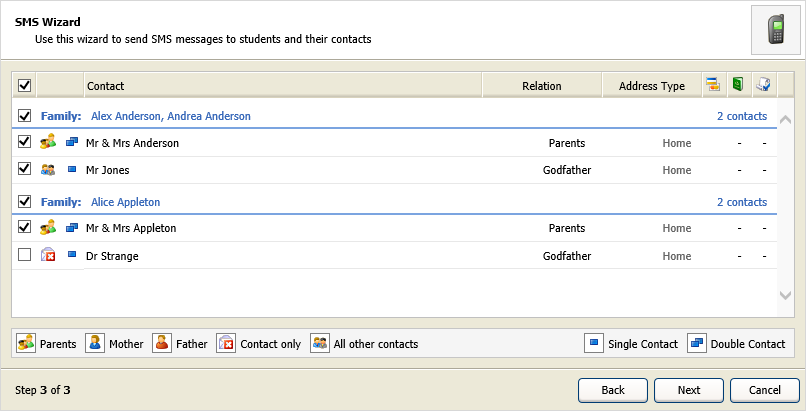
- Click Next. Step 3 of the SMS Wizard is displayed:
- Use the checkboxes available to select the recipients of your text message.
- Click Next. A popup window is displayed. You are prompted The wizard is complete based on your selections. Do you want to continue with these choices?
- Click Yes. The Send SMS window is displayed:
-
Select the Message tab:
- Message Body. Enter the body of your text message. You are limited to 160 characters per text message. If your text message exceeds the character limit it spans across a number of separately sent messages.
- The Message Total box shows the total number of separate text messages sent.
- Outbound Sender Identity. SMS message recipients see the selected Sender Identity as the caller ID. If a virtual number is selected here, the recipient only sees the number in caller ID (the message may need to be clear that it is from your school). Use virtual numbers if you want the recipient of the message to reply.
- Select the Recipients tab. Use the checkboxes available to select the recipients of your message. A key is displayed in this tab to help you.
- Select the Filter by Consents tab. Use the checkboxes to filter any opted in/out consents selected by students in the Student Portal (over 16s only) or student contacts in the Parent Portal (under 16s).
- Click Send SMS. A Communication Summary is displayed for you to check that your message has been sent.
- Click Close Window.