Enable Till Enrolment
How to link ID Manager to the FasTrak Client:
-
You will first need to make sure that both ID Manager and the FasTrak Client are installed on the till.
-
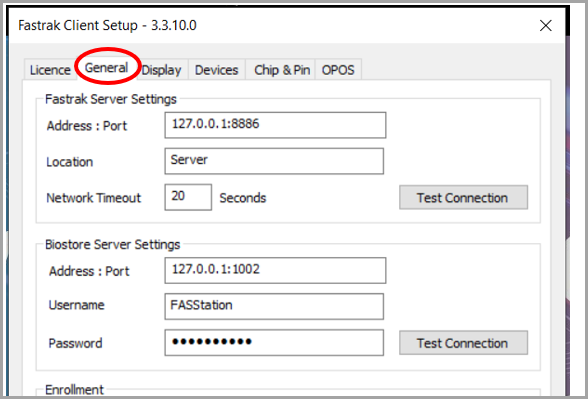
You will then need to go into the FasTrak Client Setup and find the General tab located at the top of the app as shown below:
-
Once on this screen you will need to look down and find the Enrollment section. To link ID Manager you will first need to search for the folder location on your device. To do this you will need to click on the button with the three dots as shown below:
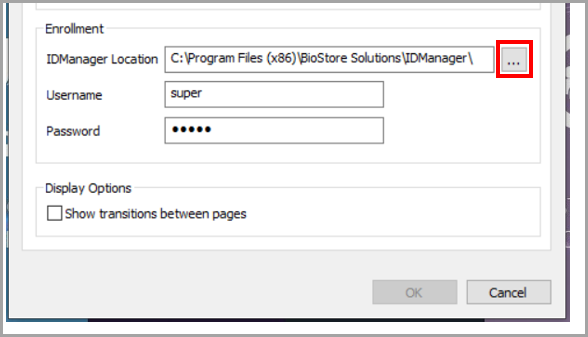
- You will then need to search for the ID Manager folder location on your device. The default folder location unless changed is - C:\Program Files (x86)\BioStore Solutions\IDManager\
- Once you have found this folder you will need to click the Select Folder button to save this.
- You will then need to enter the username and password that you use to login to ID Manager. We recommend a Manager login account is setup in ID Manager for this. Please refer to Add or Edit ID Manager Logins on how on do this.
- ID Manager will now be linked with the FasTrak Client allowing you to enrol on the till.
How to enrol on the till:
-
First you will need to go into FasTrak Admin and find the Maintenance button at the top of the screen as shown below:

-
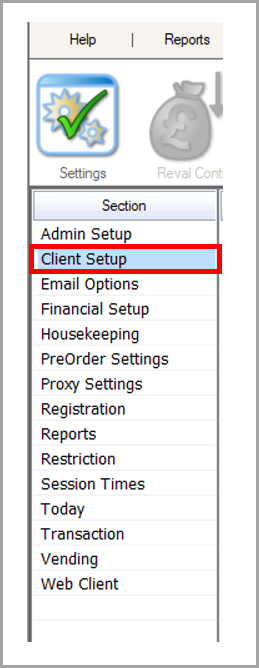
Once you are on the maintenance screen you will need to find the Client Setup button that is located in the list on the left of the screen:
-
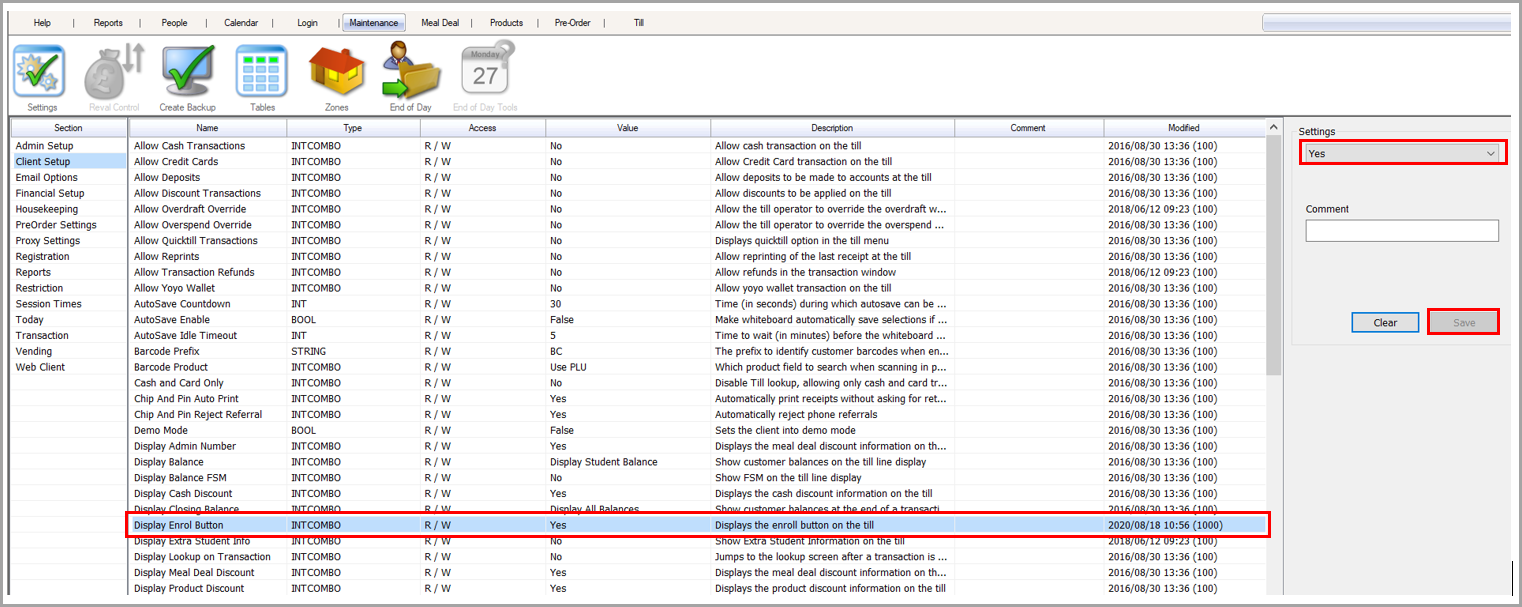
In the Client Setup you will find a long list of options that you can configure. In this list you will need to find the option Display Enrol Button. Once found you need to highlight this button and then change the option in the Settings box located on the right of the screen to Yes and click the Save button. This will allow the enrol button to appear on the till:
-
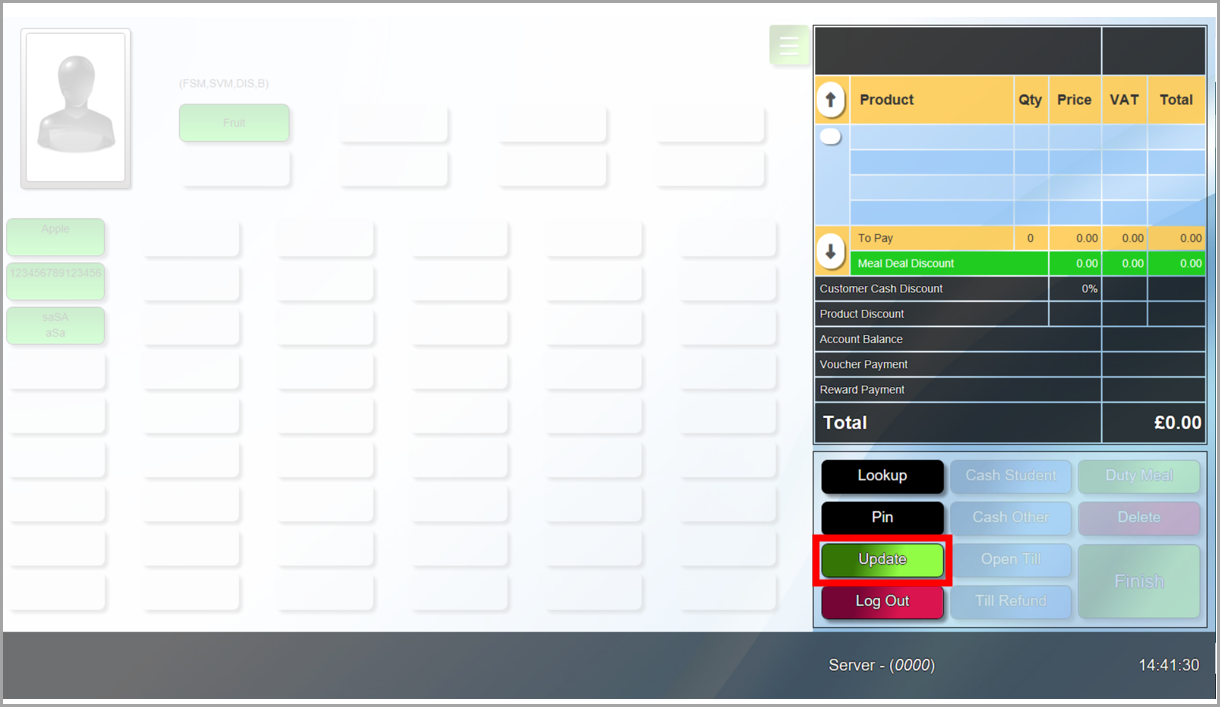
Once this is done you will need to go onto the till and login. Once on the main till screen you will need to find the Update button if the enrol button doesn't automatically show up:
-
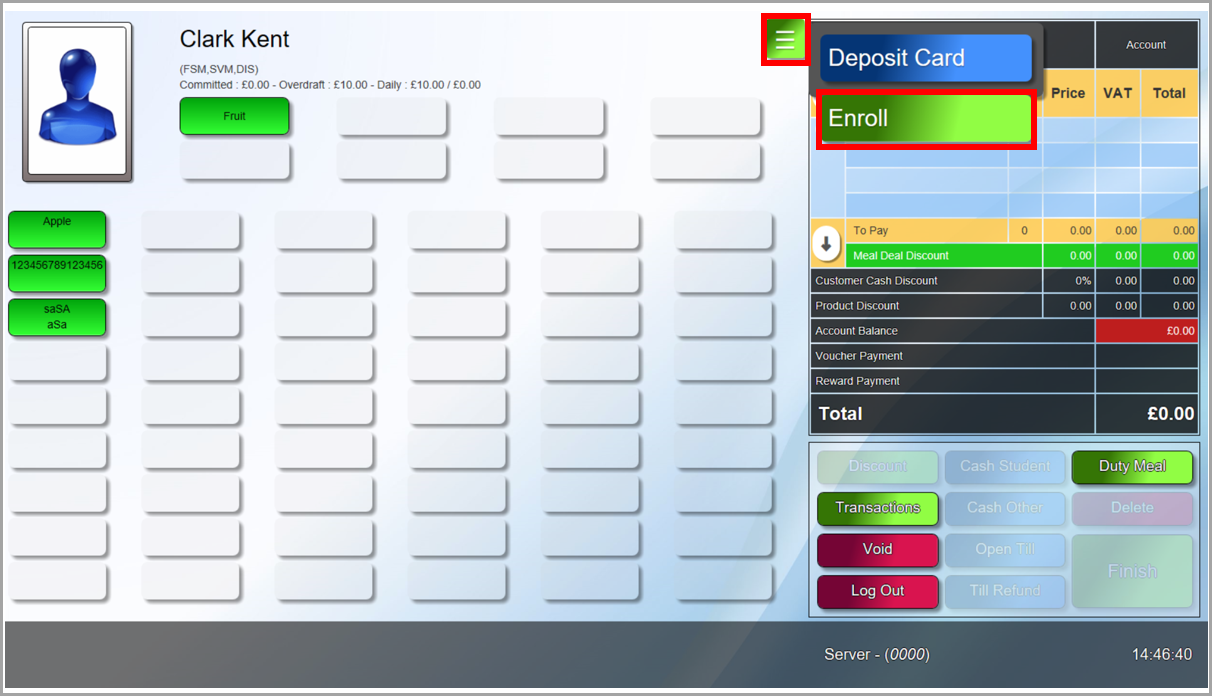
Once you have updated the till the enrol button should show near the top right of the screen. To enrol a user you must first find them using the Lookup button. Once you have located their account you will need to click the green button near the top right of the screen and then choose the Enroll option as shown below:
-
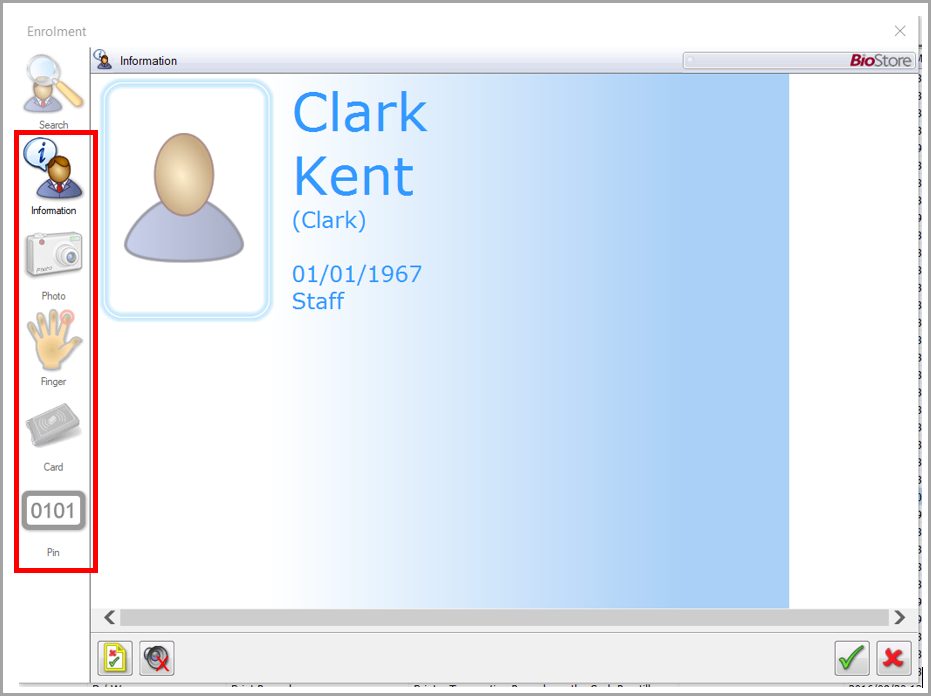
Once you click on the enrol option the following screen will show up. From here you can see the user's information, take their photo, scan their finger print, register/print their card and assign them a pin:
-
Once you have chosen the options you wish to use and enrolled the user you need to press the green tick at the bottom right of the screen to finish the process. This will then take you back to the till screen so that you can continue and enrol the next user.