Saving a Data View
Any data view that has been created or edited can be saved as required. The view can either be saved as private (accessible only to you) or public (accessible to everyone).
When marking a view as private, it is important to note that anyone can access a private view if they are given the URL. Access to the data in any data view is determined by the security setup defined by your System Administrator.
With the required data view selected:
- Click the Save Data View icon on the toolbar.

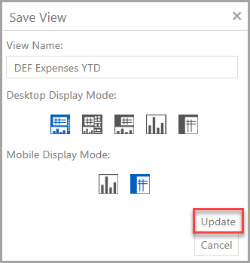
- If you want to save the data view with the same name, click the Update button.
- If you are saving a new view or want to change the name of an existing view, enter the View Name then click the Save button.
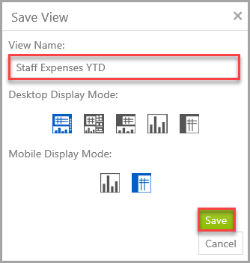
- There are five different display modes that you can set the view to display by default when the view is opened. Hover over each design mode icon to view the type of mode. Select the required mode before clicking the Save or Update button. For more information, please see Changing the Data View Display Mode.