Stripe
The images and steps in this topic are based on our new design (which you can currently switch on and off). If you haven't switched the new design on, the images may look different.
Take secure online payments with a simple setup process with Stripe.
Visit Stripe for more information or to sign up for an account.
Get help and support from Stripe.
Set up Stripe
- Select your user account initials, then Account Settings.
-
From Configuration Settings, select Receiving Payments.
-
From Stripe select Settings.
-
Select the Bank Account, Currency and Payment Method you want to assign to Stripe transactions in IRIS Kashflow.
-
Select Default Payment Provider to make Stripe you default payment processor.
-
To use this payment processor for the invoice Pay Online button, select Redirect me to PayOnline settings.... Complete the required information, then Add PayOnline button to invoices.
-
Select Connect to Stripe.
-
Enter your Stripe Email and Password to link your Stripe and IRIS Kashflow accounts.
-
You will be returned to IRIS KashFlow, select Configure it for me to complete the set up.
Select Sign Up to Stripe to create an account if you do not already have one.
You can add additional payment methods.
That's it, you are set up and ready to take Stripe payments when viewing an unpaid sales invoice. Additionally, the Stripe powered Pay Online button will be added to your PDF sales invoices where customer can access the secure payment portal to pay you directly.
Collect payments using Stripe
From sales invoice
-
From Sales > Sales Invoice select any unpaid invoice to open it.
-
From Payments select More actions > Card payment.
-
The Stripe card payment form displays. Complete the customer card details and select Take Payment.
-
Once the payment has been verified the invoice timeline will update accordingly.

From Pay Online button
-
Send the sales invoice PDF to the customer with the usual method.
-
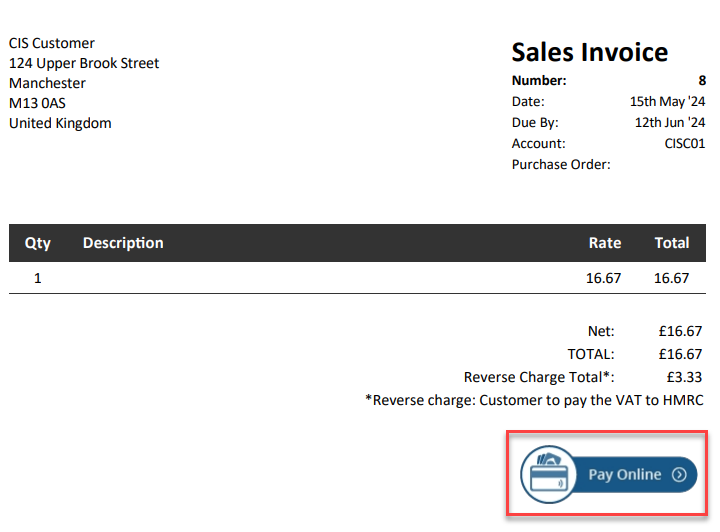
When the customer views the PDF they will be able to select Pay Online.
-
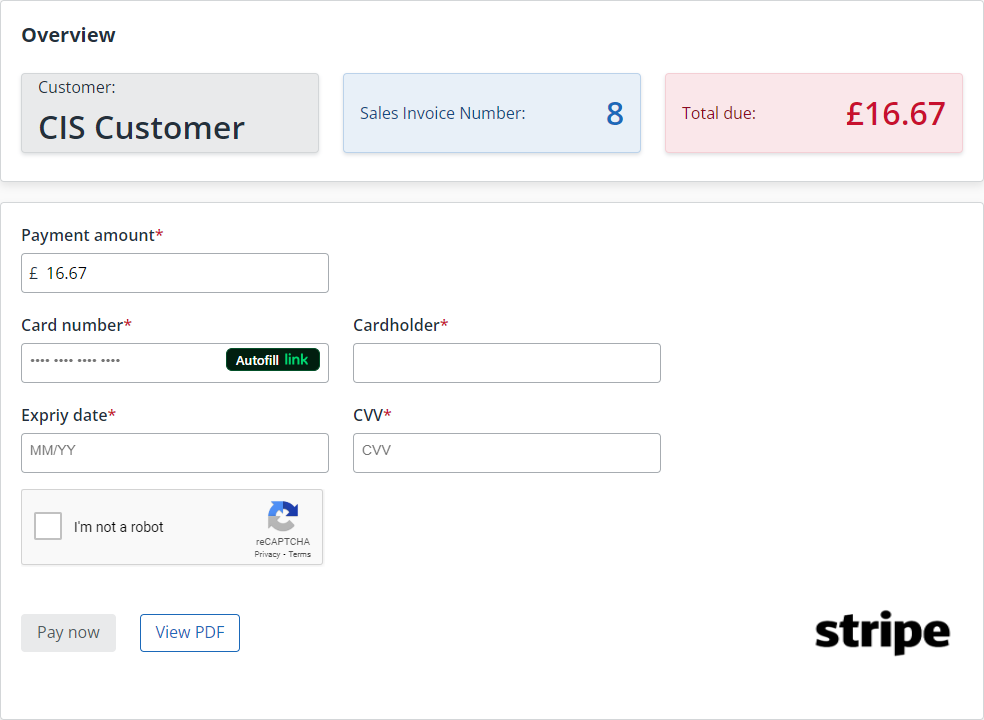
The Stripe payment for will display. The customer completes their card details and completed the reCAPTCHA check, then select Pay now.
-
Once the payment has been verified the invoice timeline will update accordingly.

