Create email templates
You can send a variety emails directly from IRIS Elements Cashbook. We provide a standard set of templates that can be edited to create customised emails (including fonts, images and text substitutions).
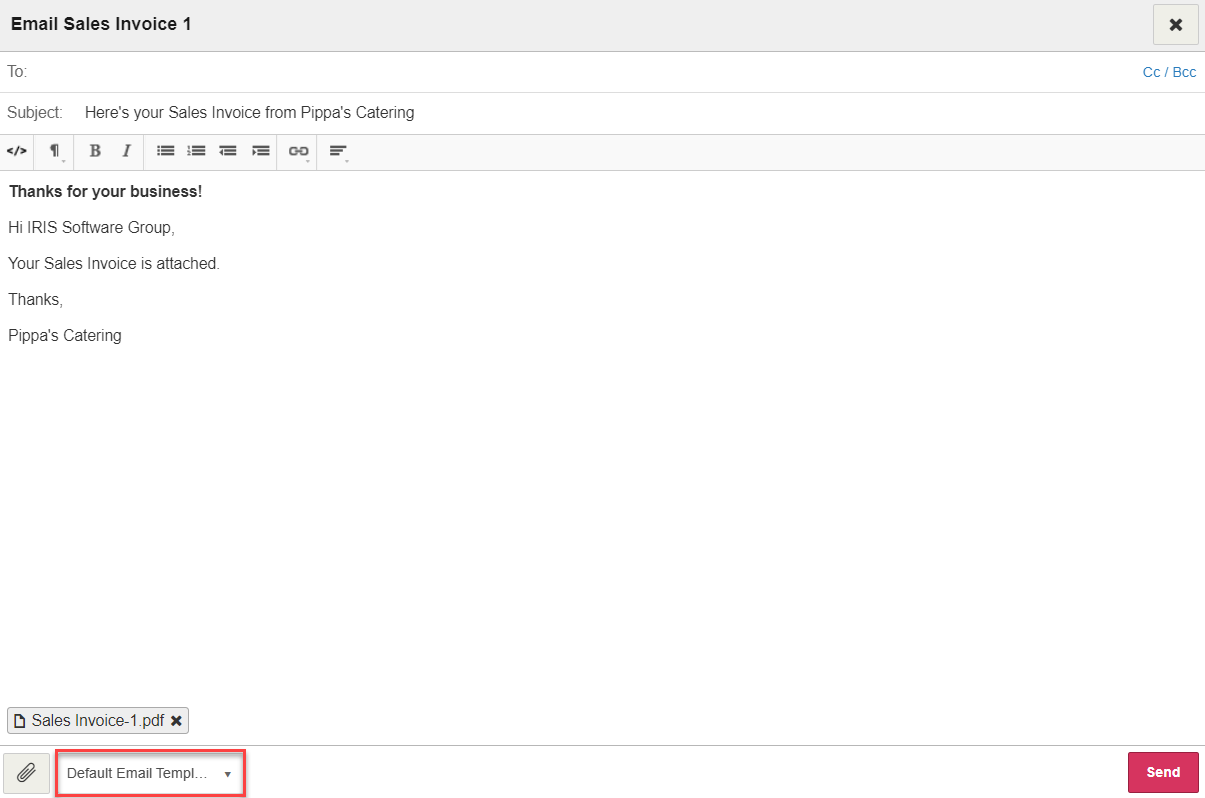
A template defines the default format and content of an email based on that template, but can be overwritten when the email is created. Templates are selected from the end of the email.

-
Go to Settings. From Configuration > Settings, select Email Templates.

-
Select an existing template to edit or select Create to create a new template.
-
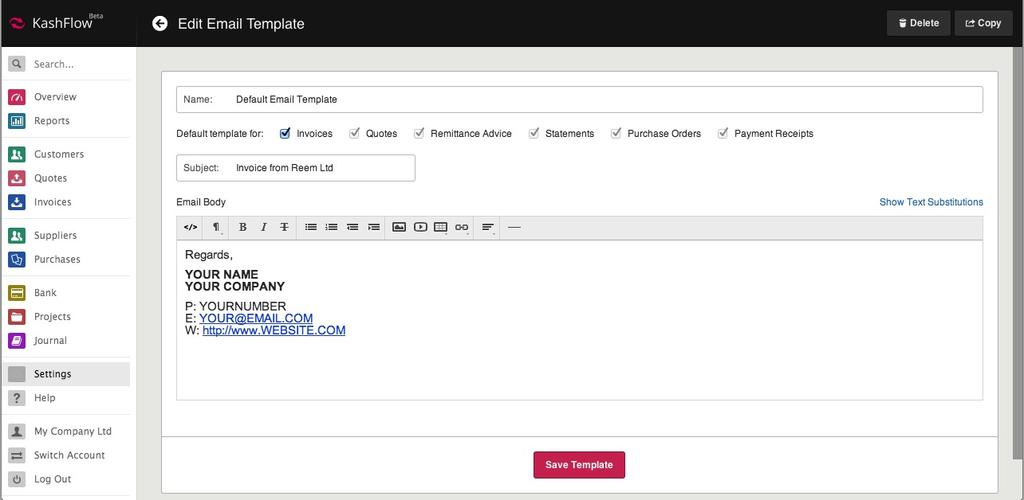
Enter a template Name. This will be the name used to select the template from a list when the email is created - try to be as specific as possible, such as
Send Invoice,Send Invoice Reminder, etc. -
Select the documents this template can be used for.

-
Enter a default Subject for the email.
-
Enter the body of the text in the same way that you would write the actual email. Use the icons at the top to format the text, insert images, videos, hyperlinks and horizontal lines (hover over an icon to find out what it does).
 Add an autosignature
To add an autosignature, switch to HTML mode by selecting the Source </> icon, then copy and paste the following HTML to the end of the email (replacing the CAPS text with your own details).
<p>Regards,</p>
<p><strong>
YOUR NAME<br />YOUR COMPANY</strong></p><p>P:
YOURNUMBER<br />E: <a href="mailto:
YOUR@EMAIL.COM">YOUR@EMAIL.COM</a><br />W: <a href="http://www.
YOURWEBSITE.COM">http://www.YOURWEBSITE.COM</a></p><p><img src="http://www.
LINK.com/IMAGE.jpg"></p>The last line is only applicable if you have an image you want to insert under your autosignature.
To preview, select the Source </> again. The preview should look like this:

-
You can also insert text substitutions. These will be replaced with values from IRIS Elements Cashbook when the email is produced. For example, [FIRSTNAME] is replaced by the contact's first name. Select Show Text Substitutions.