
iXBRL is a format used by HMRC and Companies House to produce a document that can be read by the user, but also contains embedded tagged data that can be understood by computer systems.
This topic explains how to generate and electronically submit iXBRL accounts to Companies House and how to generate an iXBRL report for submission to HMRC from the Accounts Production module.
The bookmark navigation offers single-click access to any section of the report to make accessing the desired location even more efficient. The Search feature gives the user the ability to quickly find words, phrases or even numbers within the report.
With new advanced search capability in our data screens, finding the right note or disclosure to edit couldn’t be easier. As the user types, the fuzzy search logic identifies all the matches that are likely to be relevant even when there isn’t an exact match.
Step through all the matches with single-clicks or using the arrow keys
on the keyboard to efficiently find the desired location which is then
displayed for review and edit. A double-click will display the result
and close the search pane leaving the last search string for easy access
should the user select the wrong item.
The Companies House iXBRL service will cater for the electronic filing of accounts of companies/LLPs and Charities with the exception of Academy and Incorporated Charities prepared under Charity law.
The following accounts types are as follows:
Audited abridged accounts (for periods commencing on or after 1 January 2015)
Audited small accounts
Audited group accounts
Audited full accounts
Audit exempt dormant accounts
Audit exempt micro-entity accounts
Audit exempt abridged accounts (for periods commencing on or after 1 January 2015)
Audit exempt abridged accounts (for periods commencing prior to 1/1/2016)
Audit exempt group accounts
Audit exempt full accounts
Charity Accounts - Academies and Incorporated Charities prepared under Charity Law CANNOT currently be eFiled to Companies House.
All users MUST be registered with Companies House for Electronic Software
Filing (E-Filing), and their Presenter Reference, Authentication and
Registered Email Address entered within IRIS via Setup
| Practice Options | C/H Identifiers. For more information
on registering with Companies House, from Accounts Production click
here.
Only Master users have the
ability to tag the report by default; however, there is a separate
permission that can be activated for other staff members which can
be set from within System maintenance – select Staff
| Staff Maintenance, highlight the staff member and click View | Privileges tab – tick the
option Can create iXBRL copy for
Companies House.
IMPORTANT: Customer Support
can only give guidance on the process to tag your iXBRL accounts.
It is the user’s responsibility to select the appropriate tags from
the taxonomy.
In this topic Hide
Step 1 – Identifying Account/Groups descriptions that have been amended from the IRIS default
Step 2 – Tagging Text within the Data Screens
Step 3 - Generating the iXBRL Accounts to be sent to Companies House and/or HMRC
Step 4 – Tagging Report Items within the Tag Editor
Step 5 – Reviewing the Tagged iXBRL Report
Step 6 – Finalising the iXBRL Report
From the Accounts Production menu, click Reports
| Account/Group Descriptions
The following screen displays.
Select the relevant options for each section and click OK.
Close the report once the items have been reviewed.
Select Edit | Data Screens
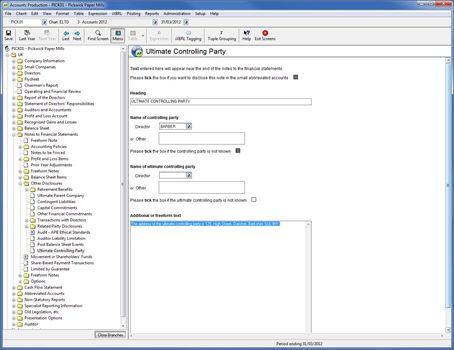
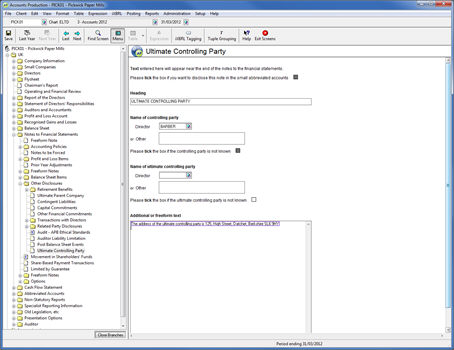
Select the relevant section of the report to tag from the Data Screen branches. For example, select Notes to Financial Statements | Other Disclosures | Ultimate Controlling Party
Enter the identifier of the Director by clicking the magnifying glass or enter the name as freeform information in the Other field (This screen cannot be saved where both fields are entered).
Complete the relevant fields.
The specific fields in Ultimate Controlling Party Data screens, for example, Name of Controlling party will be automatically tagged in the Tag Editor however, any additional or freeform texts entered within the Data screens must be manually tagged, if concept labels exist within the Minimum Tagging list.
Highlight the text entered in the Additional or freeform text field.
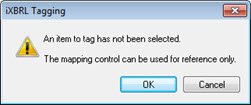
Click the iXBRL Tagging icon on the menu bar or right-click on the mouse and select iXBRL Tagging.
If no text has been highlighted when selecting
the iXBRL Tagging option, the following displays:
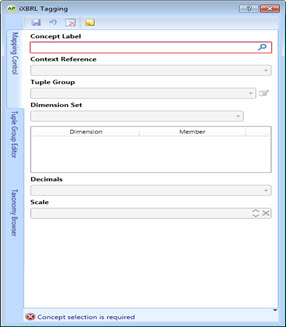
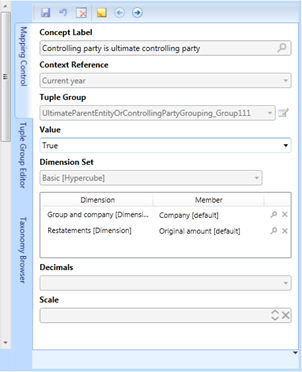
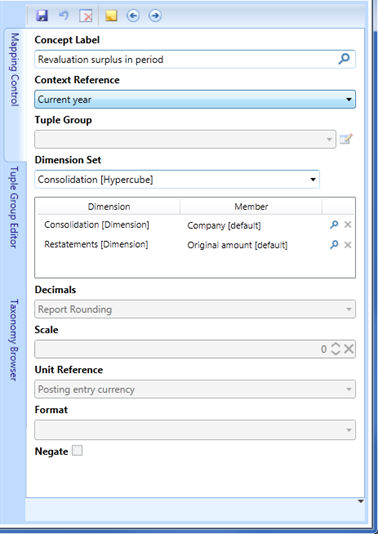
The following screen displays.
The following screen displays.
Select the relevant Context
Reference and click Save.
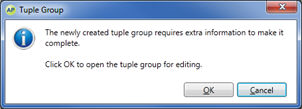
If the selected Concept label requires a Tuple Group, the following
screen displays.
Click OK.
If the selected Concept label does not require Tuple Group, go to step 13.
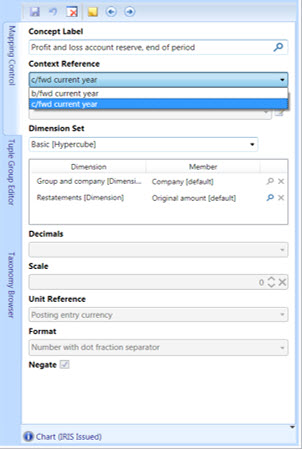
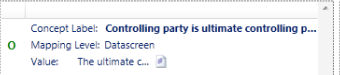
The following screen displays.
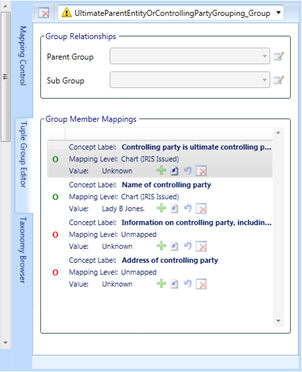
Double-click on the hash icon next to the green O under Group
Member mappings to confirm the mapping.
A new Tuple Group will be created and displayed within the Tuple Group
field as shown below.
Close the iXBRL Tagging screen by clicking the red cross in
the top-right of the screen.
The data screen shows the text which has been tagged highlighted in
a purple text box.
If other disclosures are required for tagging, select the appropriate data screen and complete.
Click Save to save the changes to the data screens.
Click Exit Screens.
iXBRL accounts generated for electronic filing to Companies House MUST comply with minimum tagging requirements set out within the taxonomy. Therefore, once the accounts have been generated and displayed within the Tag Editor, they should be tagged accordingly, prior to submitting to Companies House.
iXBRL accounts generated for Companies House use the same set of data as those generated for HMRC, therefore the majority of tagging carried out will apply to both sets of accounts and will therefore only need to be entered once. Where Abridged iXBRL accounts are generated for Companies House a small number of report items which wouldn’t be reflected on a full set of accounts, may need to be tagged in addition to those used on both sets.
All accounts must be reviewed with care to ensure they meet the requirements made on the directors by the Companies Act. If accounts cannot be filed electronically due to the restrictions imposed by Companies House then they must continue to be submitted by paper.
Prior to generating the iXBRL report, complete and finalise clients Annual Accounts - Posting | Posting Entry Status | Finalised Status | Reports finalised
Things to consider before iXBRL accounts are generated for Companies House:
Size of Company -select Edit | Data Screens| UK | Company Information |Size of Company
Choice of Report -select Edit | Data Screens| UK | Company Information | Choice of Report - Audit, etc.
Country for Legislation -select Edit
| Data Screens| UK | Company Information |Country for Legislation
To display a list of reports available, click the magnifying glass next to the Report/Document field.
Confirm that the correct posting entries have been selected by default or make your selection in the Current and Last field.
When generating iXBRL accounts to be submitted electronically to Companies House, the Copy to be filed at Companies House? option MUST be selected (this is selected automatically for Abridged Accounts). When generating iXBRL Accounts to be submitted electronically to HMRC, leave this option deselected.
Select Copy to be filed at Companies House if you want to produce accounts for submission to Companies House. Selecting this option will cause the Tag Editor to launch in Companies House mode. This mode includes the functionality to electronically file the iXBRL accounts with Companies House.
For more help on a specific item/option on this screen, click the ? top right-hand side of the screen.
The Copy to be filed at Companies House option and the Submit and Submission Status options are available for Limited companies ONLY. When Submit is selected, a list of submissions which have been created (either via the Tag Editor of iXBRL Editor) but not yet submitted to Companies House, will be displayed. A submission will display here where Submit Later is selected within the Tag Editor or iXBRL Editor after selecting Create Submission.
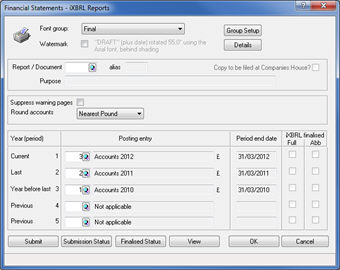

Click OK to continue.
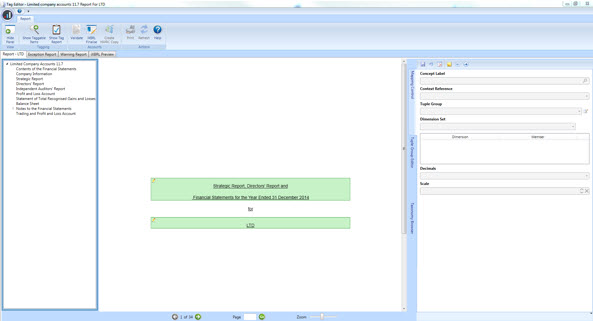
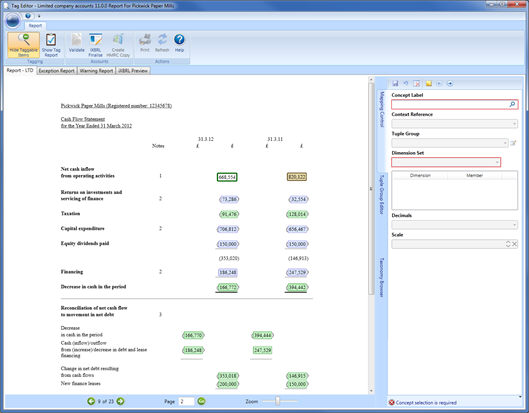
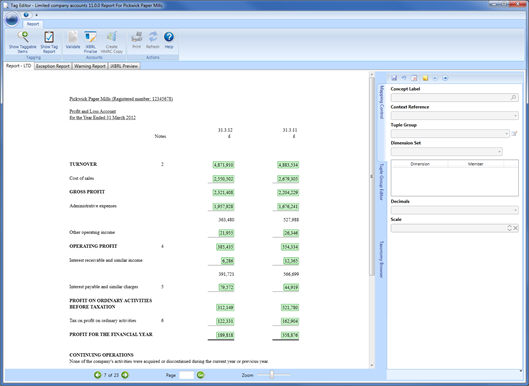
The Tag Editor screen displays:
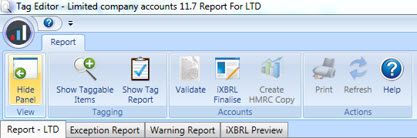
For iXBRL Accounts to HMRC, the options on the tool bar display as
follows:
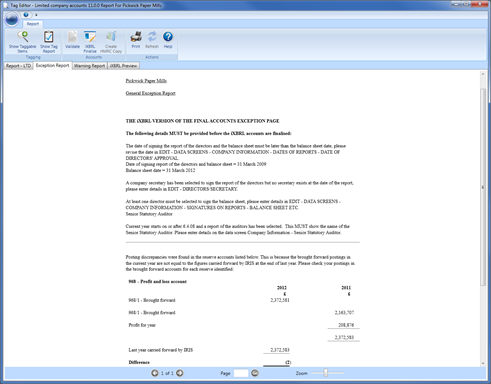
The Exception
Report tab displays exceptions within the report that need
to be modified before the iXBRL report can be finalised.
See example below:
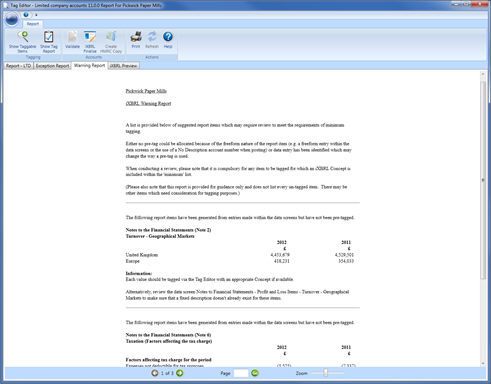
The Warning Report tab gives details of report items which have not been pre-tagged and may require manual tagging, if there is an appropriate concept in the minimum tagging list. See example below:
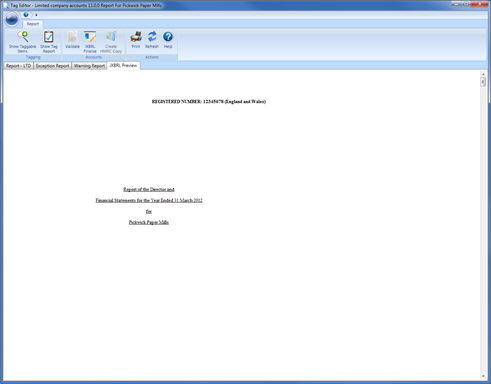
The iXBRL Preview tab displays the full report in a readable format that will be sent to Companies House, see example below:
Things to consider when tagging your iXBRL accounts:
Concept labels for the totals cannot be amended (for example, operating profit and profit after tax).
The pencil icon next to the Notes (on left), indicates that the concept label of the notes can be amended.
If required, reports can be printed from the iXBRL preview tab, not from the Reports tab.
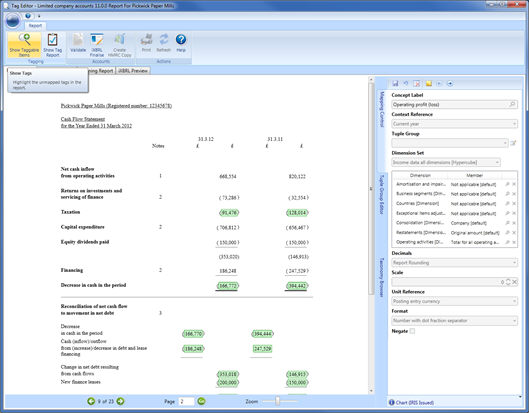
Within the Tag Editor screen, click the Report-LTD tab.
From the toolbar, click the Show Taggable Items icon.

 .
.
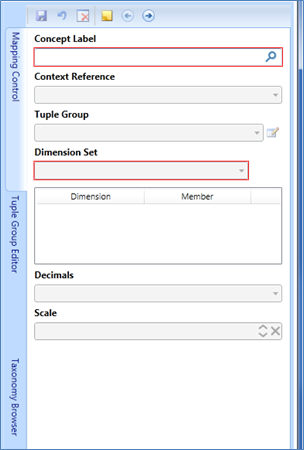
The following screen displays.
Apply default - this option reverts the tagged item back to the IRIS default; this option only applies to pre-tagged items of the report that have been amended.
Clear mapping – this option clears mapped tags that have been applied.
Show/Hide notes – this option shows or hides notes.
Next/Back - this option selects the next or previous item to be tagged.
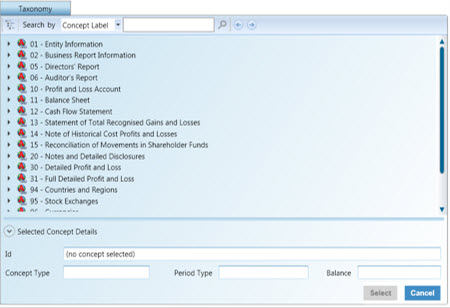
When searching in the mapping control for the appropriate iXBRL Tag, you are now able to change the drop-down option ‘Search by’ to either ‘concept label’ OR ‘references’ to switch between the standard search facility or to search by Legislative references.
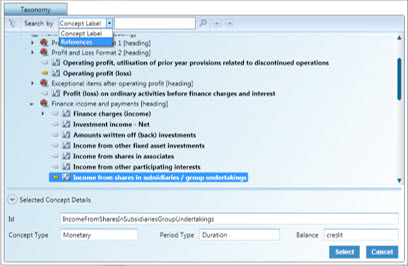
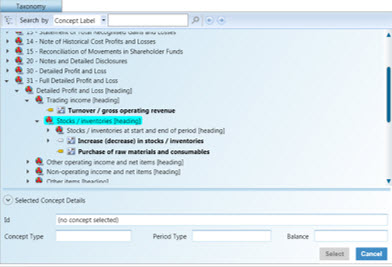
When selecting a concept label within the Taxonomy, users should be aware that if the tag icon (on the left-hand side of the chosen concept label) is shaded in grey, then it is available to be selected. However if the icon is shaded in yellow, the concept label is already used in the report; therefore an alternative concept label must be selected.
 Available
 Not available
If required select the relevant option from the Context Reference drop-down list.
Click Save.
The following dialogue may display:
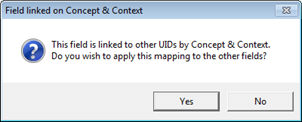
The Concept label link fields
in the Tag Editor. That is, Current year figure to Last year. Therefore,
if Yes is clicked, last year
figure will be automatically tagged with concept label selected for
current year. If No is clicked,
users are advised to manually tag the last year figure.
The Tag Editor is a tool which allows users to apply tags that conform to the UK GAAP to a set of iXBRL accounts produced and generated within the software. Once the appropriate tags are applied, a submission for Companies House can be created.
Companies House will only accept submission of electronic accounts prepared under UK GAAP. The iXBRL accounts produced for HMRC will also be acceptable to Companies House. All the information required by Companies House is included in the iXBRL accounts you send to HMRC.
The iXBRL tagging requirements are the same for both HMRC and Companies House. All the accounts information required by Companies House is included in the UK GAAP minimum tagging list specified by HMRC. However, where your company qualifies, you may still choose to submit abridged iXBRL accounts to Companies House created as a subset of the data you provide to HMRC.
For iXBRL accounts which are to be submitted to HMRC or Companies House, there is a set of minimum tagging requirements which must be adhered to. Each report item, for which a concept exists within the minimum tagging list, must be tagged. When iXBRL accounts are first generated a number of report items will be tagged automatically by default. The remaining report items should be reviewed and tagged accordingly.
The report will display the tagged items in GREEN. If any of the report items which have default tags require amendments, the items can be selected by left-mouse clicking on the highlighted box or by double clicking into the box.
When items are selected, if links exist to other report items, the report item will be highlighted in a different colour, that is, BROWN, indicating the items are auto linked. The link is normally between the current and last year figures.
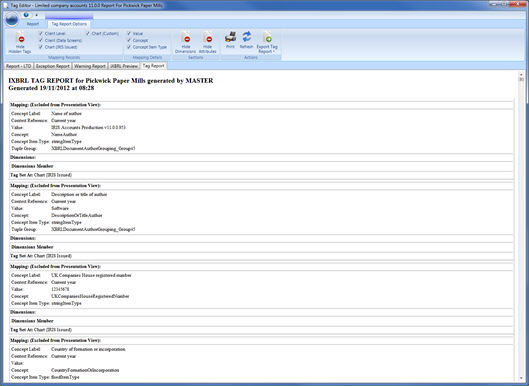
Selecting Show Tag Report will display the Tag Report as a new tab (window) within the main screen. The Tag Report displays an overview of iXBRL tags and associated attributes that will be contained within the iXBRL report created for HMRC. The report generated provides detailed information regarding all of the tags that have been applied for the client within the Tag Editor screen. This report is useful for audit purposes and can be exported as a CSV by clicking the Export Tag Report icon.
The Tag
Report tab is generated:
Go to step 3 to generate the Tag Editor screen.
Selecting Validate will perform validation on the tags applied to the report and a report will be generated which shows the Tag Errors that needs to be reviewed prior to finalising the iXBRL report.
The Tag Errors tab will contain a grid view of all the report items where problems have been found. Each record will provide details on the Concept, Value and Attributes selected against the report item when mapped within the Mapping Control.
Selecting an item in the grid will display more detail in the bottom half of the window which gives an indication as to the action required to clear the error. Once selected, the Mapping Control will also display the details for that report item. The mapping can be updated /cleared here if required. Double-clicking or selecting View Report Item will jump to the report item within the Report tab, where the details can also be corrected as applicable.
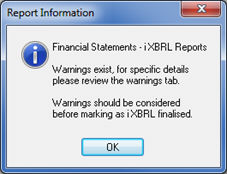
Upon successful validation, the following message displays.
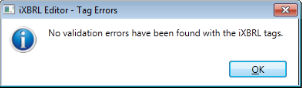
The Validate icon displays as  .
.
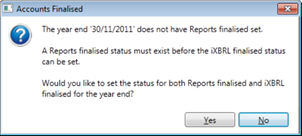
Click the iXBRL Finalise icon.
The following screen displays, (only for Companies House submissions).
Click Yes.
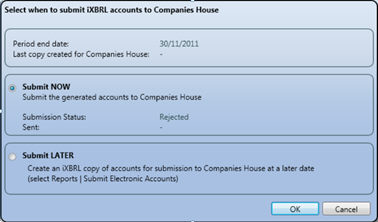
If you are producing iXBRL accounts for Companies House, follow Creating a submission for Companies House. If you are creating a submission for HMRC, follow Creating a submission for HMRC.
For users who would like to submit
the accounts at a later time, select Submit
LATER. This option creates an iXBRL copy of the accounts for
submission to Companies House at a later date. To submit the Electronic
accounts, select Reports | Submit
Electronic Accounts or Reports | iXBRL and CH E-File | Select Submit
IRIS displays a message ‘Transmitted successfully’. This DOES NOT confirm the accounts have been Accepted. To confirm the status of the submission, select Reports | iXBRL and CH E-File | Submission Status. Select Query Status to poll to Companies House.
This completes the creation of the submission to Companies House (ignore the subsequent steps if you are not creating a submission for HMRC).
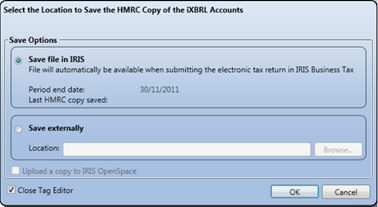
The following screen displays.
Save
file in IRIS – This allows the iXBRL account file to be automatically
attached when generating the Electronic CT600 in IRIS Business Tax.
Save externally – This allows the
iXBRL accounts file to be saved in a specific folder.
Click OK.
The process summary is for easy reference, full details are shown above.
Complete and ‘finalise’ clients Annual Accounts (Posting | Posting Entry Status | Finalised Status | Reports finalised) within Accounts Production.
Generate iXBRL Accounts within the Tag Editor (Reports | iXBRL and CH E-File), complete iXBRL tagging and check the content of the accounts making sure all exceptions and errors are cleared prior to submission.
Click the iXBRL finalise icon, clear any Tag Errors reported after Validation.
Select Create Submission | Submit Now to submit iXBRL Accounts to Companies House prior to deadline.
Companies House receive the electronic Accounts via iXBRL service.
IRIS displays a message ‘Transmitted successfully’. This DOES NOT confirm the accounts have been Accepted.
A 'poll' for the status MUST be performed within IRIS by selecting Administration | Launch E-File Scanner. For more information see - Tracking and Monitoring.
Companies House send response and reason code back to IRIS where appropriate.
Confirm the ‘Status’ of Accounts within IRIS by selecting Posting | Posting Entry Status | Submission Status.
If Accounts are ‘Rejected’ and no reason code is provided, contact IRIS Support for assistance (or review the KnowledgeBase on our Website).
If accounts have been ‘Rejected’ and need to be re-generated and re-submitted, make amendments and repeat steps as above.
At regular intervals check the Status
of ALL client’s accounts by selecting Reports
| Status Audit Report.
Click here for a glossary of terms relevant to iXBRL.