|
 |
|
|
The Extract/Import options are similar to the Extract/Replace facility in Accounts Production. Use it to extract a copy of the client's data on to a floppy disc and then import it on to an IRIS database on another computer. This is useful where:
Work is to be carried out off-site using a laptop or home computer (a licence is required for the extra screen); or
To take clients from one IRIS database and add them to another IRIS database.
The process will normally make use of floppy discs or memory sticks but the client may be extracted to a zip drive or hard disc for network transfer or attachment to an email.
Do not try to import a client exported from a newer version of Personal Tax to an earlier version eg exported using version 8.2 and imported into version 8.1. Data that has changed format will not be imported correctly because the older version will not recognise the structure of the new data. IRIS is able to import clients that have been exported using an older version of IRIS because it is backward compatible. For example, a client exported using version 8.1 may be imported into version 8.2. We do not recommend attempting to import clients exported using an IRIS version that is more than one year old (more than two versions different).
A list of data items extracted is given at step 4, below.
Select a client before selecting Extract from the Client pull-down menu. If no client has been selected, IRIS automatically displays the client browser.
IRIS will search for the drives available. There will be a short pause and some grinding noises from the floppy disc drive. It does not matter if a floppy disc has not been inserted at this stage.
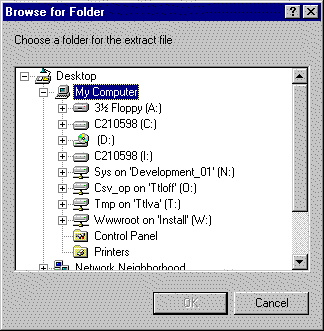
This is a "tree-view" of the drives available on the computer:
Use the mouse to point at the drive (usually 3½" Floppy - the A: drive) or click on the [+] sign to the left of the drive to show the next level of "branches", the folders (or directories in DOS terms) within that drive.
If the floppy drive (A:) has been selected, insert a floppy disc before clicking OK.
Click OK when the appropriate drive or folder has been highlighted.
If the drive/folder selected already contains a copy of the selected client, confirm that it is to be overwritten. Click Yes to overwrite the existing extract file or click No to select an alternative location.
All the personal tax data for the client is extracted.
This includes:
Spouse's id, name and address etc;
Identifiers, names, addresses etc of all businesses linked to the person. This will include past and present employments, trades and partnerships;
Tax data for all SA tax years; 1997 onwards;
Administrative information (client details, tax return dates and client account). From version 7.7 onwards all administration data is included in the extract/import process. Any client's data extracted prior to version 7.7 will not include administration data.
All capital asset data;
Details of any children registered for an APA claim.
The following is not extracted:
Personal pension planner information;
Lloyd's underwriter data.
Internet submission details.
The process does not take long and the data file will be quite small (under 10Kb in most cases). The filename will be the client identifier with the file extension .XFR. This file may be emailed to another location for import to another IRIS database. Click OK to confirm the extract procedure is complete.
This process differs from the replace option in Accounts Production. It is not necessary to set up the client before it is imported. IRIS Personal Tax automatically creates the client using the same identifier used when it was extracted. It will also create all associated identifiers (spouse and any businesses that the client is or has been involved with). If the associated identifiers already exist, a link will be established with that business.
It is recommended that the extract file be saved and emailed to a secure location.
This is a "tree-view" of the drives available on the computer:
Use the mouse to point at the drive (usually 3½" Floppy - the A: drive) or click on the [+] sign to the left of the drive to show the next level of "branches", the folders (or directories in DOS terms) within that drive.
Click OK when the appropriate drive or folder has been highlighted.
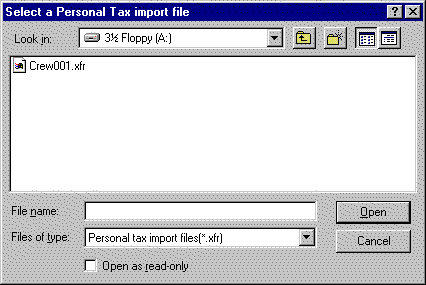
A list of extracted clients is displayed:
Double-click on the client or click once and then click Open.
If the client selected already exists on the IRIS database, all of its data for all tax years will be deleted and replaced with the data in the extract file. Click Yes to replace the existing file or click No to exit from the procedure.
The process does not take long. Refer to step 4 of the extract process, above, for a list of data items included in this process.
When running the extract a prompt displays warning that jointly held income will be lost during the Import process.
It is possible to clone a Personal Tax client by using the extract and import options, see above This can be useful for what-if? planning; leaving the existing client's data untouched and trying scenarios using a copy of that data.
To clone a client:
Follow the steps for extracting a client (for example extract client DOLLY)
Change the identifier of the client (change the id from DOLLY to DOL01)
Import the extracted client (import DOLLY)
The result is two clients, one with the original data (DOL01 in our example) and a clone (called DOLLY). Note that the original client's data is now under a different identifier (DOL01 in our example).
Watch out for the following shortcomings in the cloning process:
A married client will be linked to the same spouse. To avoid problems, change the spouse's id after extracting the client (step 1) but before importing the clone (step 3).
The client will be linked to the same businesses. This is of no real consequence for an employee but will cause problems with sole trades and partnerships. It will also cause problems for directors and officers where IRIS Accounts Production is used to prepare the accounts for the business.
If the clone is deleted soon after its creation, this will not matter. If the clone is to be kept, the ids of the businesses should be changed at step 2 of the process above. This could cause some confusion so it may be necessary to follow the following steps for long-term clones. The aim being to keep the original client and associates with their original identifiers and give the clone(s) new identifiers.:
For example, client John Adams ADAMS J runs self-employed business Adams & Co A001 and is married to Mrs Clair Adams ADAMS C.
Extract ADAMS J
Change id ADAMS J to ADAMS JX
Change id ADAMS C to ADAMS CX
Change id A001 to A001X
Import ADAMS J (this will create ADAMS J, ADAMS C and A001)
Change id ADAMS J to ADAMS JXX
Change id ADAMS C to ADAMS CXX
Change id A001 to A001XX
Change id ADAMS JX to ADAMS J
Change id ADAMS CX to ADAMS C
Change id A001X to A001
The result is that the original client ADAMS J, his wife ADAMS C and his business A001 remain under their original identifiers, the clones are ADAMS JXX, ADAMS CXX and A001XX.