 |
 |
|
|
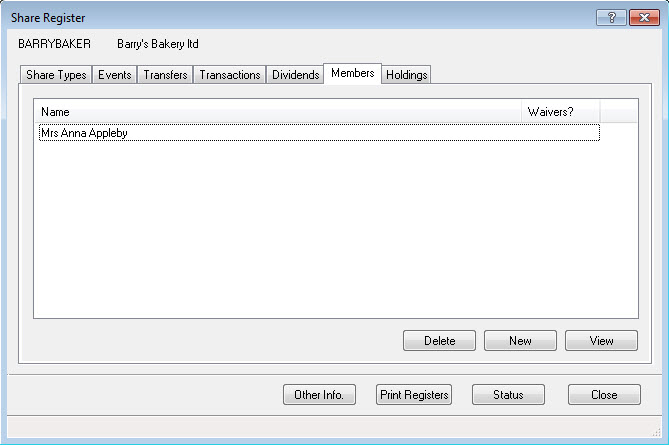
This screen shows a list of all past and present members for the client identified at the top of the share register.
On the Members tab, go to New. The New member screen displays. Choose an IRIS client (one set up on the IRIS basic database) or an Other shareholder (see below on how to create an other shareholder).
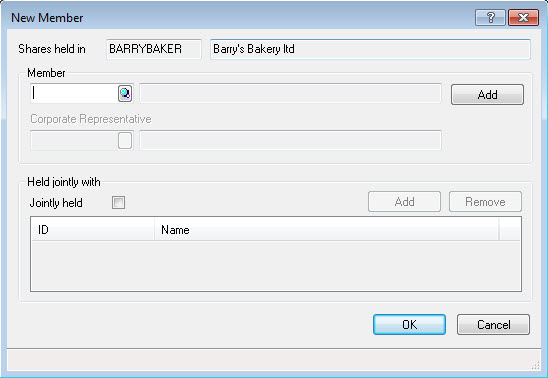
If the new member is an IRIS client, click the magnifying glass next to that field, highlight the relevant individual and click Select. If the person does not exist on the database yet and therefore is not listed, click New to set up their details. Once the person has been created and given an identifier they will appear on the client list, highlight their name and click Select.
If the new member is an Other Shareholder, click the magnifying glass next to that field and a People and businesses who are not clients screen displays with a list of non-clients. To create a new non client click New at the bottom of the screen and enter the details required if they are a person or a business, once complete click OK. The non-client should then be displayed on the list, highlight them and click Select.
On this New member screen there is also the option to identify whether the member holds shares jointly or not jointly. The default is Not jointly but if the shares are held jointly select whether it is with an IRIS client or Other shareholder.
Click OK to link the selected member to the company detailed at the top of the screen or Cancel to abandon this link.
To see details of a shareholder, highlight them on the list and click on View, the Shareholder Details screen displaysr. This screen shows all the shareholdings that this member has within the selected client.
Options on this screen:
In the top section there is the option to make the shareholder a joint shareholder. Once this is selected the relevant joint member can be selected from the IRIS client database or the Other shareholder database, as relevant.
There is also the option to View Waivers, see Creating and printing Dividend Waivers. The joint shareholder option cannot be changed if a dividend waiver exists against the member, the waiver will need to be removed before being able to change the member to joint shareholder or vice versa.
The rest of the screen lists the various types of shareholdings the member has with this company and what the total of each share type held is.
Transactions, gives a list of the transactions that make up this members total shareholding including the date that the shares were issued. To see the details and make changes click View, or to set up a new transaction for the member click New, click Cancel to exit out of the screen back to the Shareholder Details screen.
Certificates, this works in the same way as running certificates from the Share types tab, the difference here is that the only certificates that are shown are specifically those related to the selected member.
Delete removes the association of this member with this company. A member can only be deleted from this company when they have no transactions allocated. If transactions have been allocated, delete them and remove the member.
View, highlight a share holding and click View, this will display the details of the shareholder, for example, details of joint shareholdings and so on. On this screen a joint shareholding can be set up by clicking Make Joint. If a joint shareholding is already set up, there will be options for Amend Joint or Make not Joint.
Save, this option saves any changes that are made to this member that is, if the member is made into a joint member or the waive dividends option is altered then clicking OK will save these changes.
Close, this exits the Shareholders details screen, returning to the Members tab.
The non client database is usually accessed through the set up of a transaction or a member by selecting the magnifying glass next to Other shareholder. This database is for entering names and addresses of individuals/businesses that are not currently clients but are needed to complete the Share Register.
By clicking this magnifying glass a screen called People (and businesses) who are not clients displays with the following options:
Print displays a screen for People (and businesses) who are not clients report output. There is the option to send the report straight to Printer, PDF, Word processor or Screen.
New displays a screen called Person/Business who is not a Client, if the client is a person, make sure that the Person is selected. If it is a business, select Business. Input the details of the shareholder, for example, name and address and so on. If the address is shared with another client and has already been set up on the database, at the bottom of the screen select Use Address Already on Database and then click Find Address. A screen displays called Addresses. Scroll down the list of addresses until the correct one is found, highlight it and then click Select. The address will display on the Person/Business who is not a Client screen. Once this screen is filled in click Insert and this shareholder will then be available for selection from the People (and businesses) who are not clients screen.
View a member on the list needs to be highlighted. View shows all the details set for this non-client, that is, full name and address. Changes can be made if necessary, click Update to save such changes. There is also the option to Make client which will remove the non-client from this database and include them on the client list with an identifier.
Select a member on the list needs to be highlighted; Select identifies to use this non-client. The details will be entered into the relevant field from which the non-client database was accessed.
Close exits the non client database without making any selection.
In the Share Register, select the Members tab, highlight the member that is waiving their dividend and click View. The Dividend waivers present option will be selected if there are any waivers already set. To see what waivers are set or to create a new waiver click View waivers.
The Dividend waivers screen displays with the following options:
New to create a new dividend waiver.
There following new waiver options are available:
All shares held in this company - means that a dividend will not be paid to this shareholder at all.
All shares of type - click Type to select the share type that the shareholder(s) will be waiving their dividend for.
All shares in holding - click Holding in order to select the holding that the shareholder(s) will be waiving their dividend for.
Part of a holding - click Partial to select the holding for which some shares are being waived. Once the holding has been selected insert the numbers of shares from this holding that are being waived in the number field.
There are two radio buttons allowing the selection of which numbered shares within this holding are being waived.
The two choices are:
Numbered from the first share in the holding or
Numbered to the last share in the holding
Specific dividend - at the end of this field click Dividend to select the actual dividend that the shareholder(s) will be waiving. If the dividend is not in this screen click New to create it.
For dates from … to … inclusive - this can be used in conjunction with the first 3 options on this screen. That is, if All shares held in this company is selected with dates entered then the waiver will only apply within the stipulated dates. If no dates are entered then the waiver is ongoing.
View to display the details of the highlighted waiver.
Print Deed will open a Deed of Waiver of Dividends using Microsoft Word.
Delete will delete the viewed waiver.
Save is for if changes need to be made to this waiver.
Cancel is to close this screen without saving any changes.
OK is to save the waiver details entered. Cancel is to abandon the setup of this waiver.
Cancel is to exit the Dividend waivers screen back to the Shareholders details.