Lock the system
IT Manager Practice Admin
There may be occasions when you want to lock the system to prevent user access, for maintenance purposes.
Once set, staff members will be notified via a browser message that the system will be locked. The message will continue to be displayed when people navigate from page to page.
At the time set for the system to be locked, all users except those in the Access Group will be logged out of the system and will not be able to log in until the lockout details have been cleared.
-
Select Admin > Task pad from the menu, then click System Lockout Settings in the System Administration section.
-
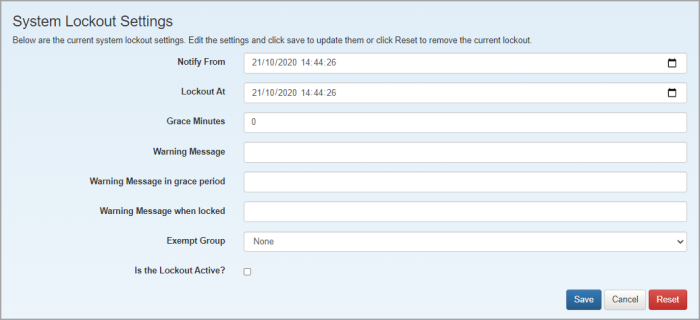
Apply the settings as follows:
-
Notify From - select the date and time that the notification messages should start.
-
Lockout At - select the date and time that the system is to be locked.
-
Grace Minutes - enter number of minutes grace that users have before being logged out after the lockout time.
-
Warning Message - enter the reason for the system lock that you want to be displayed in the locking message displayed to system users.
-
Warning Message in Grace Period - enter the message to be displayed to system users when the grace period is reached.
-
Warning Message when locked - enter the message to be displayed when a user tries to access the locked system.
-
Exempt Group - select any group of users who will not be affected by the system lockout.
-
Is the Lockout Active? - select this checkbox to activate the lockout which will be applied based on the date/time selected.
-
-
Click Save.