Start a payrun
-
Click on the Payrun icon.
-
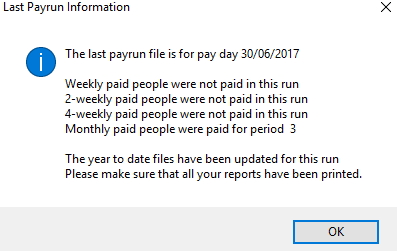
Go to the Payrun menu and select Start a New Payrun. You will see a warning message confirming the last payroll date.
-
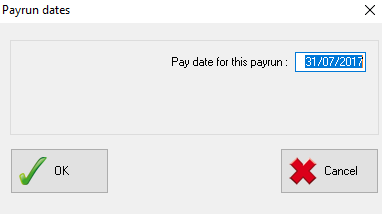
Click OK to continue. The next pop-up box allows you to enter the pay date.
-
IRIS Payrite will suggest a day based on the normal paydate set in the system setup module.
HMRC guidelines state that you should enter your USUAL paydate here, even if you are paying employees early because the usual paydate is a non-working day.
-
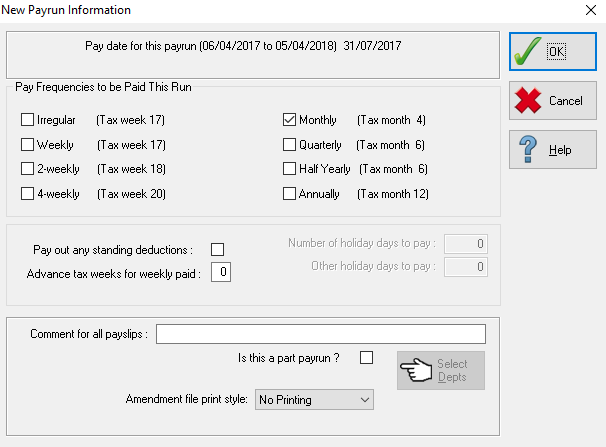
The Pay Frequencies to be Paid this Run shows the pay frequencies that will be paid in the payrun. You can amend the options here by adding a tick to the frequency that you wish the pay.
This setting will automatically default to the pay frequency set for the payroll in System Setup.
If you need to globally advance any tax weeks in a weekly payroll – for example, if there is a company shut down for a couple of weeks – then you should enter the amount of weeks to be advanced in the Advance Tax Weeks for Weekly Paid field.
You should enter the number of weeks to be advanced rather than the total number of weeks being paid.
A global message to be printed on all payslips can be entered in the Comment for all Payslips field.

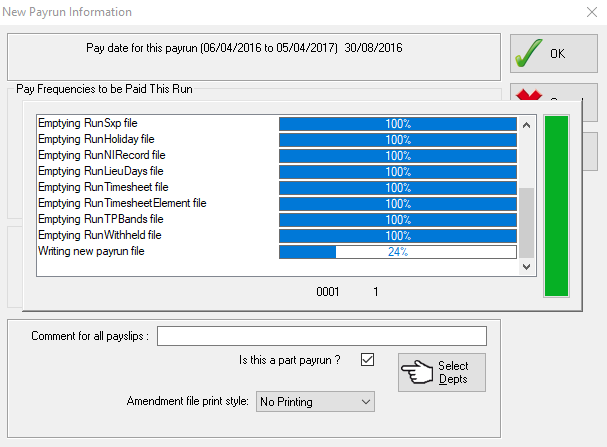
If you wish to produce a summary report after the initial payroll calculation, select Print File from the Amendment file print style field.

-
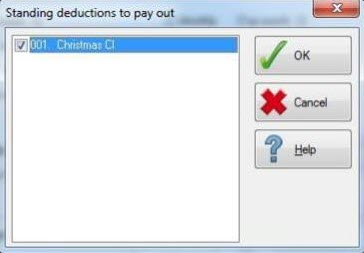
Enter a tick in the Pay Out any Standing Deductions box if any Year to Date balances for standing deductions are to be paid out for all employees, e.g. a Chritsmas Saving Club.

A further window will appear for the user to select which deductions are to be paid out.
-
Tick any deductions to pay out and click OK to return to the previous screen.
-
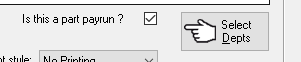
If you are doing a part payrun – for example, you only want to run the payroll for certain departments, you should check the Is This a Part Payrun flag.
-
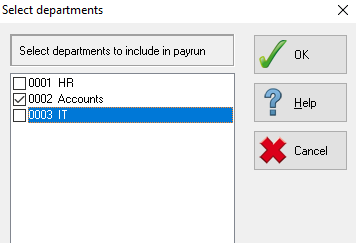
Click the Select Depts button to choose departments to include on the payrun, this opens a pop-up screen.
-
Enter a tick against all departments you wish to include in the payrun and OK to return to the previous screen.
-
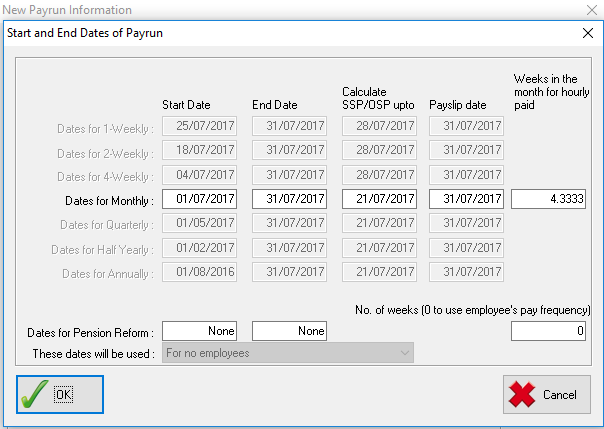
The next screen includes calculation dates for the payroll. Although the dates can be amended, generally once the pay run has been run for the first pay period and the correct parameters for the payroll have been set in System Setup the user should only need to check them.
The dates available on the screen are:
-
Start Date – the start date of the period being paid
-
End Date – the end date of the period being paid. IRIS Payrite uses this date to determine the end date for the pay period for tax SMP, SAP and SPP purposed
-
Calculate SSP/OSP up to – the date that SSP should be paid up to. Long term sick can be entered into IRIS Payrite but SSP will only pay up until the date specified.
-
Payslip date – the date that will print on the payslips. This date can be amended when the payslips are actually printed.
-
Weeks in the month for hourly paid – enter the number of weeks to pay hourly paid individuals who have hours per week on their base data record (only required for monthly payrolls). IRIS Payrite defaults to 4.33 weeks, but the company may prefer to run a different cycle in line with accounting periods.
-
-
Click OK to continue, IRIS Payrite will now clear any previous run figures and run an initial calculation for the new period.