Create an OSP history import
Before you start, you MUST ensure that you have set up the import codes in IRIS Payrite to match your import file. If you have not done this, please refer to the guide in the previous section.
-
Click on the Import / Export icon.
-
Click the + button or double-click on New Layout.
-
Name the template to something you can easily recognise.

-
Set the parameters for file type according to the format of the file you are importing.

-
Check the Does CR or LF end record? box, and set the Inverted Commas to Around Text Fields.

-
Set the Date Format and Time fields as fields to match the formats in your import file.
These will be date format 4 for DD/MM/YYYY format dates and Dec hrs with decimal point for hours fields expressed as decimal.
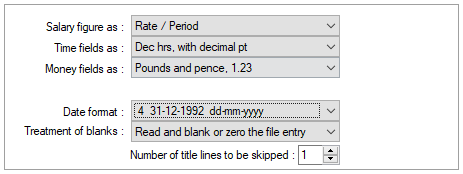
Set the Treatment of Blanks option to Read and blank or zero the file entry, then set the Number of title lines to be skipped to reflect the amount of header lines in your import file.
The Salary Fields As setting can left as the default setting as you would not import any salary details on this sort of import.
-
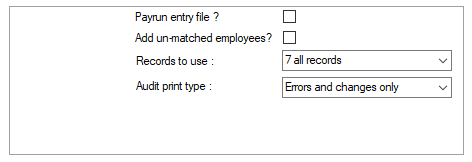
You can leave the option boxes at the bottom of the screen unticked, as we do not need to set any of these when importing the OSP history.
-
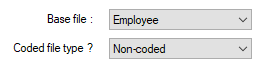
Go to the Variables Layout tab.
-
Set the Base file to Employee and leave the Coded File Type as Non-Coded.
-
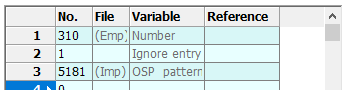
Map out the template by setting the variables according to their position in the file. As an example, the file mapped here will be the import file we looked at earlier.

The only fields we need here are the employee code and the history pattern, so we will ignore everything else. We need to use the variable 5181 for the import.
-
Remember, even though the pattern in the import file covers twenty-two entries in the import file, IRIS Payrite will treat them as one.
-
Click Save.