Create a Quick Query
In this section:
Create a Quick Query
-
Go to System Tools > Exports & Reports > Quick Queries and select Create New.

Field Search
-
From the Form dropdown, select the first form containing fields you want to display.
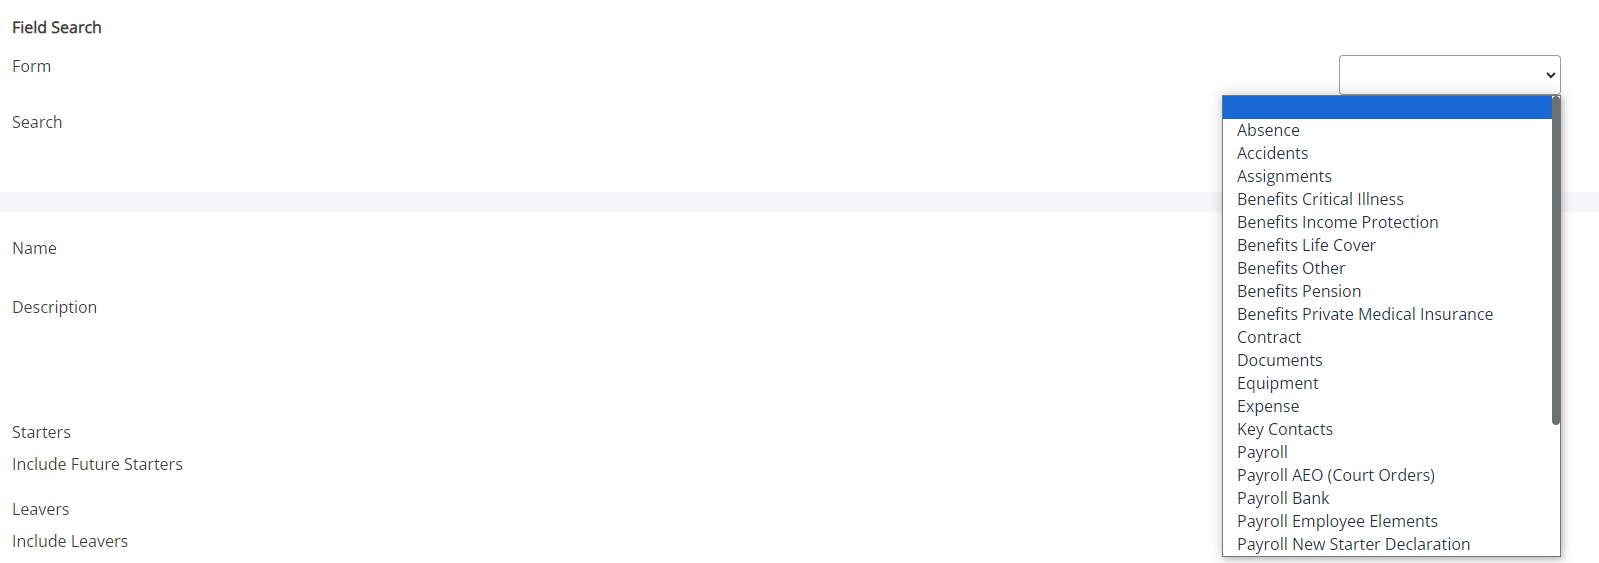
The screen populates with the available fields from the form you have chosen.
-
Select each field you require. The Selected Fields list updates with your choices.

Selected Fields
-
Enter the position number into the box next to each field to reorder them.
You can also use the up/down arrows to do this.
To remove a field from the list, select the bin icon next to the field.
-
To add fields from another tab to your query, return to the Form dropdown and select the next tab.
The screen repopulates with fields from your chosen tab.
Select each field to add to your query.
-
Repeat this process until you have added all fields to the Selected Fields list.
-
If you do not need to add custom fields, update the field's settings such as changing its display name, apply a query filter, or filter on dates, you can skip to running your query.
Custom Fields
This feature may not be included in your package. Check with your Account Manager to make sure you have access.
If you do not have access to the Custom Fields feature, go to the Ordering and grouping section.
Custom Fields allow you to combine fields together to make a new field.
By multiplying number fields or combining text fields, you can customise and refine your quick queries even further. Although, you can only use fields which you have access.
With Custom Fields, you can:
-
Combine text fields to create a new text field.
-
Replace text fields with new text, depending on conditions.
-
Multiply values together to create a new value.
-
When creating a quick query from System Tools > Exports & Reports > Quick Queries > Create New, a Custom Field option displays once you start adding fields.
-
Select Custom Field.
A pop-up configuration screen appears. Here you can build your custom formula fields.
Only select Custom Fields once you have chosen all other fields to use in your query
Field Description Selected Fields Choose an option from the dropdown list of fields available to use in your Custom Field (those you have selected in your query).Action Choose an available action from the dropdown. Apply Select to paste the details you have selected into the Custom Field box. Type Choose the field output type from the dropdown list. Custom Field This is the area where the Custom Field creates. Enter information directly into the box. Check Select this to make sure the formula you have created is valid. Save/Close Save your work and return to the Quick Query screen.
-
You can use the following functions in your formula:
For Number fields:
-
+
-
-
-
*
-
/
-
IF/THEN
For Text fields:
-
You can combine several text fields. Select Apply several times to add multiple fields.
-
REPLACE - Replace existing text with new text
For Date fields:
-
DAYS - number of days between dates.
-
Ordering and grouping
You can add various settings to each field you have selected in your query.
-
In the Selected Fields section, select the field name.

-
Complete the fields that display using this table as a guide:
Field Description Display Name To display a different name within your query results, enter it here.For example, you may want Known As to display as Name.Order By Select either Ascending or Descending to order the query results using this field.You can only select 1 field to order by.Group By Select this box to group your results by this field.For example, group by Department to display your results per department.Hide Field Select this box to include the field in the query but not in the query results. 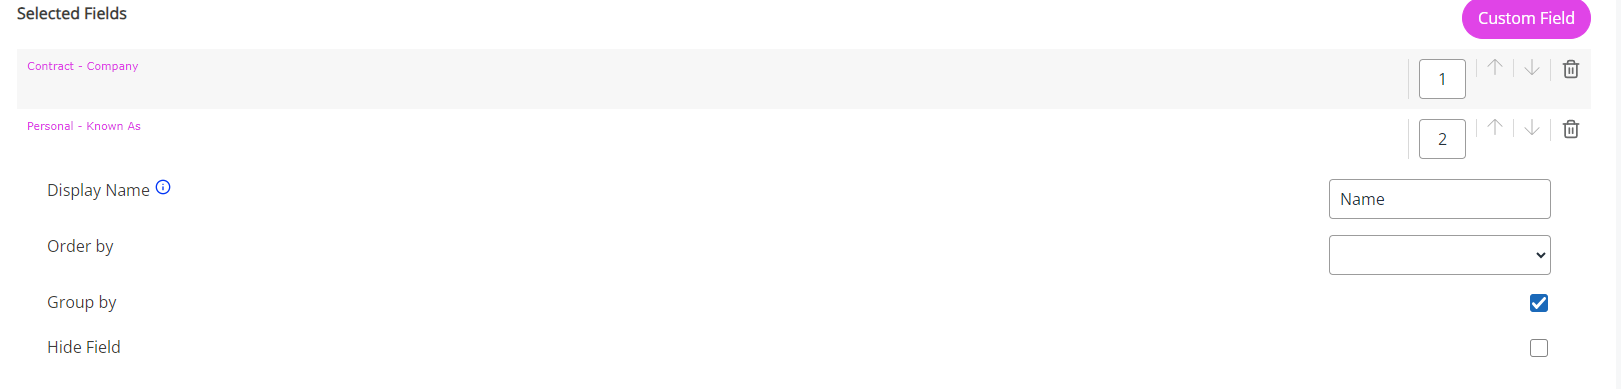
Apply query filters
Adding filters to the fields in your query allows you to tailor the data that appears in your results.
-
If you have not already, in the Selected Fields section, select the field name.
-
Complete the fields in the Query Filters section using this table as a guide:
Field Description Type When adding more than 1 row of criteria to a field, you must select the type of filter you require.-
Select AND to display results for one value and another.For example, Absence When an employee or worker is absent from work. This can be for a variety of reasons. – Date From is on or after the start of this week and on or before the end of this week. This shows results for anyone with an absence starting during this week.
-
Select OR to display results for one value or another. For example, employees within the HR or Payroll Department.
Filter Select an option from the dropdown. Value Enter the value you are basing the filter on.For example, you may add the Contract – Team field to your query, set Filter to Equal to, and in Value, enter Administration.This filters the query results to only show employees in the Administration team.Add Filter Select this after you have created your filter. The filter appears on your screen.A reminder also appears on the field in the list to show you it has active filters applied.Add more filters to these fields, if required. -

Filtering on dates
Dynamic Dates is a time-saving feature, which allows you to run a query for a period without editing it.
You must choose a search result which includes a Date for the Query Filters section to display the Dynamics Date dropdown.
To use a dynamic date alongside a query:
-
In the Field Search Section, select an option which includes date options. For example, Absence.
-
Choose a date option from the Search Results. For example, Date From.
-
In the Selected Fields section, select the field. For example - Absence - Date From.
-
In the Query Filters section, from the Filter dropdown, select On or After.
-
From the dynamic date dropdown, select Start of this week.
This allows you to view absences When an employee or worker is absent from work. This can be for a variety of reasons. which started in the current week.
The same idea applies for previous periods. For example:
-
From the Form dropdown, choose Payroll Employee Elements.
-
In the Search Results, choose Start Date.
This allows you to identify all elements with an effective date within a specific time.
You can use this information you have gathered to notify Payroll of any changes that need processing.
To do this:
-
In the Selected Fields section, choose Payroll Employee Elements - Start Date.
-
In the Query Filters, choose AND.
-
From Filter, choose On or after.
-
From Dynamic Dates, choose Start of this month.
Saving your query
-
Scroll further down the page and enter a Name and Description for your quick query.
-
Select if you want to Include Future Starters, Include Leavers, or Leavers Only in the query and add any dates (optional).
-
Use the Where Clause Builder (cog icon) to specify who you wish to include in the query results, or if you want to include all employees, do not build a clause.

-
From the Category dropdown, select where to save your query.
To add a new category, select the word Category and enter a new option within the associated Lookup Table.
-
To share your query with other users, select the Shared Query dropdown and choose either Editable or Read-only.
-
Editable - allows users to edit the query (add fields, amend filters etc).
-
Read-only - allows the user to run the query but not edit it.
-
-
Scroll to the top of the page and select Save.
After creating your query, you can then run it.
Run a Quick Query
-
Once you are happy with all fields and filters added, you can either save your query so that you can return to it later or choose Run Query for the query results.
-
If you save first, to run the query, from the Quick Queries screen, select drop-down on the required row > Run Query
The results displayed on screen are filtered and ordered based on the criteria you added.
-
At the top of the Query Result screen, underneath the query name, a Row Count displays, showing the number of records returned by your query.
-
-
To open the employee's Personal tab, select on either Forenames, Known As, Surname or Employee ID.
-
If required, navigate to any tab on the employee's record and select Query Results to return to your query.
-
-
Selecting Actions displays a list of options:
-
Use Query Results opens the Personal tab for the first employee in your query results.
Work your way through each employee using the back and fourth arrows. With the information gathered from the query results, review/update your employee records, if required.
-
Export to Excel - opens a spreadsheet for the query.
-
Export to PDF - creates a PDF of the query.
-
Print - prints a copy of the query.
-