Adding a new Profile
From the menu of the left-hand side of the screen select Users, Profiles & Roles then select Profiles. There are helpful tooltips if you hover over the below three areas to let you know what they relate to.

You should see a screen similar to the below – this may look different depending on the Profiles that are already set up by yourselves.
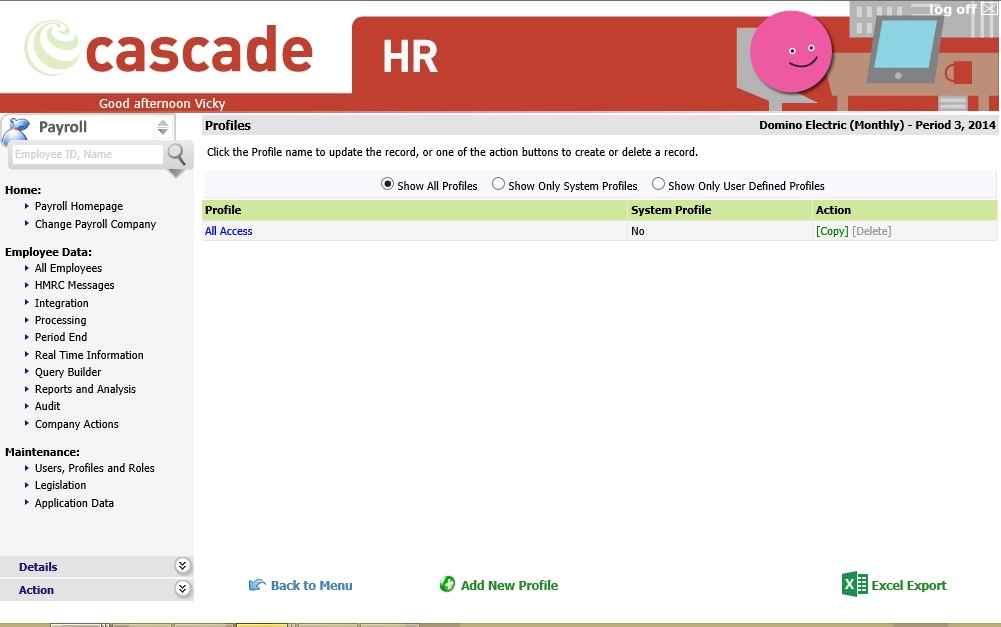
There are three views to the Profile screen. To change to another view simply select the radio button at the side of that option.
|
Item |
Description |
|
Show All Profiles |
Shows all the profiles available in the system, both User Defined and Fixed. |
|
Show Only Fixed Profiles |
Fixed profiles are in the system by default and cannot be deleted or changed. |
|
Show Only User-Defined Profiles |
Shows the profiles that have been created by you and your team. |
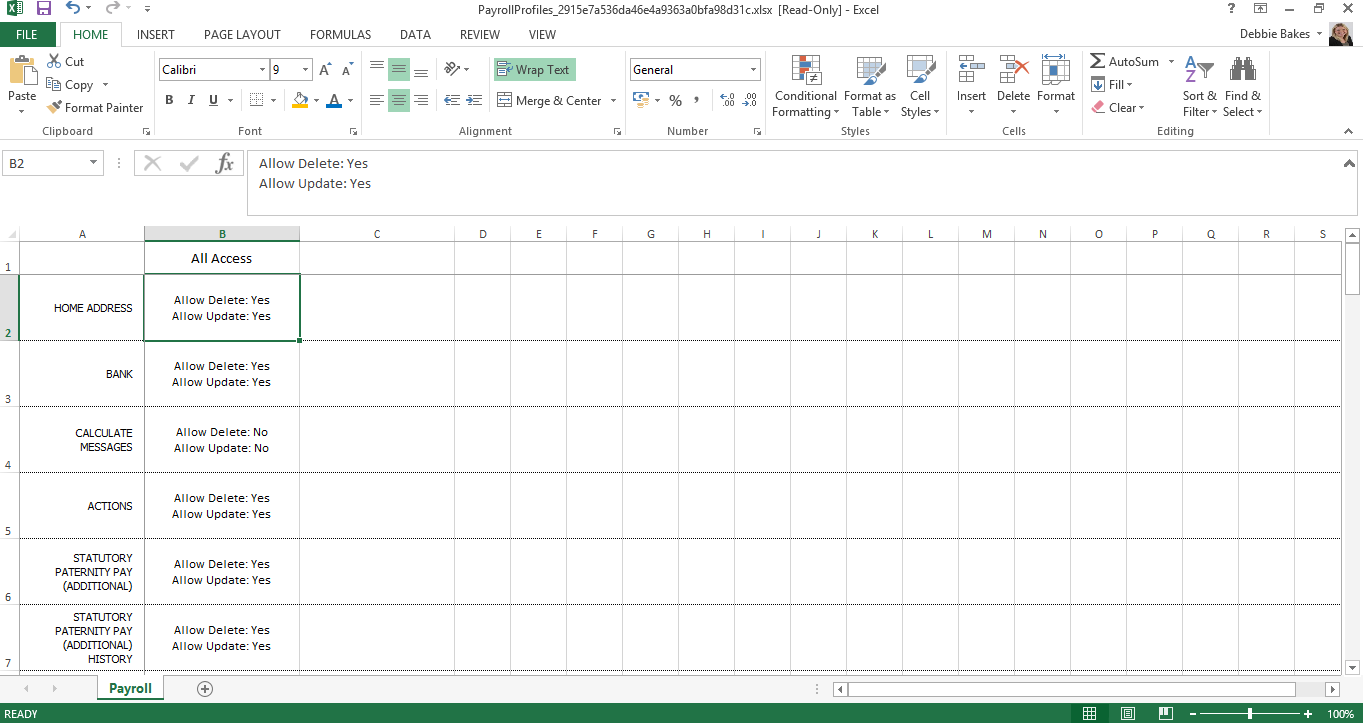
There is a very useful Excel Export option on the Profiles tab, once exported, this details the access granted to each Payroll Web Profile. This is a quick view of User Access.
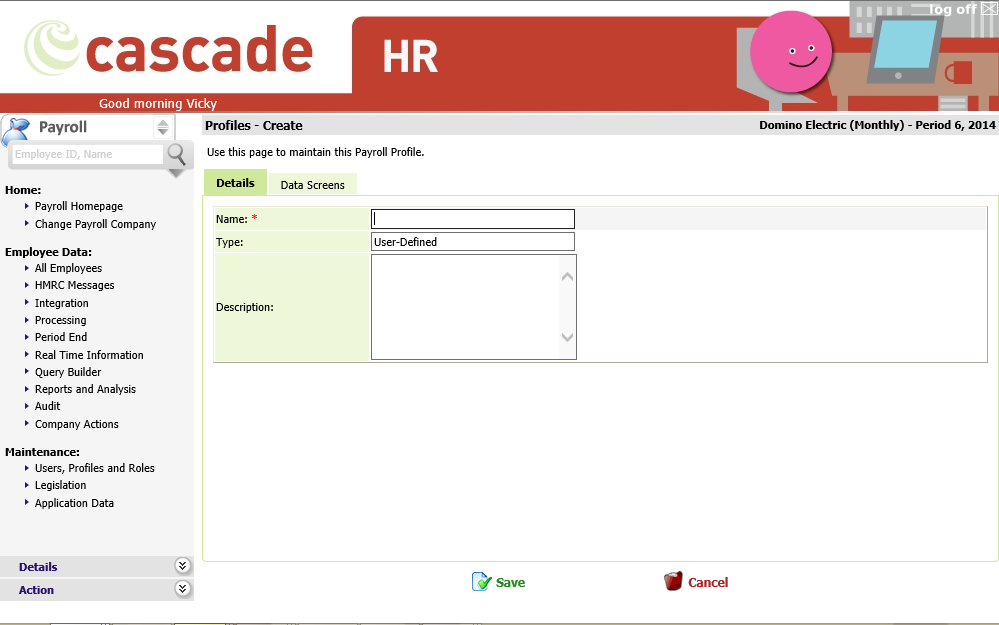
The first tab is called Details start by entering the Name for the new Profile in the Name textbox. As this is a Profile that you are adding into the system the Type automatically shows as User-Defined. You do not need to save at this point you can continue with setting up the remaining information for the Profile. You may, if you wish, add a description of the Profile and Screen Information within the Profile in the Description narrative box.
A profile can be assigned to more than one person, so ensure you give the profile a meaningful name such as ‘Payroll Manager’, ‘Payroll Administrator’, ‘Payroll User’. Avoid using People’s Names as individuals tend to change roles within organisations, this can cause confusion for the Payroll Administrator when allocating Profiles.
Select the Data Screens tab to choose which pages should be made available/unavailable to this profile.
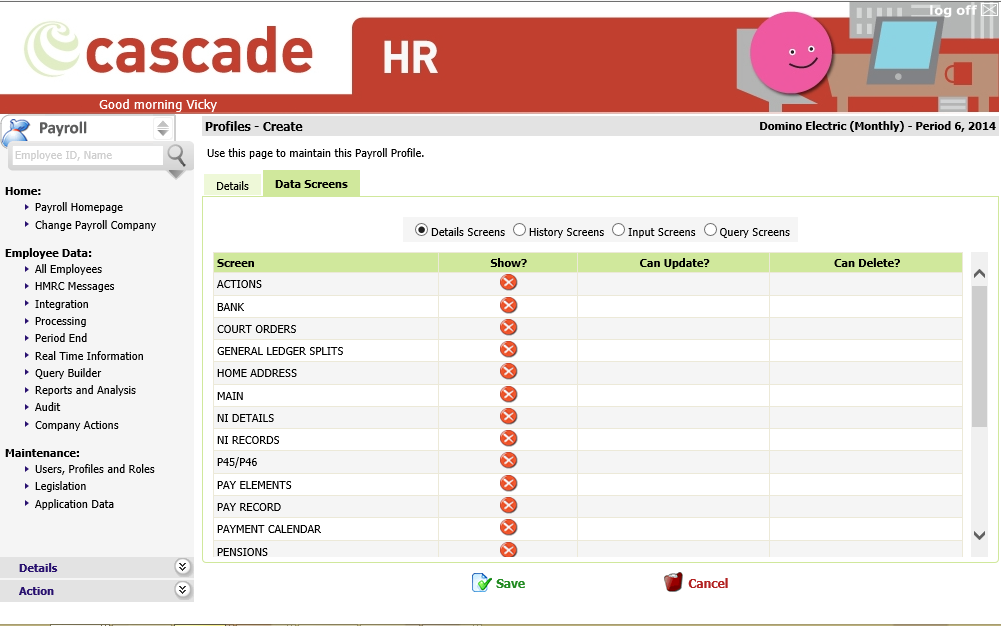
There are four views to the Profile screen, seen across the top of the screen. To change to another view simply select the radio button at the side of that option.
|
Item |
Description |
|
Details Screens |
When selected this area will display all the screens that contain employee data, these are the details of the employee in Payroll Web |
|
History Screens |
When selected this area will display all the screens that contain Payroll Web History data in Payroll Web |
|
Input Screens |
When selected this area will display all the screens where Payroll Web Pay information can be entered for the employee. |
|
Query Screens |
When selected this area will display all the screens that are classed as “Query Builder Only Screen” i.e., they are visible in Query Builder but not in other areas of the system |
When deciding the security access on a profile there are several options:
|
Item |
Description |
|
Show? |
If checked, the screen will become available for any user assigned to the profile to view. |
|
Can Update? |
There are only 2 options available in the can update section: Yes – allows the user to directly update the page. For example, you may wish Payroll Managers to directly update information so that they able to input pay details for employees. No – allows the user to view the information but not make any changes. For example, you may want other payroll clerks to have access to view the payroll information on other companies, but you wouldn’t want them to be able to add any new details directly to employee’s records. |
|
Can Delete? |
The can delete option allows the user to delete information from this screen when set to yes |
Before leaving the Profiles section, remember to either Save or Cancel your changes.