Payrolling Benefits - Option 2
Before you begin
Make sure you have read About Payrolling Benefits before deciding on this option. Also see Payrolling Benefits - Option 1.
Option 2 shows the itemised BIK’s on the employee’s payslip and is added into the employee’s gross pay and tax calculated accordingly however, a net deduction is also applied to contra the total of calculated BIKS.
Below is an example of an Option 2 payslip:
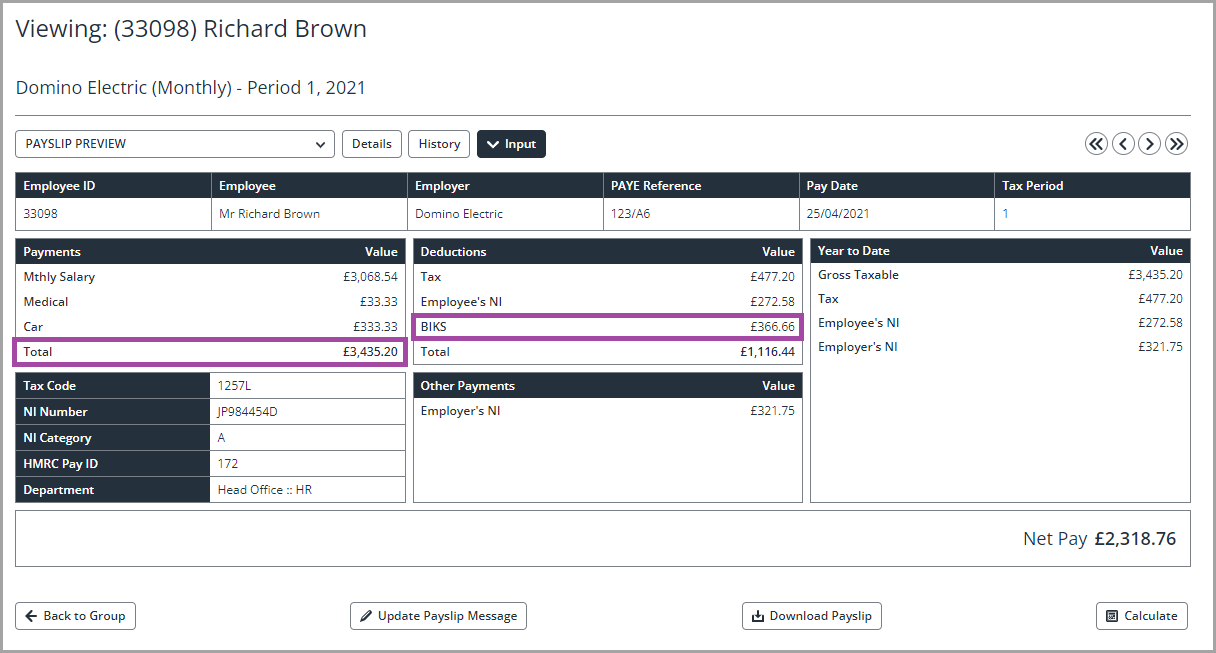
Some customers may prefer this option as the gross pay total balances so may be clearer for employees to understand.
Configuration
Step 1 - Creating an Annual Element
It is recommended that BIK’s are itemised (at the very least against the employees record, however you may wish to total these on the payslip to be one value) so that you can easily report on BIK amounts as well as manage in year changes more efficiently.
You may wish to create a reference element to hold the annual total which can then be used in a formula to calculate the correct period amount.
If you do not wish to create an annual element and are just processing a period amount them please skip to Step 2.
-
Within Payroll > Settings > Application Data > Pay Elements > Earnings, select to add a New Element.
-
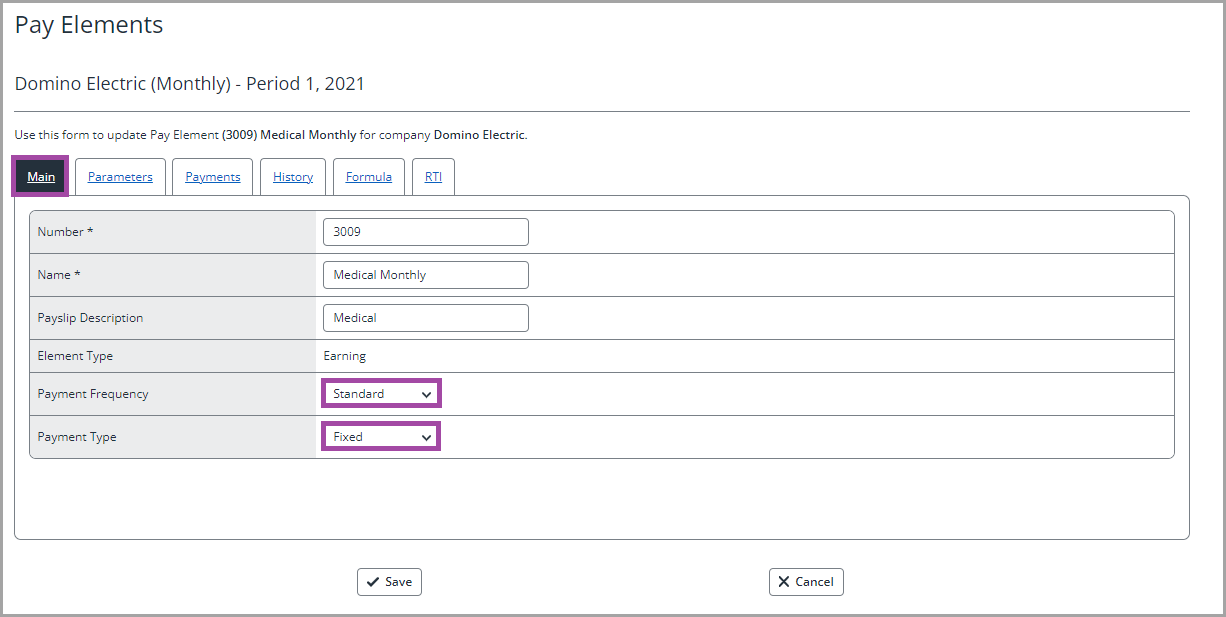
On the Main tab, populate the element name and ensure that the Payment Frequency is ‘Standard’ and the Payment Type is ‘Fixed’.
-
Once you have populated the Main tab, click on the Parameters tab.
-
Make sure that none of the parameters are ticked – this is a reference element only and none of the parameters are applicable.
-
Once you are happy with the details, select Save.
You need to repeat this process for each BIK element.
Step 2 – Creating a Period Element
-
Within Payroll > Settings > Application Data > Pay Elements > Earnings, select Add a New Element.
-
On the Main tab, populate the element name and ensure that the Payment Frequency is Standard and the Payment Type is Fixed.
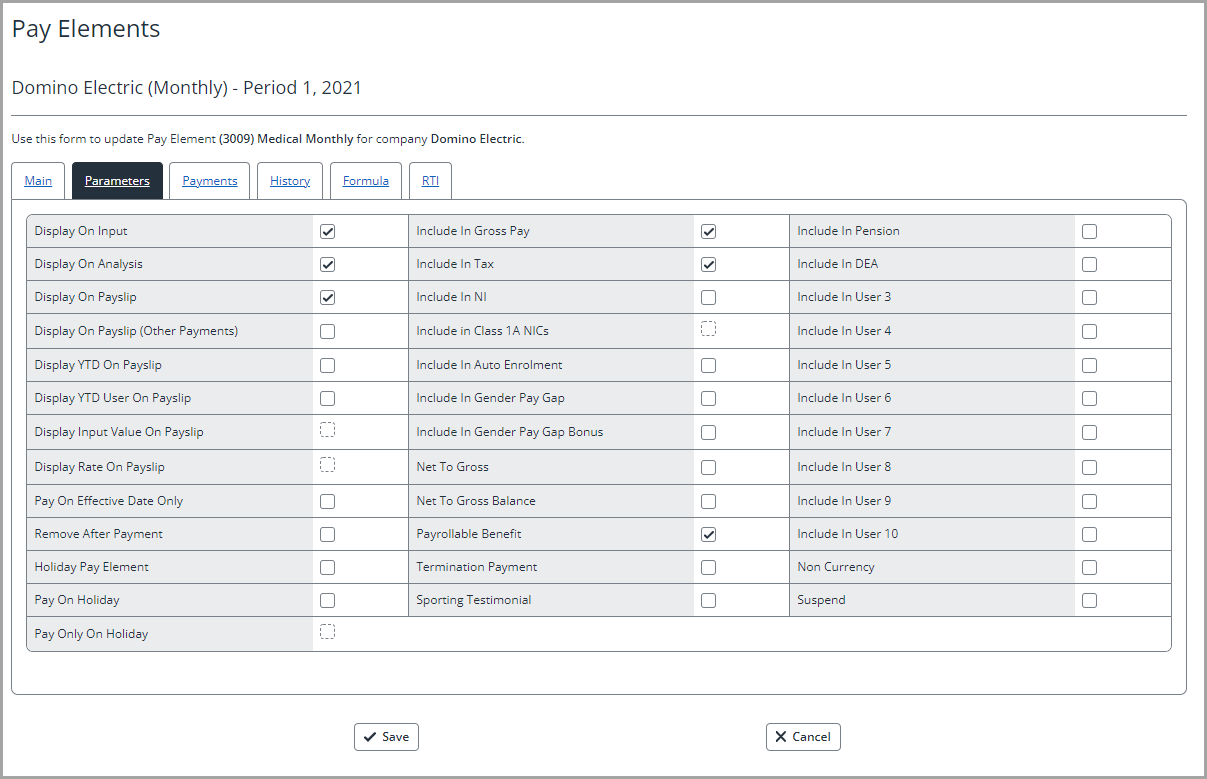
 Once you have populated the Main tab, select the Parameters tab.
-
There are lots of different settings on this page, however, the following settings are recommended:
Field Name
Details
Display on Input
This displays the element within the ‘Input Variable Pay’ screen against the employee record.
Display on Analysis
This pulls the element through on the Gross Pay Analysis report and the GL file.
Display on Payslip
This setting shows the element on the employee’s payslip.
Include in Gross Pay
This includes the value in the gross pay totals.
Payrollable Benefit
This is a key field, as it is the identification marker for IRIS Cascade to pull the element through in to the ‘Payrollable Benefits’ column on the FPS report.
Include In Tax
This includes the amount into the employees Gross Taxable .
-
If you have not created an annual reference element and are just processing the period values the go to Step 3 – Creating the Deduction Element
-
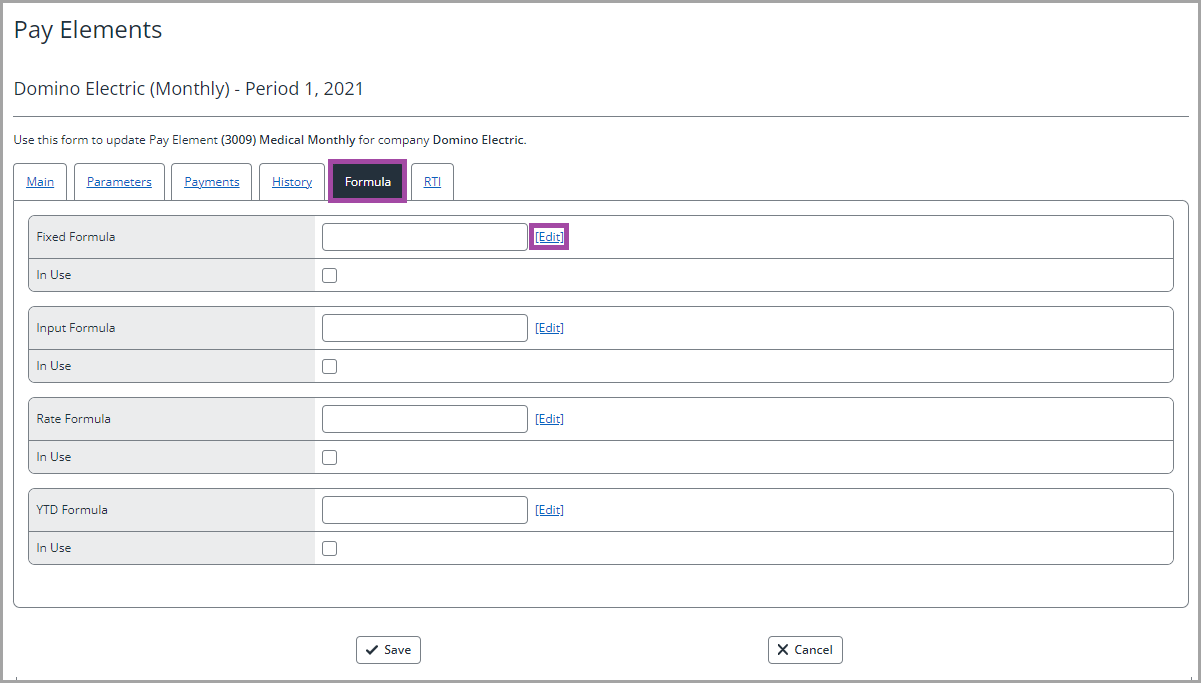
Once you have configured the element parameters select the Formula tab.
-
From the formula list, select to edit the Fixed Formula.
-
Within the formula builder, select the relevant annual element from the Component list and select Add Component
This moves the element into the Function field at the bottom of the box. You can then divide (/) the annual element by the number of relevant pay periods, e.g. by 12 for monthly and 52 for weekly (etc). You can also use the Function Builder to add in the relevant rounding rule.
-
Once you have updated this page, select Save.
-
The formula should display from the initial Formula Page. Select the box to mark the formula as In Use.
-
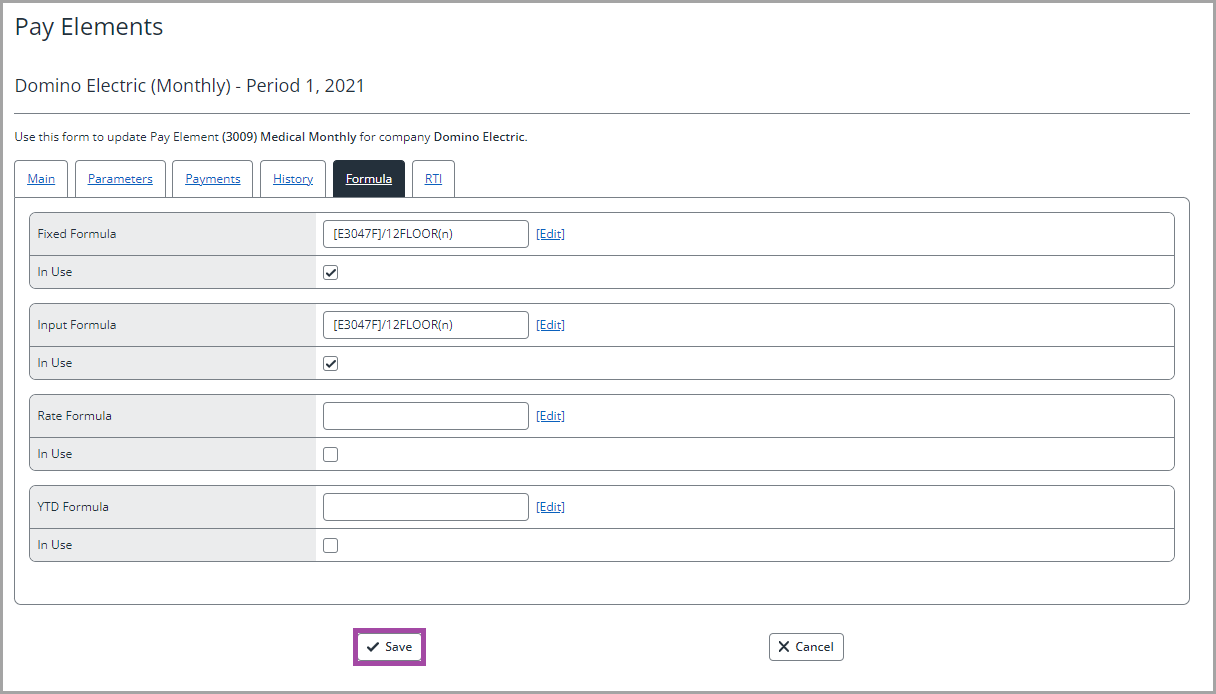
In order for the formula to carry across onto the employees Input Variable Pay screen, you need to add the same formula within the Input Formula. You can add this in the same way, however you can also copy and paste the formula across, ensuring that too is In Use. When you have finished, the Formula tab should look like the example below:
Step 3 – Creating the Deduction Element
-
Within Payroll > Settings > Application Data > Pay Elements > Deductions select Add a New Element.
-
Once the information is populated, select the Parameters tab.
-
There are lots of different settings within here however the following settings are recommended:
Field Name
Details
Display on Input
This displays the element within the ‘Input Variable Pay’ screen against the employee record
Display on Analysis
This pulls the element through on the Gross Pay Analysis report and the GL file
Display on Payslip
This setting shows the element on the employee’s payslip
Deduct Before Gross Pay
This deducts the amount from the net pay
-
From the formula list, select to edit the Input Formula.
-
Within the formula builder select a period BIK element from the Component list and ensure the Value Type is Calculated then select Add Component. This moves the element into the Function field at the bottom of the box.
-
Add each BIK element into the formula using the + between each element.
By using the Calculated values, IRIS Cascade uses the formula to deduct the calculated period amount for each BIK element and adds them together under one deduction element.
-
You can also use the Function Builder to add in the relevant rounding rule.
-
Once you have updated this page, select Save.