Processing Prepayments in IRIS Purchasing
For information relating to processing prepayments for non order invoices in IRIS Financials, refer to Overview Of Prepayments. We strongly recommend reading the overview before carrying out any prepayments processes.
Before posting any prepayment documents, it is essential to check that all the accounting periods within the prepayment time frame exist, and have a security role of PERIOD.8 or less. Prepayments are not posted to the correct periods if this is not the case, and this can be time consuming to rectify. For information on how to check the access level, refer to Opening/Closing Accounting Periods.
If you experience any problems with prepayments as a consequence of accounting periods being closed or having the wrong access level, refer to Dealing with Prepayments Posted to the Wrong Period.
There may be occasions when invoices need to be created for subscriptions or insurances (for example) that are invoiced annually, but the expenditure needs to be split across the relevant accounting periods. The facility to create a prepayment invoice must have been previously set up in the Settings area of IRIS Financials Purchasing.
-
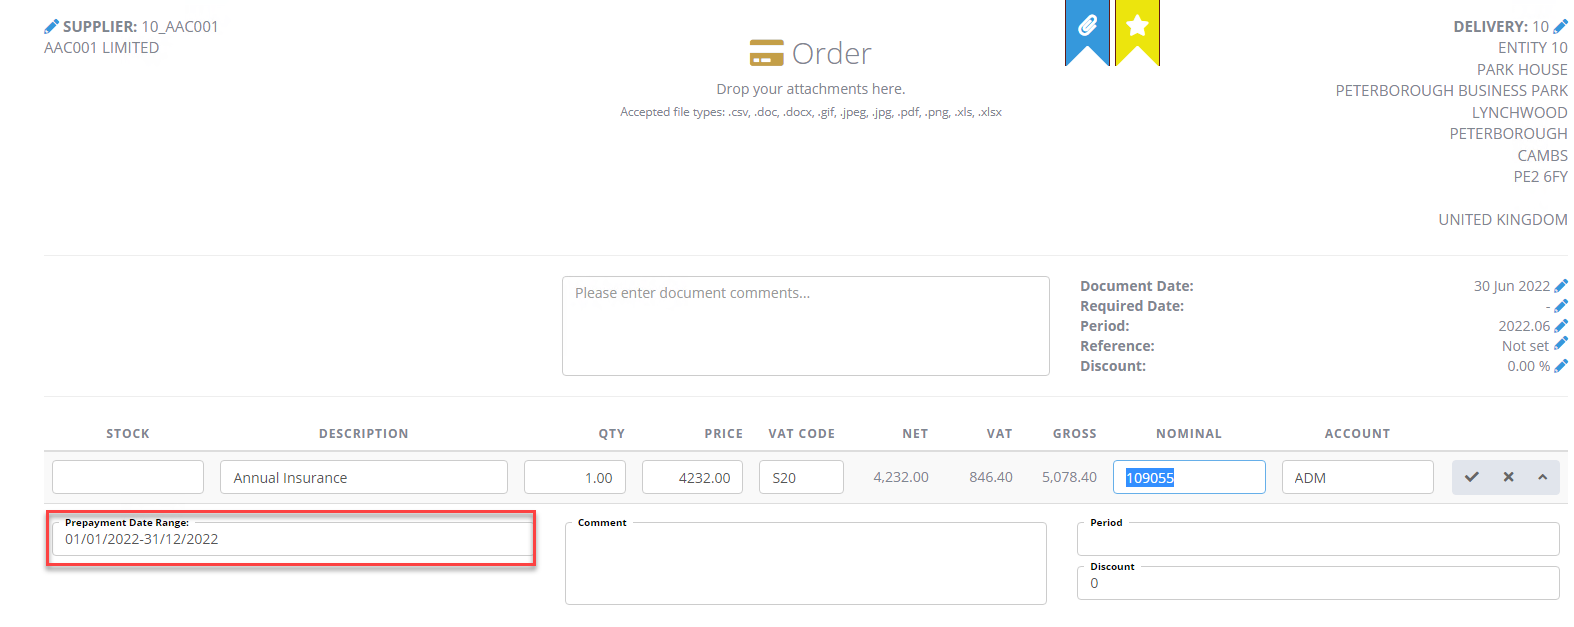
Create the invoice in the usual way. Select the Edit (grey pencil) icon to edit the selected invoice line, then select the down arrow to display the additional information.
-
In Prepayment Date Range, enter the start and end date (in dd/mm/yyyy format) of the prepayment separated by a hyphen and without any spaces. For example, 01/01/2022-31/12/2023. If Date Range and Prepayment are not visible, refer to Setting up Prepayment Invoices.

-
Select the Validate (Tick) icon, then select Post Invoice.
-
On successful posting, two messages are displayed showing that the invoice has been successfully posted in IRIS Financials Purchasing and that a POIN has been successfully created in IRIS Financials.
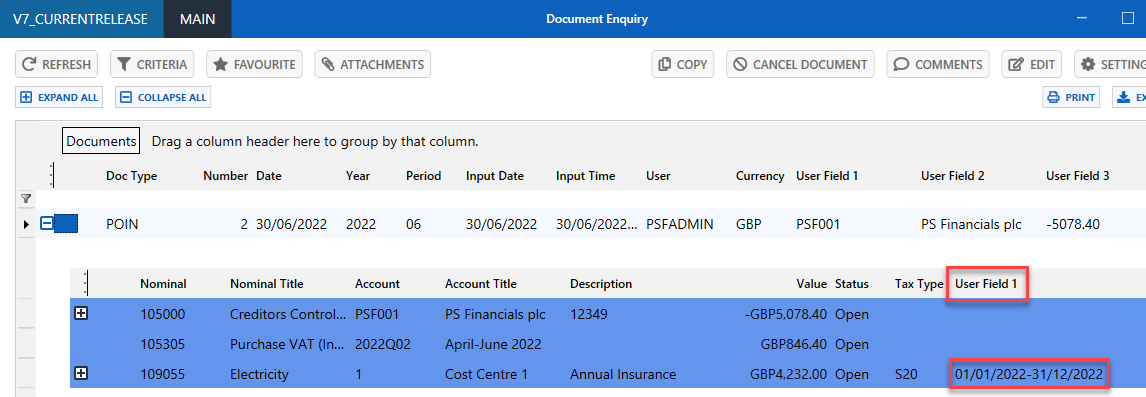
The POIN document displays the prepayment date range in Userfield 1.
