Manage Important Term Dates
Key Dates can be used to add holidays, events, trips, or any other important dates that you want to share with a person A parent, legal guardian, carer, or someone responsible for a student.. When the key dates are added, a person can add the required dates to their device calendar (i.e., phone, tablet, etc.)
Key Date must be selected in MyEd Name of the application parents and carers use to receive messages sent by schools using IRIS Reach. Settings for key dates to be displayed in the MyEd app. For more information, go to MyEd App Settings.
- Select My Ed > Key Dates.
- The My Ed - Key Dates page is displayed.
Create Key Date
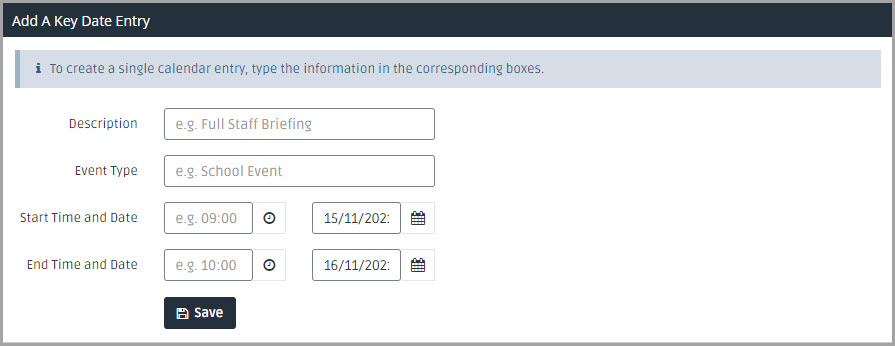
- In Add A Key Date Entry, enter a name for the date in Description and Event Type e.g., Year 1 Museum Trip.
- Select a Start Time and Date and End Time and Date from the date and time pickers.
-
Select Save.

Import Key Dates
Key dates can be imported from your Management Information System (MIS) calendar (SIMS Only), or by manually creating a CSV report with the required information.
Import CSV File
Download and enter the required information in the Key Dates CSV file. When the details have been entered, the file can be imported in IRIS Reach.
The columns Description, Event Type, Category, Start Date, and End Date are mandatory. Do not delete any of the headers in the file.
Import from Management Information System (MIS) (SIMS Only)
You need to contact our support team, log a support ticket (a Service Cloud account is required), to get a copy of the Key Dates Report for MyEd.RptDef report definition file, which needs to be saved to your computer.
- In SIMS, select Import, then Open.
- Find the Key Dates Report for MyEd.RptDef, then select Open.
- The status of this file is displayed as Pending. Select Import, the status is changed to Imported, then select Close.
- Select Reports, then select Run Report.
- Select the Focus icon, then the Diary icon.
- Double-click the Key Dates Report for MyEd.RptDef report, select the Start Date for the diary entries, then OK.
- Select Browse to select the location to save the export and enter a file name.
- Select Save, then OK. The report can then be imported in IRIS Reach.
Import Key Dates in IRIS Reach
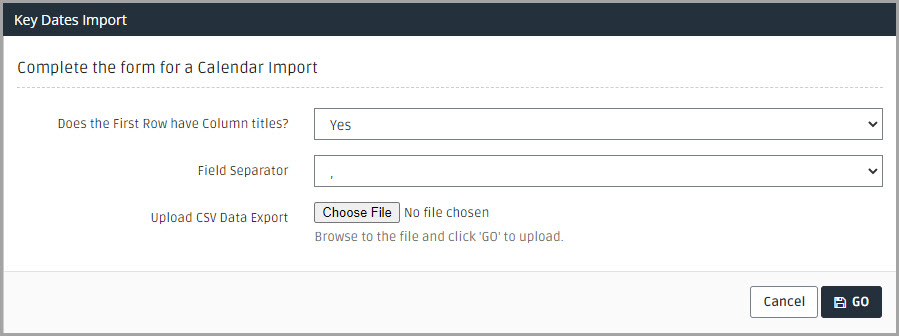
- From Key Dates Import, select either Yes or No from the Does the First Row have Column titles? drop-down list.
- Select the required option from the Field Separator drop-down list.
-
Select Choose File to locate your report, select Open, then select GO.

-
The My Ed - Calendar Import Step 2 page is displayed. In Calendar Import Step 2, select the categories you want to import, then select GO.

-
The My Ed - Confirm: Calendar Import Step 3 page is displayed. In Confirm: Calendar Import Step 3, check the details displayed, then select Import Data.
IRIS Reach only imports new calendar entries and ignores previously added calendar entries.
-
The My Ed - Calendar Import Complete page is displayed with the details that have been added to IRIS Reach.
Edit and Delete Key Dates
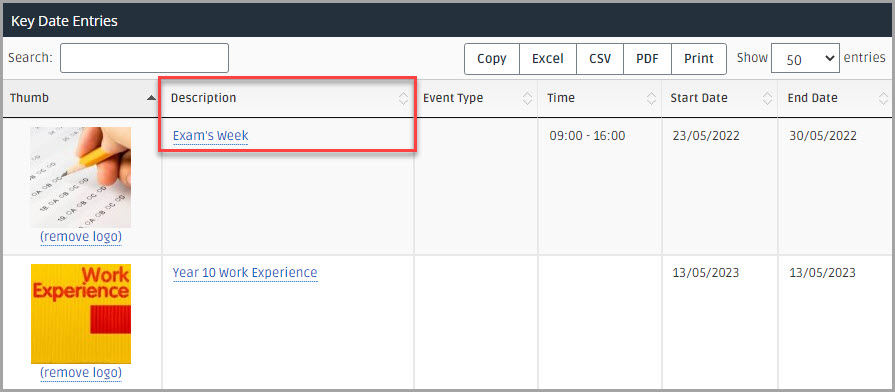
Key Date Entries displays any image uploaded, and the description, event type, time, start date, and end date of any added key dates.
To manage the image displayed for the key date, select the image in Thumb adjacent to the required Description. For more information, go to Add or Remove Images in the MyEd App.
-
Select the Description for the event you want to edit.

-
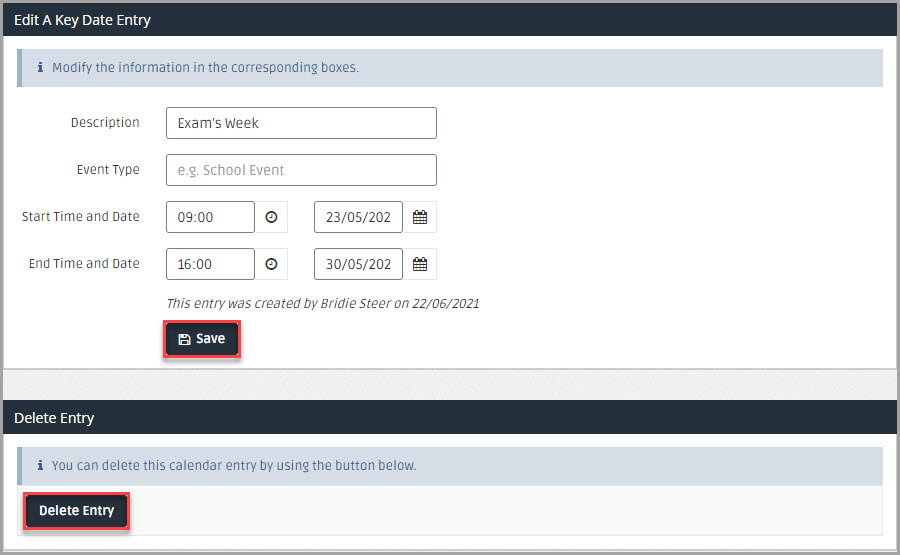
The MyEd - Edit Key Date Entry page is displayed.
Edit — Change the required details then select Save.
Delete — select Delete Entry.
