Setup SIMS for IRIS Sync
This process is only for customers using IRIS Sync Onboarding
To set up the connection between SIMS and IRIS Sync, the SIMS IRIS Sync Software File must be downloaded and installed on your organisation SIMS server.
When the SIMS IRIS Sync Software File has been downloaded from IRIS Sync Onboarding, installation must be completed.
We have designed the process to guide you through the process of installing the SIMS using the IRIS Sync Setup.
Install the IRIS Sync Setup Software
The software must be installed on the server where SIMS is installed.
- Find the saved IRIS Sync Setup file that has been downloaded from IRIS Sync Onboarding and open it.
- Select Install, then follow the steps to complete the install.
Set up a SIMS user account for IRIS Sync
IRIS Sync requires a dedicated SIMS user account to connect to your data. You need to set this up before configuring the settings below.
The account must have the following roles assigned in SIMS:
- Administration Assistant
- TP SuperUser
- Third Party Reporter
- Exams Officer
- Admissions Officer
Configure the Settings for IRIS Sync
The IRIS Sync configuration supports multiple instances of SIMS on the same machine.
If your organisation used IRIS Data Extractor before, the SQL server instance is no longer needed for this new version.
- Open the IRIS Sync Config.
- Enter the details for:
- IRIS Link Key — Copy from the MIS Setup and Permissions section in IRIS Sync Onboarding.
- Organisation Id — Copy from the MIS Setup and Permissions section in IRIS Sync Onboarding.
- SIMS Server name — Name of the server SIMS is hosted on. This is usually in the format of servername\sql_instance, for example LATEST-SIMS-GA\SQLEXPRESS.
SIMS Database name — The name of the database specific to the SIMS instance.
The SIMS Server name and SIMS Database name are available from the SIMS connect.ini. To find them, select Browse Connect.ini.
- SIMS Username — Account created for IRIS Sync.
- SIMS Password — Account created for IRIS Sync.
An example of what the details should be like when entered is in the IRIS Sync config image:
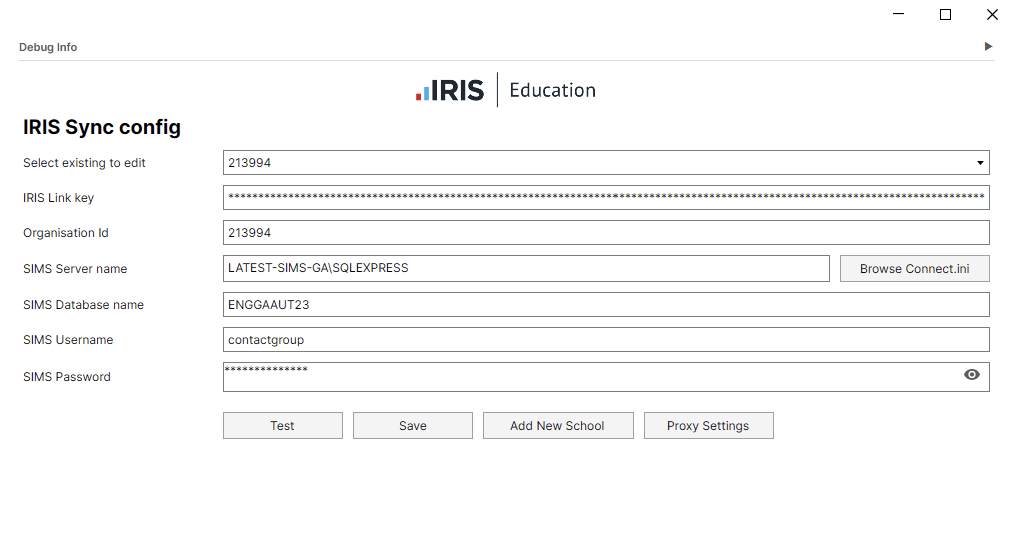
- If the server requires a proxy to access the internet, select Proxy Settings, then enter the required details.
- To make sure IRIS Sync and SIMS are connected correctly, select Test.
- If the test is successful, the organisation details are displayed in a section under the buttons.
- If the test was successful, select Save.