Creating Sales Accounts
In order to raise a sales invoice to a customer, you must first set up the customer account on the Sales ledger.
To do this:
- In IRIS Financials select Masters>Accounts then select the applicable SALES ledger. Depending on your organisation, it may simply be called 'SALES' or it may be prefixed with your 3-letter location code such as 'LLL_SALES'.
- Click the Add button and enter a code for the account in the window that appears. There is a 12 character limit. This can be made up of letters or numbers, but avoid using spaces or special characters such as '&'.
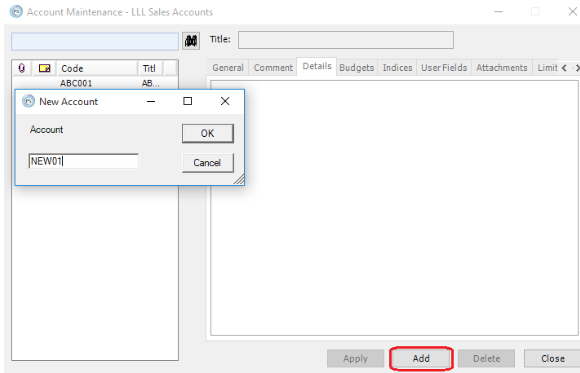
- Click the OK button and then enter the full description of the account in the Title field at the top.
- Click the Address tab to enter the address details.
- Select the Contact tab and enter the customers contact information.
- There is the facility to enter bank details in the Payment Information tab to allow you to issue refunds to the customer by BACS if necessary. If you do not have any bank details for the customer, then you can set the payment method as Cheques.
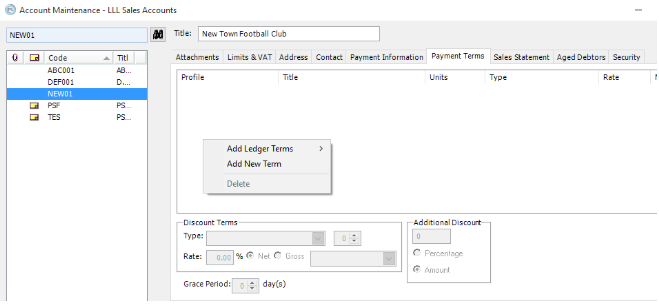
- Click the Payment Terms tab to add payment terms to the account. Right-click in the white area and select Add Ledger Terms and choose from the options available.
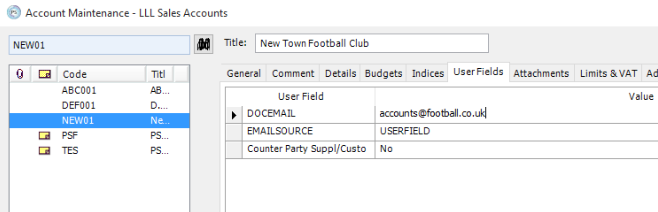
- Select the User Fields tab and enter the email address that is to be used to send invoices to using the Document Emailer module. If using this field, set the Email Source to show User Field. Alternatively you can use this field to specify the email address from the Contact or Comments tabs if required.
- If the customer is to be included in the Counterparty Supplier or Customer report select Yes from the Counterparty Supplier/Customer user field.
- If you wish to restrict access to the account to certain users, click on the Security tab and select suitable roles for the View, Modify and Post dropdowns.
If you leave these dropdowns blank, then any user that has access to the SALES ledger will also have access to the account.
The View and Post roles allow users to see and post to the account, whereas the Modify role allows users to make changes to the account itself. - Click Apply to save the account.
The remaining tabs do not require input, but are explained briefly below:
-
General - Contains the option to raise the access level above the default level 3, and the option to untick the 'input allowed' box to prevent all postings to the account if necessary.
-
Comment - The Comments tab is a free text field where you can add notes to the account for reference.
-
Details - The Details tab will display any transactions posted to the account
-
Attachments - Documents can be attached to the account by browsing to the filepath where the document is saved.
-
Limits and VAT - A credit limit can be set against each account allowing the user to receive a warning should the limit be reached, preventing further postings.
-
Budgets and Indices tabs - These are standard tabs that appear on all ledgers but are primarily used against the analysis type ledgers, where income/expenditure is recorded (e.g. cost centres).
-
Sales Statement - Allows a statement to be generated displaying the outstanding invoices on the account.
-
Aged Debtors - Displays the outstanding amounts on the account and the length of time outstanding