Scanning Documents into IRIS Financials
This topic relates to an example of the scanning of documents using the following scanners (Epson GT-S50N or Epson GT-S55). If you are using any other scanner you will need to refer to the relevant product manual.
-
Print the barcode and attached to the applicable document
-
Search for and open your scanning application - typically found in the Windows Start menu.
-
Select the PS Financials setting profile at the top of the window. The configuration should be the same as the following:
-
Document Source: Single-Sided
-
Size: Auto
-
Resolution: 300dpi
-
Image Type: Auto
-
Image Option: None
-
-
Insert the document(s) into the scanner and select Scan.
-
Select OK on the next dialog box.
All files scanned in here will get saved to the location specified by your network administrator. For example:
(PSF_Share) T:\Document Imaging\Scanned Documents
The share location will be network specific and may differ from the location above depending on the location specified by your network administrator. -
Next, open up the IRIS Financials application, then go to PSF Links > Document Imaging.
If you do not have the PSF Links option on your toolbar, go to Options > Scanning.
-
Once the Document Imaging/Scanning application is open, go to File > Open From > Folder….
-
Select your Scanned Images folder. This will be a shared folder which was specified by your network administrator.
This imports all of the documents located in the specified folder.
-
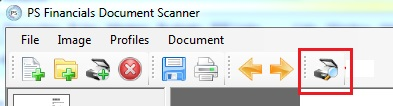
Once you are happy that all your documents are showing, select the Scanner icon.
-
Select ..., then select the SCAN profile. This searches the scanned documents for the barcode.
-
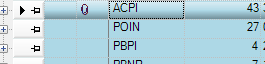
Select OK. A new window displays the scan results. If multiple documents have been scanned, it will organise all of the documents on the left.
-
If you are happy with the results, select the filing cabinet icon with the green arrow. This attaches the documents to the relevant records.
-
Select a folder to save the documents and select OK.
All attached documents should be stored in the PSF_Share location. This will be a shared folder which was specified by your network administrator.
Don’t remove the files stored in here as the PS Financials software refers to these files to load the scanned images. -
The documents are attached to the applicable transactions in IRIS Financials. A paperclip icon is displayed next to a transaction which has an attachment.
-
Double-click the attachment icon to view the attached files, then double-click on a file to open it.