Check e-procurement purchase orders
After you place an E-Procurement order through IRIS Financials Purchasing, check the order details and enter any required extra information before you post it to IRIS Financials.
To check and add the extra details of an unconfirmed E-Procurement order later, close the Basket tab. To find the order again, go to E-Procurement, then select OK.
If you close the Basket tab after completing some of the required extra details, any changes are not saved.
When completing the order details, if you are unable to enter details, your IRIS Financials Purchasing session might have expired. To check, select the IRIS Financials Purchasing tab, log in again, then return to the Basket tab.
On the Basket page:
-
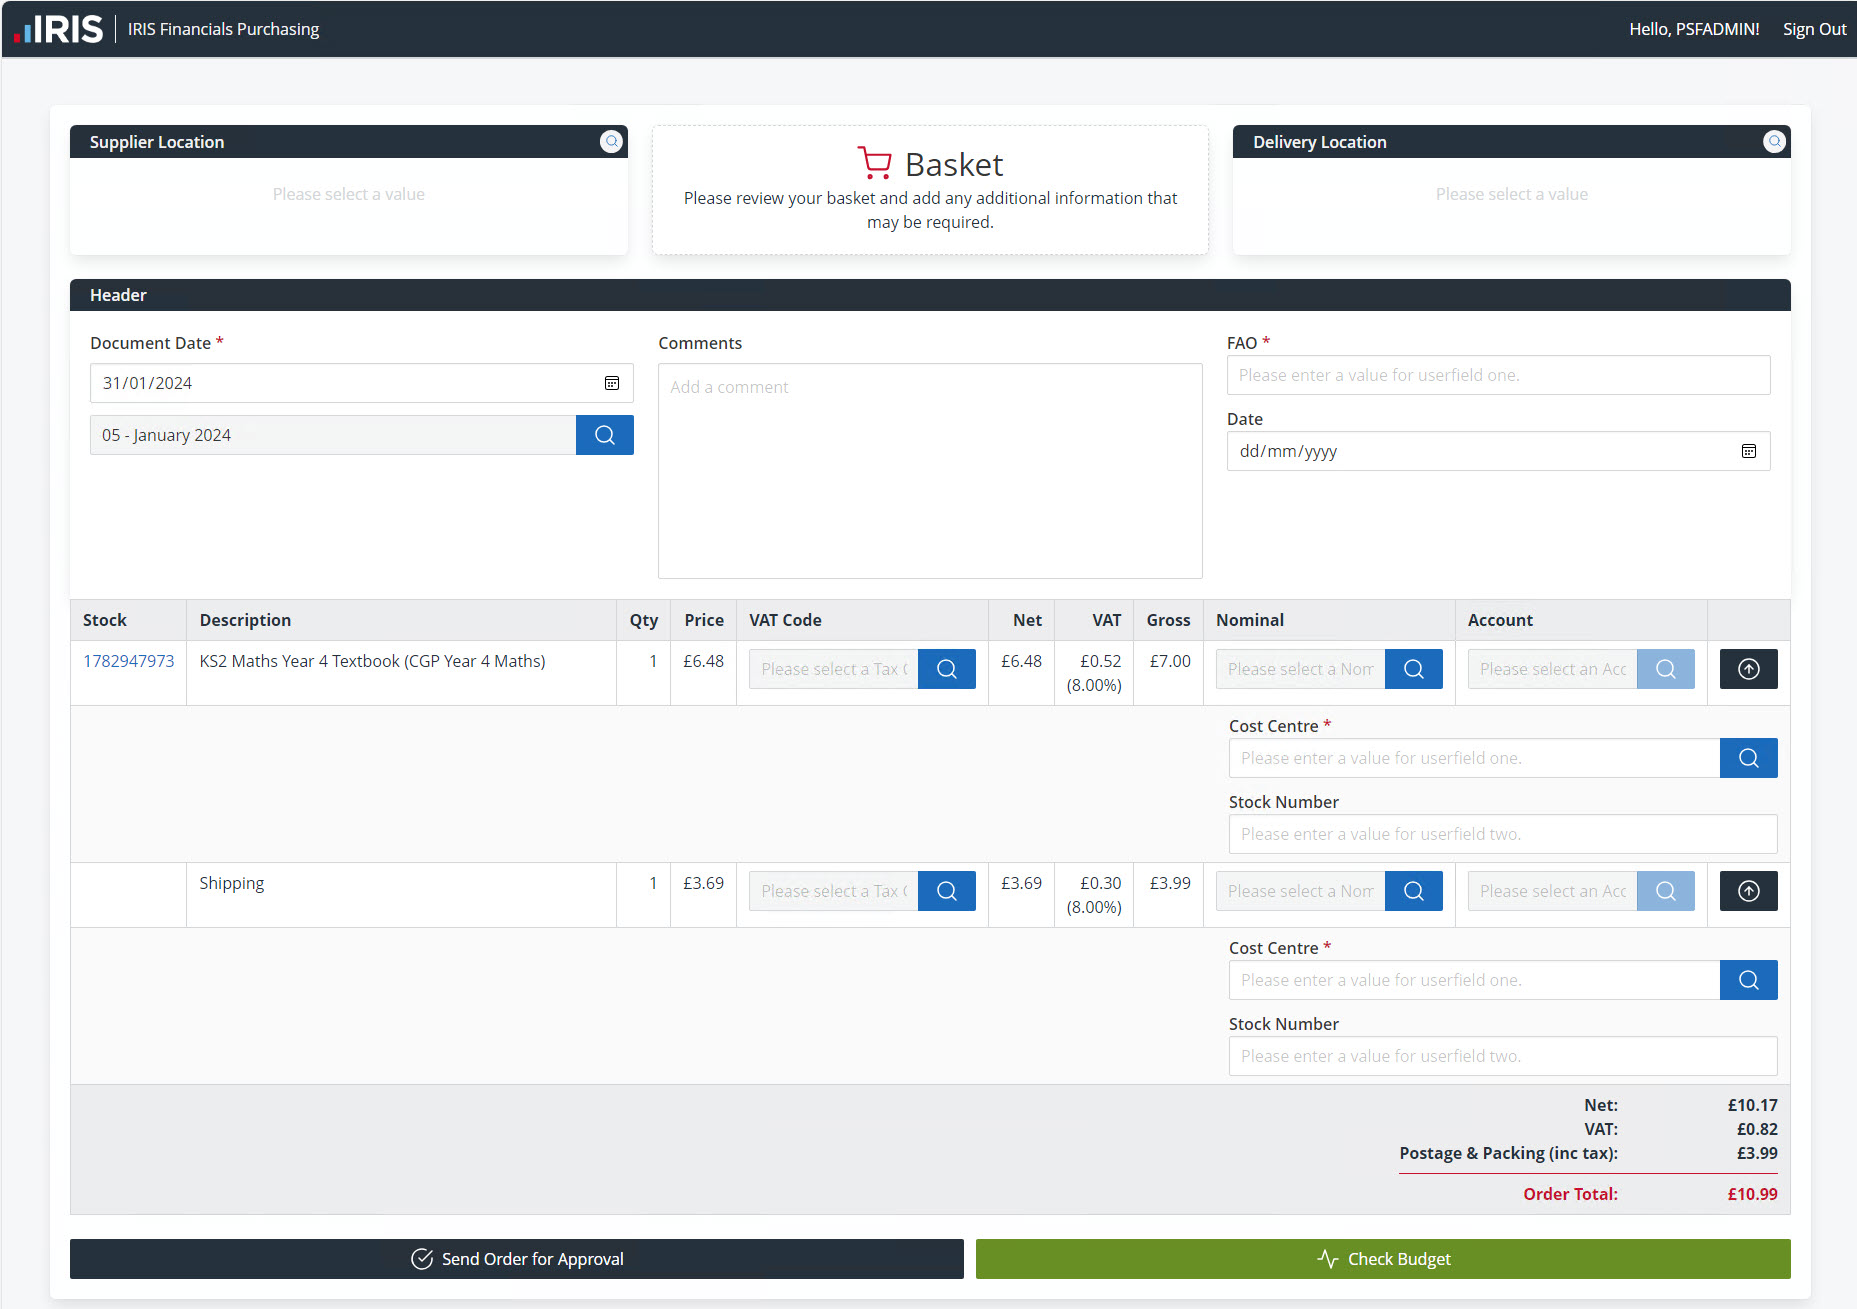
Check all the ordered items appear, and if not already completed, enter the following:
- Supplier Location
- Delivery Location — If a default delivery location has been set for the supplier, it is automatically populated.
-
Recipient Name — Enter the details of who the order is being sent to or who should deal with it when it arrives
If your organisation uses an FAO or F.A.O userfield, the Recipient Name is automatically copied to the userfield but it is not displayed in the Basket.
- Document Date — Change the date and period as required
-
Comments — If someone must approve the purchase order, enter any details to share with the approver
If you have set up userfields in IRIS Financials Purchasing, enter the relevant details for each one, as required.
For each ordered item and shipping line:
If you set a Default cost centre ledger and Default cost centre account for the supplier, the system fills in Nominal and Account with those details.
- VAT Code — Only if not automatically populated.
- Nominal — Select the nominal to post the item line to in IRIS Financials.
-
Account — Select the account to post the item line to in IRIS Financials.
If extra information is to appear in the userfields for each item, select the expand arrow icon at the end of the line, then complete the relevant details for each one, as required.
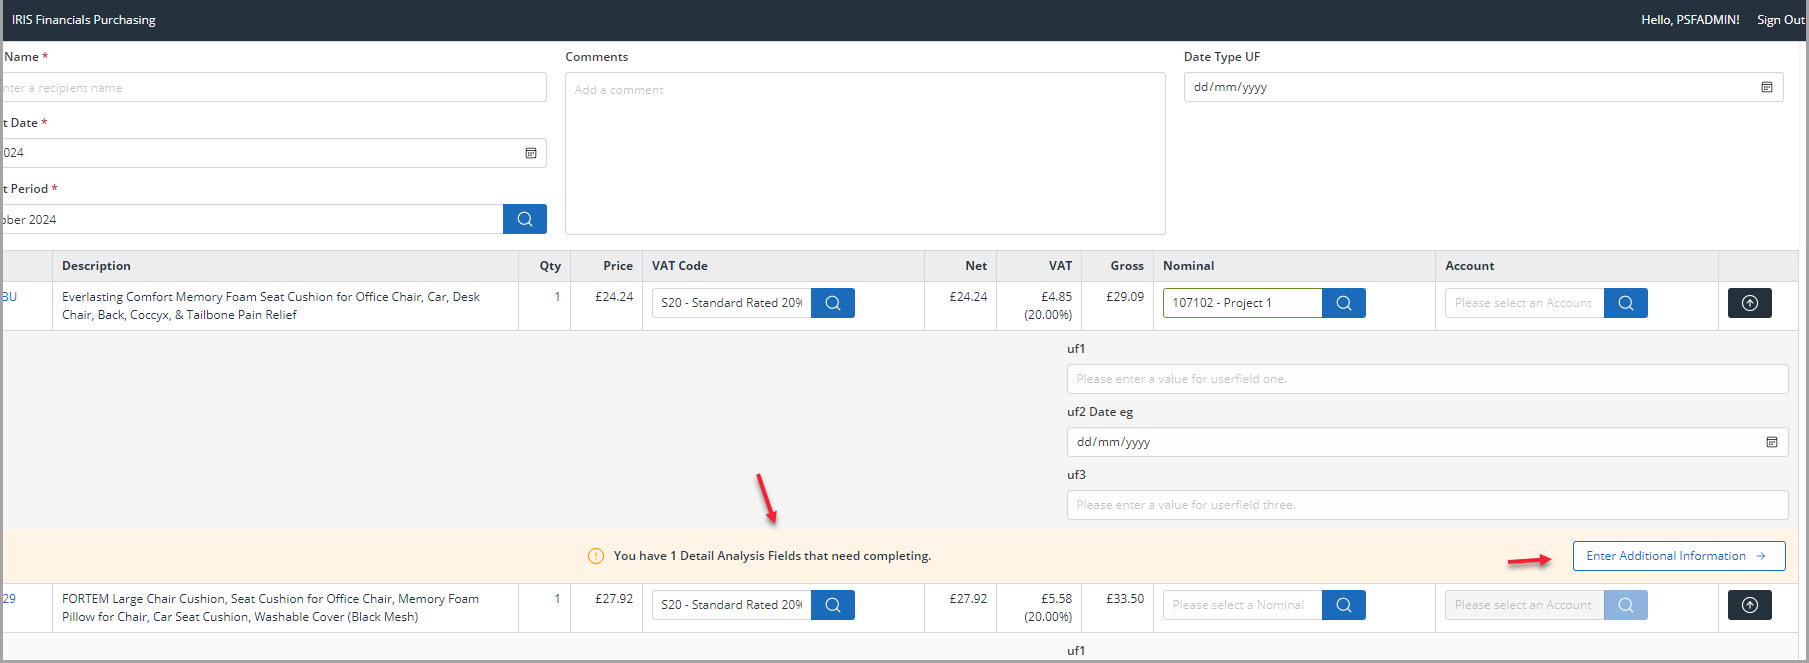
For IRIS Financials Purchasing version 6.0.359 or later, if any of the item lines need Detail Analysis Fields (DAFs), a warning appears. To enter the information for DAFs, select Enter Additional Information.
-
After completing all the required details, to send the order to the supplier for processing and confirmation, either:
- To skip checking the details against an assigned budget, select Send Order for Approval.
-
To check the details against the budget before confirming the order, select Check Budget, then Proceed.
For IRIS Financials Purchasing version 6.0.359 or later, Check Budget also allows the budget to be checked against Detail Analysis Fields (DAFs) for each line. To check the budget against a DAF, for the relevant line, select DAF Budgets.
If your organisation requires approval of purchase orders first, the system sends the document to your assigned approver, and sends it to the supplier only after approval.