Provide a user access to Reporting Services
If a new user needs to open reports through the Reporting Suite or IRIS Financials Purchasing, set them up as a Reporting Services user. This process is only required for customers not using our PS Cloud environment.
Complete the processes in this topic on the SQL and Report server (if you have one). You may therefore need to speak to your IT department/provider for assistance. The example shown in this topic uses Microsoft SQL Server 2016.
Add a new Reporting Services user
- On the Report Server (if you have one - SQL Server it not), open an internet browser and enter http://[Servername]/reports in the address bar. For example, if your server is called aaw05, the address is http://aaw05/reports.
-
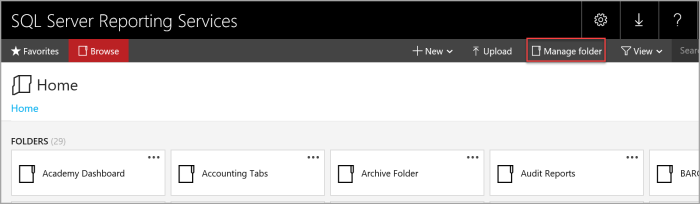
The SQL Server Reporting Services window opens. Select Manager Folder on the toolbar.
In previous versions of SQL Server, this may be called Folder Settings.
-
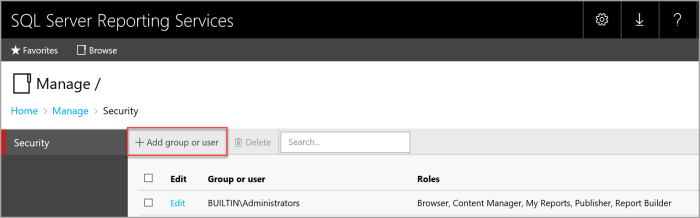
The Security page opens. Select + Add group or user on the toolbar.
-
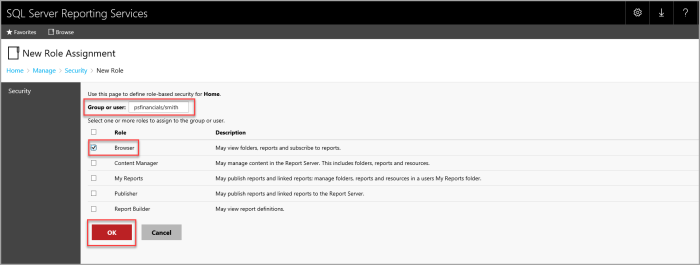
Enter the full Windows domain user name (not IRIS Financials user name) in Group or user:, then select Browser. If you are adding an ACTIVE DIRECTORY USER Group, your IT department must set it up in their Active Directory.
-
Select the OK to save the changes.
Give the user access to Reporting Services
The next step is to add the user to the XUSERLOGIN table on the SQL database. This enables the user to be able to login to Reporting Services.
-
On the SQL server, open and log in to Microsoft SQL Server Management Studio.
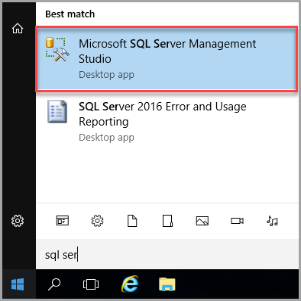
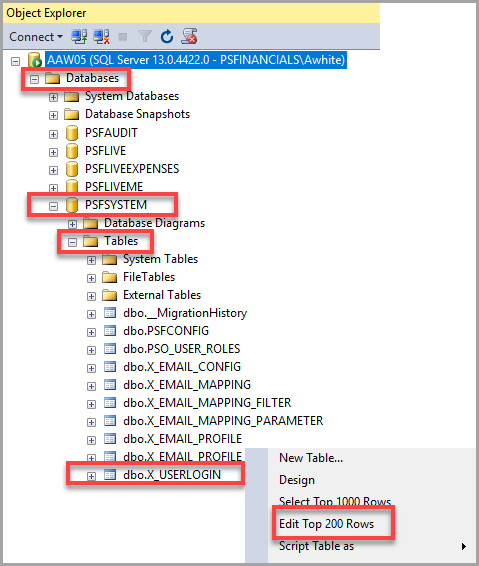
- From the Object Explorer panel, expand the Databases, PSFSYSTEM then the Tables folder to display the tables in the SQL database.
-
Right-click the dbo.XUSERLOGIN table, then select Edit Top 200 Rows from the pop-up menu.
-
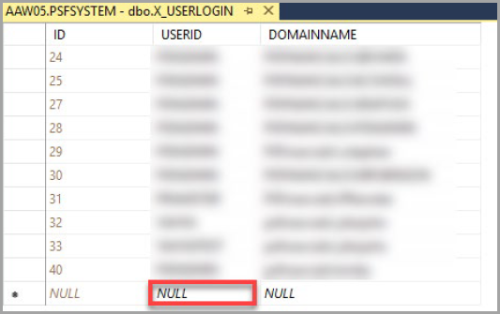
Scroll to the bottom of the list of users and select in NULL on the USERID row, as this graphic shows. Enter the IRIS Financials user name of the new user. This is the user name set up in the USERS ledger in IRIS Financials when the user was first added to the system.
-
Press the Tab key to move to DOMAINNAME and enter the new user's Windows user name.
-
Press the Tab key to create a new NULL line, which automatically saves the record. You can now close the Microsoft SQL Server Management Studio window.