Cancel Incorrect Prepayments
Some Of the nominals and ledgers used in this topic may be different to those in your chart of accounts.
If you have processed a prepayment that is incorrect, it can sometimes be easier to cancel and re-enter it. For example, an invoice which has been prepaid in error.
There are two options that can be used to cancel incorrect prepayments. Please select the applicable option from the following:
Cancel the Prepayment without Cancelling the Invoice
Cancel the Invoice and the Prepayment
Cancel the Prepayment without Cancelling the Invoice
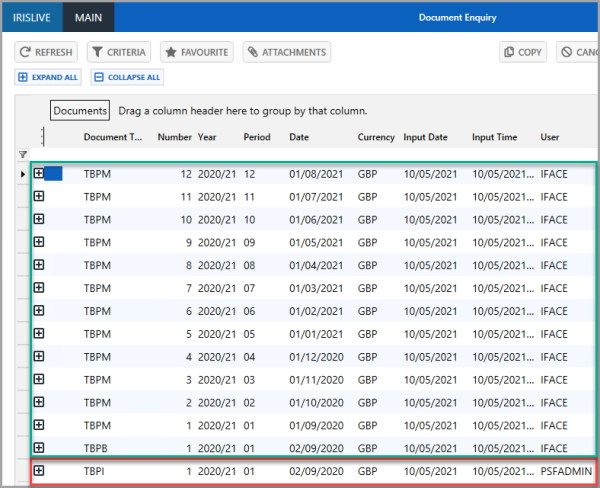
You can cancel the prepayment documents related to an invoice without having to cancel the invoice and re-enter it. This section uses the following scenario:
Invoice 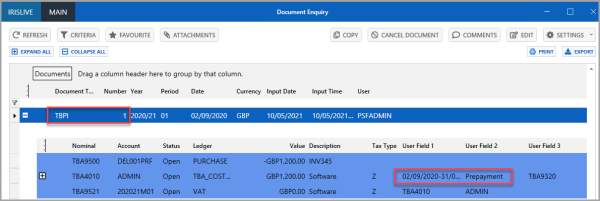
- Select Enquiries > Detail Enquiry from the menu.
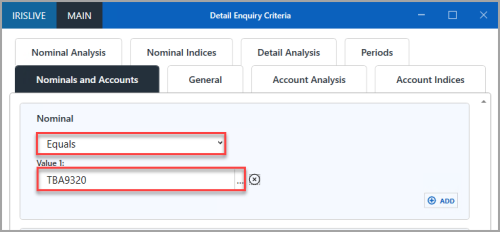
- Select Equals from the Nominal drop-down list.
-
Select ... in Value 1, then select the applicable Prepayment nominal from the Select a nominal dialog.
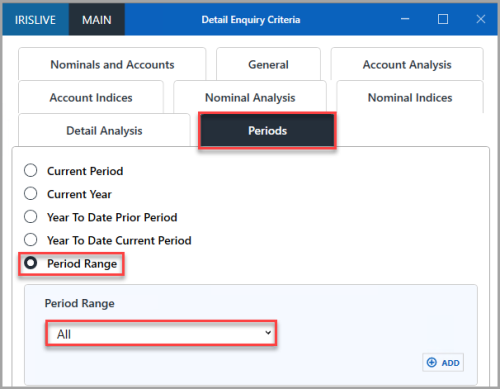
- Select the Periods tab, select Period Range, then select All from the Period Range drop-down list.
- Select OK to display the Detail Enquiry on the prepayments nominal.
- Use User Field 2 to find the invoice number related to the prepayment. Right-select on the header bar and add User Field 2 if you are unable to see the fields.
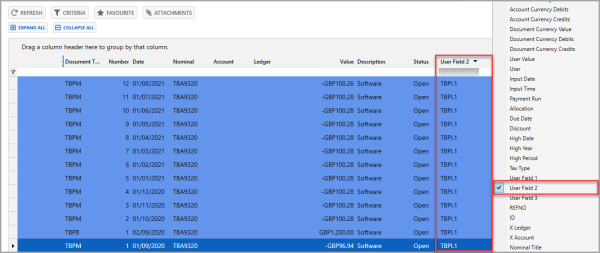
- Find and right-select on the applicable PB line relating to the prepayment you want to cancel.
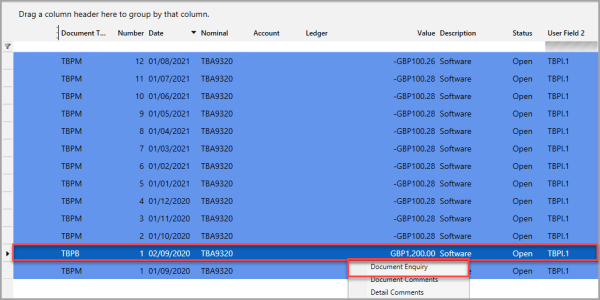
- Right-click the document, then select Copy.
- From Posting Options, select Reverse Values.
- Select the Prepayment to Balance Sheet (XXPB) Document type.
- If any additional information has been added in Userfield 1 other than the prepayment dates, for example, PPAY, it must be removed.
- POST the document.
Cancel the Invoice and the Prepayment
You can cancel the invoice used to generate the prepayment and re-enter it. This section uses the following scenario:
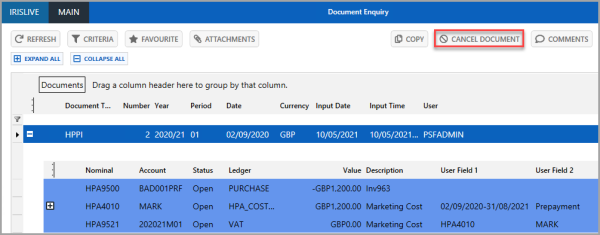
Invoice HPPI 2 has been incorrectly entered with a prepayment that is not needed. The invoice and prepayment need to be cancelled as the invoice is going to be re-entered.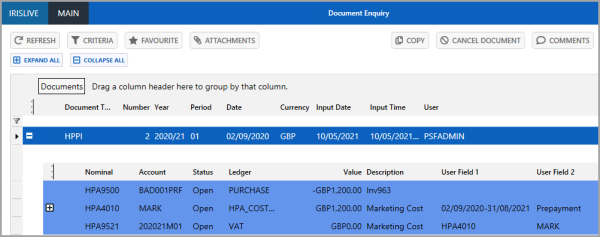
- Select Enquiries, then select Document Enquiry from the menu.
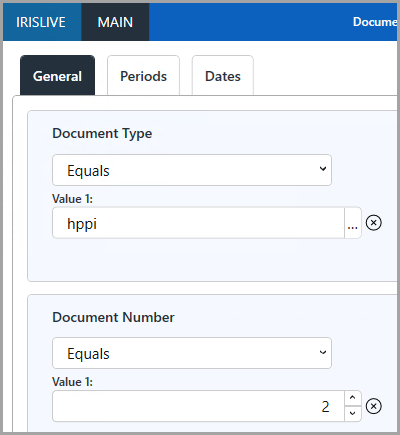
- The Document Enquiry Criteria dialog is displayed. Select Equals from the Document Type drop-down list.
- Select Drill (...) in Value 1, then double-select to select the applicable invoice document type from the Select a document type dialog.
- Select OK to confirm your selections.
- The Document Enquiry window is displayed. Select CANCEL DOCUMENT.
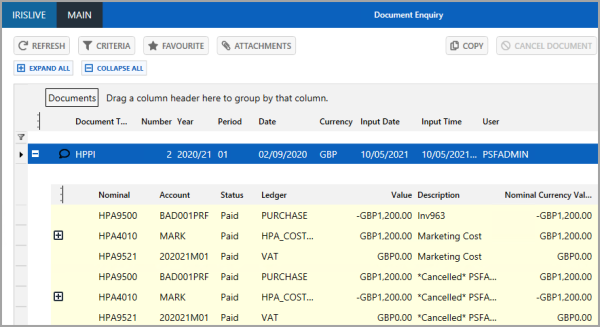
- A warning dialog is displayed. Select Yes to complete the cancellation.
- The document is now cancelled along with the applicable prepayment documents.
- You can now re-enter the invoice in the usual way. For more information, please see Processing Invoices.