Manage custom sections
Use the Management Options tab in the Pupil Manager module to add custom sections to selected areas in student records. This is useful if you want to customise student record information to suit you. Custom fields are held within either custom sections or standard sections.
To work with custom fields, follow the steps below:
-
In the Pupil Manager module, select the Management Options tab. A number of options are displayed for you to work with:

- Select Custom Fields.
-
Select Custom Sections.
-
Choose to:
-
- Add a custom section. Add a custom section to student contact records. You can add custom fields to custom sections.
- Copy a custom section. Copy a custom section into another area of student contact records. The original custom section remains in the original location. Copying custom sections saves time when you want to use the same section in current student, applicant and former student records.
- Arrange a custom section. Change the order that custom sections are displayed throughout student contact records. You may want to arrange sections into a more logical order after adding a new custom section.
- Edit a custom section. Edit a custom section if you want to change the name of the section or the area of the module it is listed in.
- Delete a custom section. Delete a custom section if it is not being used, this is a useful housekeeping tool.
Add a Custom Section
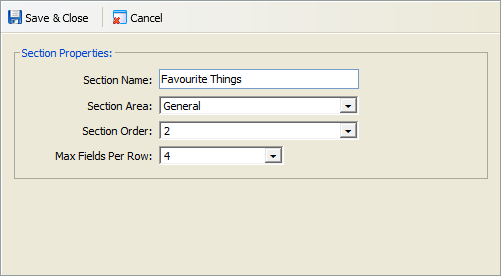
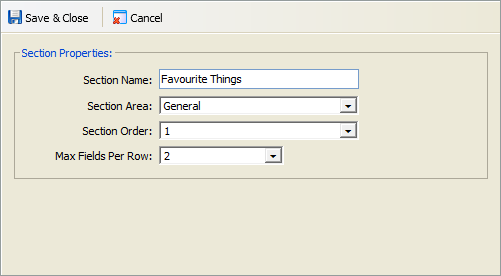
- Click Create Custom Section. An example of the window displayed is shown below:
- Enter a Section Name. This is displayed in student records to identify the section.
- Select a Section Area from the drop-down list. Your selection determines which student records tab or option the new custom section is listed in. You cannot add custom fields to all areas of the Pupil Manager module.
- Select the Section Order for the custom section from the drop-down list. Your selection determines the order which custom sections are displayed in the selected Section Area.
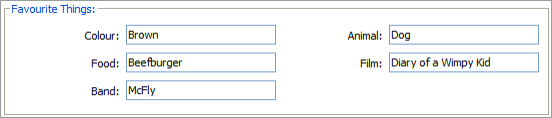
- Select the Max Fields Per Row from the drop-down list. Your selection determines the layout of custom fields within the custom section. For example, select a maximum of 4 fields per row to minimise scrolling in student records when you have a high number of custom fields within the custom section. An example of how custom sections are displayed is shown below:
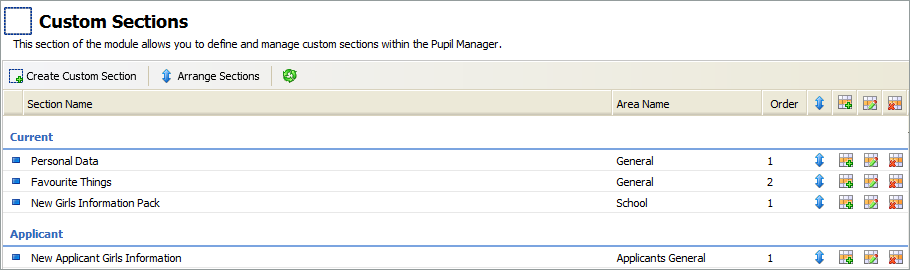
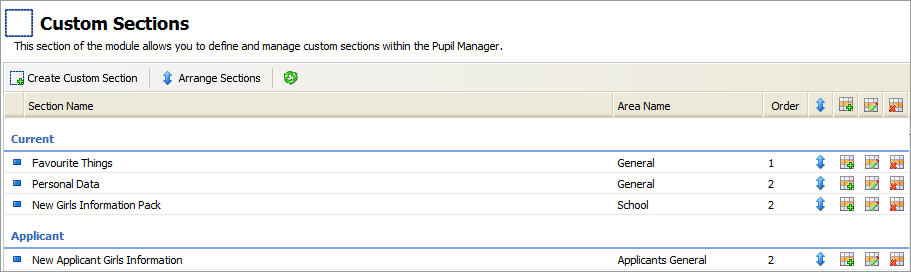
- Click Save & Close. The custom section is displayed in the Custom Sections screen under the student status it relates to. The properties you have selected are displayed to help you. An example is shown below:

Copy a Custom Section
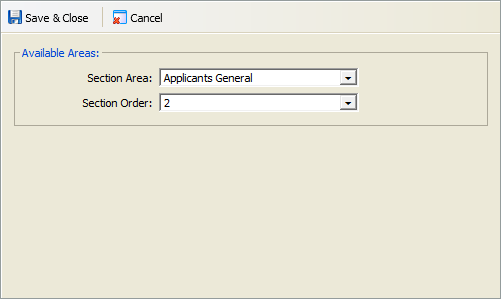
- Click the add icon in your selected custom section. An example of the window displayed is show below:
- Select a Section Area from the drop-down list. Your selection determines which student record tab or option the copied custom section is listed in. You cannot add custom sections to all areas of the Pupil Manager module.
- Use the Section Order drop-down list to select the order that custom sections are displayed throughout student records. Your selection determines the order of custom sections in the Section Area you have selected. You may want to arrange sections into a more logical order after adding a new custom section.
- Click Save & Close.
Arrange Custom Sections
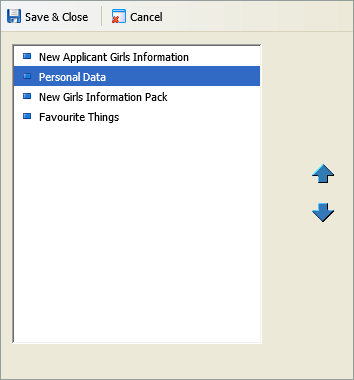
- Click Arrange Sections. The Arrange Custom Sections window is displayed:
- Select a custom section and use the arrows available to move it up or down the list, as required.
- Continue to move custom sections up and down the list until you are satisfied with the order.
- Click Save & Close. The custom sections are now displayed throughout student records in the revised order.
Edit a Custom Section
- Click the edit icon in your selected custom section. An example of the window displayed is shown below:
- Edit the Section Name. This is displayed in student records to identify the section.
- Select a Section Area from the drop-down list. Your selection determines which student records tab or option the custom section is listed in. You cannot add custom fields to all areas of student records.
- Select the Section Order for the custom section from the drop-down list. Your selection determines the order which custom sections are displayed in the selected Section Area.
- Select the Max Fields Per Row from the drop-down list. Your selection determines the layout of custom fields within the custom section. For example, select a maximum of 2 fields per row to reduce the width of student records on your screen. An example of how custom sections are displayed is shown below:
- Click Save & Close. The custom section is displayed in the Custom Sections screen under the student status it relates to. The properties you have selected are displayed to help you. An example is shown below:
Delete a Custom Section
Deleting a custom section which has been used removes the section, its fields and all related data from all student records.
- Click the delete icon in your selected custom section. You are prompted Are you sure you wish to delete this section?
- Click OK. The deleted custom section is displayed as 'No Area Assigned' in the Custom Sections screen.