Create a custom student / pupil group
To create a custom student group, follow the steps below:
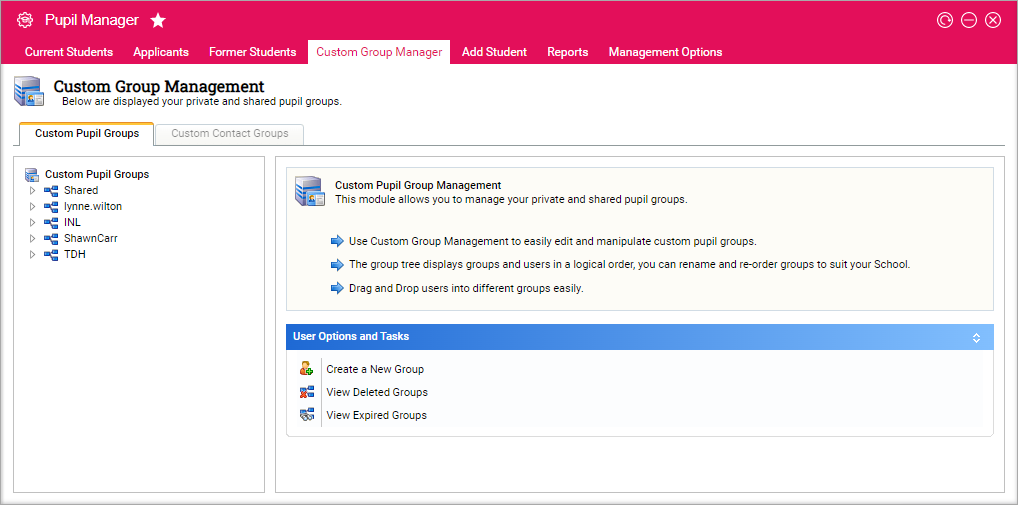
- In the Pupil Manager module, select the Custom Group Manager tab.
- Select the Custom Pupil Groups tab:
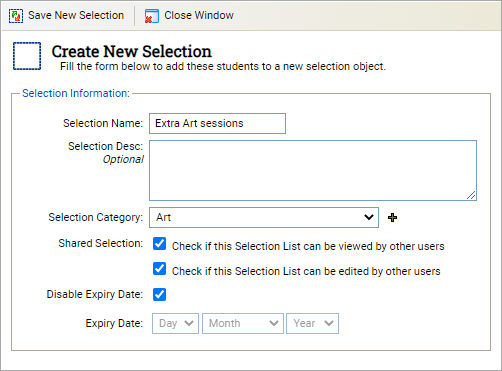
- Click Create a New Group. The Selection Management window is displayed:
- Enter a name and short description for your custom student group in the fields available.
- Choose a Selection Category from the drop-down list displayed. Custom student groups are listed under categories in the student record tabs, making them easier to organise and locate. Click the add icon to add a new category to the drop-down list available, if required.
- Use the Shared Selection checkboxes to control who can view and edit the custom student group.
- Either:
-
Check the Disable Expiry Date box and the custom
student group is set up indefinitely.
or - Uncheck the Disable Expiry Date box and enter an expiry date for the custom student group. This is a useful housekeeping tool, once a field trip is complete the custom student group is listed as expired.
-
Check the Disable Expiry Date box and the custom
student group is set up indefinitely.
- Click Save New Selection. You are prompted Do you wish to add pupils?
- Either:
-
Select Yes. See
Add students to a new custom student / pupil group
for more information.
or - Select No if you want to add students at a later date.
-
Select Yes. See
Add students to a new custom student / pupil group
for more information.


Add students to a new custom student / pupil group
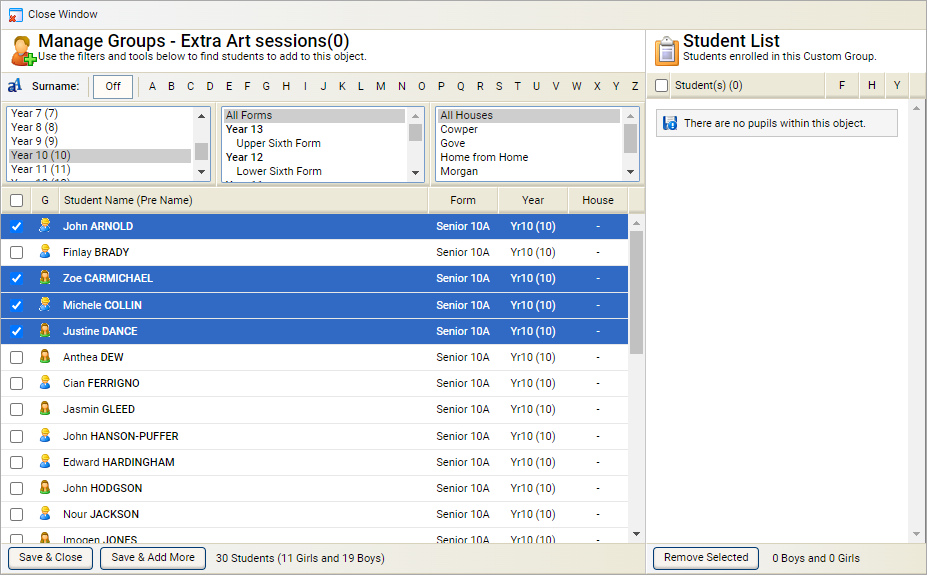
The Manage Groups window is displayed when you select to add students to a new custom student group:

To add students to your new custom student group, follow the steps below:
- Use the filters available to list students to select.
- Hold Ctrl to make multiple selections. Each selection you make filters the student records further.
- Check the boxes next to student records to select them. Use the checkbox in the header bar to select all the records listed.
- Click Save & Add More and continue to add more students. This is optional.
- Click Save & Close once you have completed adding students to the group. You are prompted Are you sure you want to add the selected students to this group?
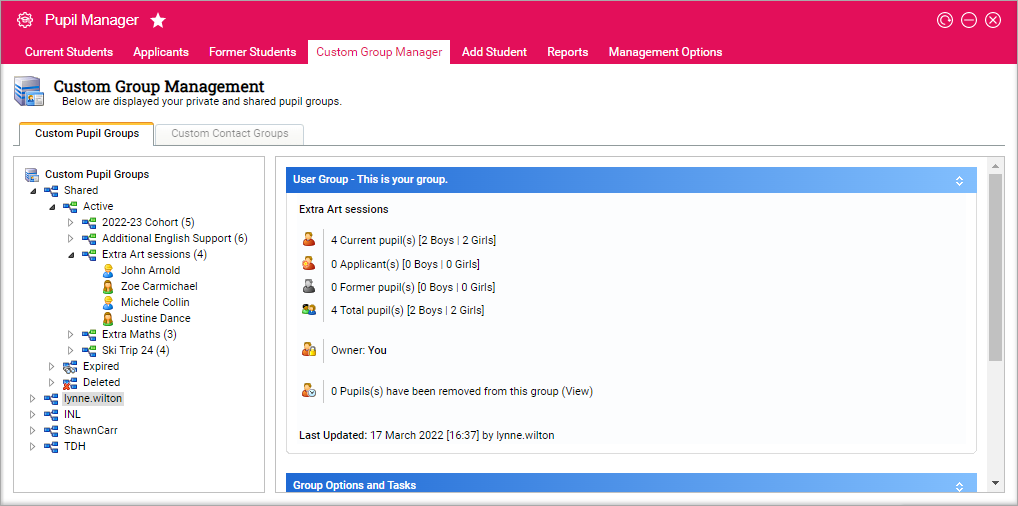
- Select Yes. The custom student group is listed in the Custom Pupil Groups tab:
